Tall or short, red, pink, purple, blue, white and shades in between, few shrubs provide the versatility of hydrangeas. Generations of gardeners have loved and designed their gardens using these showy shrubs as summer privacy screens, landscape focal points and beautiful cut flowers. Now, thanks to new hydrangea introductions, there are even more ways to use them.
Discover the Newest Hydrangeas
New types of hydrangeas are being introduced every year, and these showstoppers are fast favorites among both experienced hydrangea aficionados as well as newcomers to the hydrangea craze.
- ‘Endless Summer’
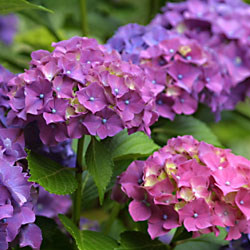
Termed “the best new flowering shrub of the decade” by some gardeners, this cultivar has gained a reputation as the first “reblooming” hydrangea. Blooming from early summer to first frost on both new and old wood, it is unfazed by high heat or extreme cold. Now gardeners in colder microclimates can grow beautiful low maintenance 3-5’ tall and wide hydrangeas. The 8″ diameter mophead balls of light blue or pink flowers bloom the entire summer.
- ‘Bloomstruck’
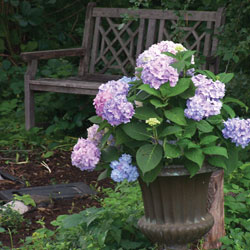
A dwarf ‘Endless Summer’ this hydrangea grows to only 2-4’ tall and wide with pink or blue 4-5″ diameter mopheads on upright red-purple stems. Perfect for containers, in smaller gardens or in the front of cutting beds, it also graces balconies and decks. In fall, red-purple colored leaves extend the beauty.
Color Tip: Change the flower colors of ‘Endless Summer’ and ‘Bloomstruck.’ The soil pH affects the flower color of many hydrangeas. To intensify the pink color, decrease the acidity by adding hydrated lime. To intensify the blue color, increase the acidity by adding sulfur. Our staff can suggest products to help you determine your soil pH and the amount of lime or sulfur to use.
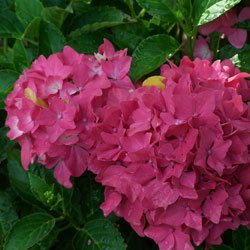
- ‘Quickfire’
Also known as Hydrangea paniculata, this variety blooms earlier than most other hydrangeas and has flowers along an elongated stalk. The flowers, blooming on new wood, open as white, gradually turning to pink in the summer and darker rose in the fall. The soil pH does not affect the flower color. As one of the hardiest hydrangeas, this beauty grows to 6′ tall in most soils, full sun or dappled shade and tolerates drought conditions.
- ‘Little Quickfire’
A dwarf form of ‘Quickfire,’ this tiny powerhouse has all the beauty and benefits of its bigger relative but in a small package. Growing only to 3-4′ tall with a slightly larger spread, this hydrangea makes a big statement in a little space when covered with blooms and can be an ideal choice to start out with hydrangeas.
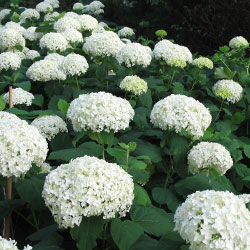
- ‘Bobo’
Another paniculata hydrangea, this variety creates huge drama for such a little plant. Growing only to 3′ tall and wide, it’s a thriller in containers, and easily won the Gold Florall medal for best novelty plant. ‘Bobo’s early season white flowers also bloom on new wood and cover the plant on strong overhead stems. Unaffected by soil type or pH, this hardy hydrangea steals the show wherever it is planted.
No matter how you use these newcomers in your landscape – larger varieties in the back of beds or as borders, smaller options in the front or in containers – their long-lasting flowers will make you think summer truly is endless.