

Whether your prefer a single candle in each window or a 12-foot tree covered with glittering decorations, our ideas will help you create a special home, from the simple to the dramatic! Try some new and stunning decorations this holiday season, including…
- Garlands and Swags
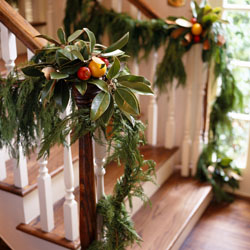
Graceful drapes of greeneries and ribbons are the perfect choice for mantles, doorways, arches and railings. Weave two coordinating ribbons around a swag for a stunning contrast, or attach cones, berries or dried or silk flowers with a dab of hot glue for a colorful burst. You might also weave a bead strand into a garland or swag for extra glamour. - Wreaths
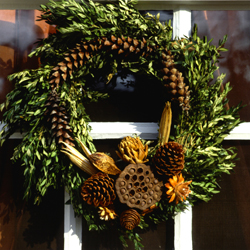
Classic wreaths can be stunning on doors, over mantles or on windows. They can be completed with a single bow or festooned with berries, trumpets or other decorations to match your décor. Whimsical wreaths may be made of candy or faux cookies, or you might tuck small gift boxes or other accents into the design. - Fresh Cut Greens
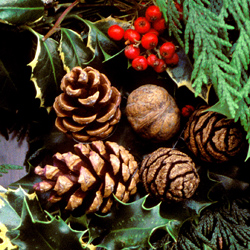
Cedar boughs and holly sprigs look and smell great, whether they are scattered on the mantle, tucked behind pictures or brimming from vases and baskets. Tie a bunch together with a big bow for a delightful, simple door decoration. When using in a vase, make a fresh cut at the base of greens before arranging and check the water often the first few days to keep them plump and fragrant. - Roping
Simple ropes of white pine look great along a fence, railing or light post. Add large, bold bows along the railing or fence with even larger bows at the base of the gateposts for an easy decoration and to bring the look together. - Ornaments
Ornaments don’t just belong on trees anymore! Fill a tall, clear vase or glass pillar with colorful ornaments to display them elegantly, no tree required. For a more elegant look, use ornaments of just 1-2 colors, or ornaments only in coordinating shades and similar hues. You can also display ornaments in a broad open dish, around the base of a pillar candle or worked into a wreath or swag. - Treats
Your favorite holiday treats can also be elegant decorations. String candy canes along a garland or arrange them in a vase for a sweet decoration. A gingerbread house can be a beautiful centerpiece, or fragrant gingerbread cookies can be attached to a garland or swag. You can even add a dish of bright peppermints as a candle base or ribbon candies to a wreath.
No matter what your decorating style, there are creative and unusual ways you can add festive elegance to your home to celebrate the season.