Ornamental Grasses lend a unique dimension to any landscape with their texture, sound, motion and architecture. By planting ornamental grasses, you can also add multi-seasonal excitement to your landscape. Either combined with other ornamental plants or featured by themselves in “Grass Gardens,” ornamental grasses are attractive from spring until late fall and often through winter as well.
Choosing Ornamental Grasses
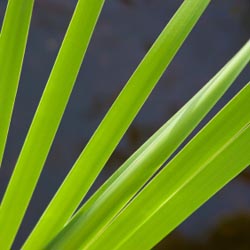
It can be challenging to select the best ornamental grasses for your landscape. Choose from varieties that are short or tall, upright or weeping. Foliage can be bold or fine and comes in colors ranging from green, blue-green, lime-green, gold and red to variegated with horizontal or vertical bands of white or yellow. Flower heads can be showy plumes, fuzzy foxtails or airy particles and appear from mid-summer to fall, depending on variety. Dried flowers and leaves may persist into winter, looking particularly effective against a snowy backdrop.
Depending on the conditions of your landscape and your grass preferences, there are many different types of grasses to try.
Screens Or Barriers
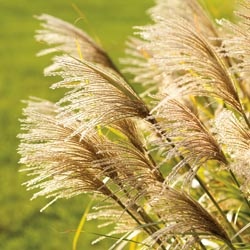
Taller growing varieties such as Plume Grass (Erianthus ravennae) or Giant Miscanthus (Miscanthus floridulus) can be used as effective screens or windbreaks. The wind rushing through their foliage creates added sensations of sound and movement. Even some of the medium-sized growers, such as varieties of Miscanthus sinensis, can enclose a patio or act as a barrier against wind, noise or an undesirable view.
Specimens
Many ornamental grasses also make excellent specimen plants and can turn a dull corner into a focal point of color and texture. Some of the most dramatic grasses for specimen planting include Maiden Grass (Miscanthus sinensis gracillimus) with its graceful arching vase shaped foliage and pinkish blooms which age to cream, and Porcupine Grass (Miscanthus sinensis ‘Strictus’) that has upright green and yellow banded stems.
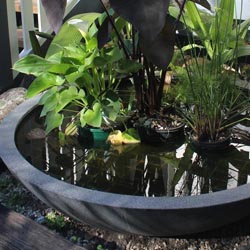
Waterscaping
Water gardens and ornamental grasses go together beautifully. A grouping of grasses looks particularly effective at the water’s edge, softening the boundary between land and water. Many grasses such as Miscanthus can tolerate moist conditions, some, like sweet flag (Acorus) and Giant Reed (Arundo donax), can grow in shallow water. Sedges (Carex), which are not true grasses, although similar in appearance, are also moisture-tolerant. Look for varieties with plain, variegated or golden foliage.
Groundcovers
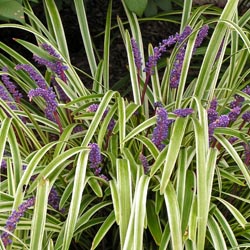
Grasses that are groundcover varieties spread by underground stolons rather than forming tight clumps. One such selection is Ribbon Grass (Phalaris arundinacea ‘Picta’), a fast-spreading green-and-white variegated variety, particularly useful as a groundcover in difficult areas such as slopes or even under trees that cast light shade. Give this one plenty of space! You’ll also want to try green or variegated Liriope and Black Mondo Grass (Ophiopogon).
Beds and Borders
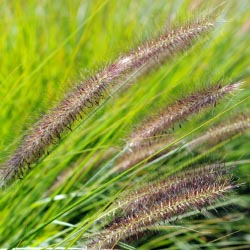
Massed in groups, ornamental grasses are wonderful as a background to, or in combination with, other plantings. Try planting them with perennials such as Black-eyed Susan, Sedum ‘Autumn Joy’ and Veronica ‘Goodness Grows’ or ‘Sunny Border Blue’ for a dynamic summer and fall interest addition to your landscape. Varieties for mass planting include Switch Grass (Panicum virgatum), whose upright delicate flowers are held above leaves that turn reddish in the fall; Korean Feather Reed Grass (Calamagrostis acutifolia ‘Stricta’) which yields stunning buff-colored plumes over a long period and Fountain Grass (Pennisetum alopecuroides) that sports maroon foxtails which age to cream in late fall. A number of different forms of Fountain Grass are available: ‘Hameln’ is a dwarf variety with creamy foxtails, while ‘Moudry’ has unusual black flowers. For edging beds and borders, plant low-growing Blue Fescue (Festuca glauca). Its steely blue clumps hold their color though winter and contrast well with pink or purple flowers or foliage.
Growing Grasses
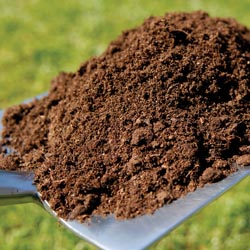
Ornamental grasses are relatively easy to grow. A site that receives at least six hours of sun per day is best, although varieties such as Hair Grass (Deschampsia) and variegated Miscanthus (Miscanthus sinensis ‘Variegatus’) can grow well in as little as four hours of sun. Soil preparation, as with everything you plant, is a must, so work in plenty of organic matter such as peat moss, humus or compost. Fertilize in early spring with 5-10-5 or bone meal, when new growth is starting to show. Clumps should be cut back to within 6″ of the ground at this time, and can be divided if needed.
You’ll love the look ornamental grasses can give your landscape, and these easy-care plants can be effective at many functions in many different types of landscapes. Give them a try today!