Richly flavorful and packed with health benefits, garlic is a great ingredient for all your favorite savory dishes. Growing garlic is very easy and helps you keep a ready supply of this root vegetable (often also referred to as an herb or spice) on hand for quick access and instant flavoring.
Health Benefits of Garlic
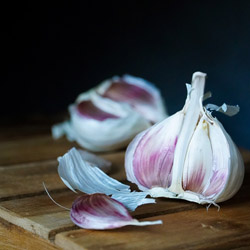
Garlic, which is related to onions, shallots, and leeks, has many documented health benefits, making it a worthwhile addition to your diet. This bulb vegetable is segmented into cloves, and may yield 10-20 cloves per bulb. Just a clove or two added to different dishes can…
- Boost immune function, minimizing colds and other minor ailments
- Reduce blood pressure to improve cardiovascular health
- Lower bad cholesterol levels and the risk of heart attack or stroke
- Reduce bone loss risk, particularly in older women
- Lower inflammation to improve arthritis and joint function
The health benefits of garlic are so well known that the plant has featured prominently in the medical treatments of different cultures for centuries, including the ancient Babylonians, Egyptians, Greeks, Romans, and Chinese. Today, many doctors continue to promote garlic as part of a healthy diet.
Tips for Growing Garlic
Fresh garlic has the most health benefits and is the most flavorful. It’s easy to grow garlic either in the garden – it is resistant to both deer and rabbits, making it ideal for borders to protect other produce – or in kitchen pots for easy access for all your cooking. To make the most of growing garlic…
- Choose organic or locally grown garlic to grow. These cloves won’t have chemical treatments that could inhibit growth, and you will be able to monitor exactly what care your garlic receives.
- Opt for hardneck garlic in northern climates because it is hardier, whereas softneck garlic can easily be grown in mild climates. If you will grow garlic indoors, either variety is suitable.
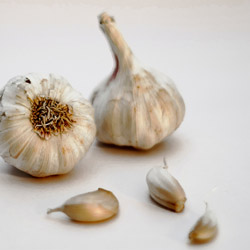
- Choose large, firm cloves without any signs of damage, softening, or bruising for the best growth and largest crop to harvest.
- Provide a cooling period of 6-8 weeks in the refrigerator for hardneck garlic, which requires a dormant period for optimal sprouting. Softneck garlic does not need as much cooling.
- Use a pot at least eight inches deep so cloves have plenty of room to develop, and the pot should have abundant drainage holes to prevent root rot.
- Space cloves at least 3-4 inches apart, or plant just one clove in each pot so the bulbs have adequate room for full development.
- Use organically rich potting soil, or amend garden soil with compost to nourish young garlic. The soil should be loose and well-draining so garlic bulbs aren’t cramped.
- Leave the papery skin on cloves for planting, and position cloves pointy-side up, 3 inches down into the soil. Cover the soil with a light layer of mulch or straw for protection.
- Position garlic where it will receive 6-8 hours of sunlight per day. Indoors, a south- or west-facing window is ideal, or use a supplement grow light to help garlic grow best.
- Feed garlic carefully, using natural fertilizer, compost, or a high-phosphorus blend specially formulated for larger, healthy bulbs.
- Water garlic well. The soil should be uniformly moist but not overly soggy, or the bulbs will rot and be unable to flourish.
- If temperatures drop, protect garlic pots by wrapping them in insulating bubble wrap, carpet, or straw bales. For garden garlic, a layer of mulch will help keep soil temperatures even.
Harvesting Your Garlic
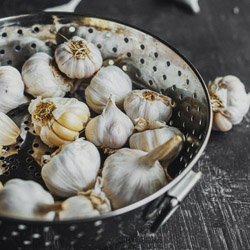
Garlic is slow-growing and will take 7-9 months before fresh bulbs can be harvested. When approximately 50-70 percent of the green tops of garlic plants begin to turn yellow or brown, the bulb is mature and ready to harvest. Use a hand rank or garden fork to carefully loosen soil around the garlic, gently lifting the bulb. Avoid bruising, scratching, or breaking the bulb, which would cause it to rot.
Gently wipe off excess dirt from the bulb, but leave the paper covering intact. Trim off the roots and stalks, and place the fresh bulbs loosely in paper bags in a cool, dry spot for 1-2 weeks. Air circulation should be good to cure the bulbs evenly, and garlic should be stored in a cool, dry place until it is ready to use, or until the best resulting cloves have been dormant long enough to plant and start the cycle over again for even more fresh garlic to enjoy.