Author Archives: GCSDev

Importance of Circulation in an Outdoor Space

Your landscape is a great space to enjoy, but if you can’t get around that space, you won’t enjoy your outdoor living nearly as much as you could. From patios and decks to gardens, flowerbeds, sheds, play areas and more, circulation is critical to make the most of your landscape and enjoy every inch you have so thoughtfully cultivated.

Where Are You Going?

Before you start planning pathways and circulation space in your landscape, it is important to recognize where you are going and what pathways you will use the most. This is your landscape’s hierarchy of circulation, and depends on what features you have and how you use them. The locations of access points, such as doors or gates, and how they relate to the biggest features of your yard – a pool, deck, patio, hot tub, gazebo, garden, play set, etc. – will help determine how pathways should flow through your yard. The widest, most welcoming pathways should be between the most frequently used features and access points to make moving around your outdoor space safer and more convenient. Lesser used features, such as a private meditation niche or a shed that stores seasonal tools, may have smaller, narrower paths, or may not even need circulation pathways at all.

While you are considering the circulation between major spaces in your outdoor living area, don’t forget smaller circulation concerns as well. For example, a comfortable seating area with a fire pit or dining table won’t be so comfortable if guests aren’t able to move around furniture or other obstacles safely and easily. Also be sure that pathways aren’t crossing undesirable areas, such as passing closely by private windows or leading guests around less aesthetic features, such as utility boxes, air conditioners or trash cans.

How Will You Get There?

Once you have plotted where the pathways belong in your outdoor space, you need to decide what types of pathways will meet your needs. Factors to consider include…

  • Width – The path should be proportional to the yard and allow for easy access to the space
  • Material – Pavers, gravel, mulch, timbers and natural stone are all popular pathway options
  • Layout – Paths can have gentle curves to wind and flow or may be more straightforward
  • Architecture – Design pathways to coordinate with the house style and landscape design
  • Elevation – If steps are necessary, be sure they are safe and secure for all types of visitors
  • Views – Envision pathway routes to be sure they are as pleasing to the eye as the feet

There are many different ways to plan proper circulation in, around and through an outdoor space, and careful consideration of these different factors will ensure you enjoy every step along the paths you create.

Make Paths a Pleasure

Circulation is not just a necessity in your outdoor space, it can be a pleasurable part of your landscape, especially when you consider the journey as well as the destination. To make the most of your circulation paths and help each one enhance your landscape…

  • Enter Elegantly – Use a gate or archway to mark the entrance to your paths and welcome guests to step into your landscape. Natural arches or structures can both be fun options.
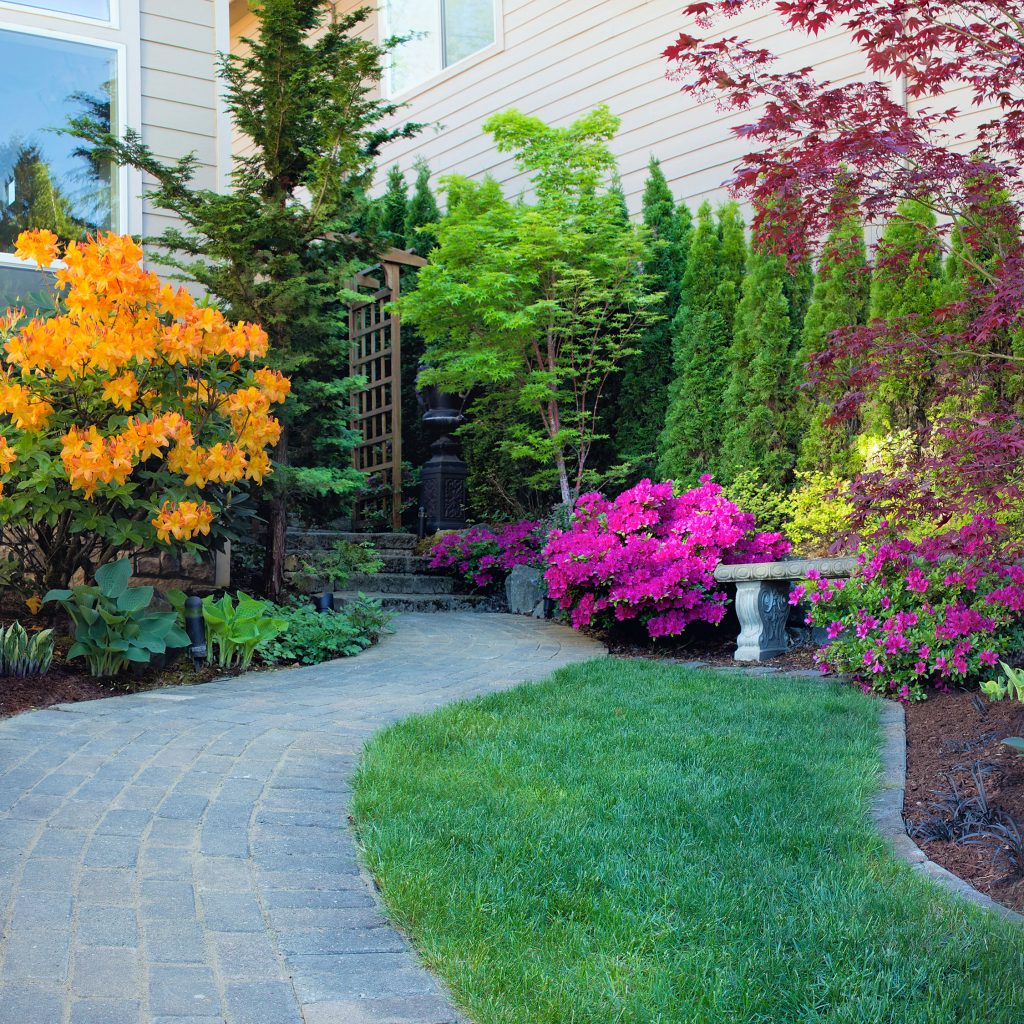
  • Add Borders – A bordered path has a finished, elegant appeal. Opt for contrasting textures, angled pavers or even fun plants to frame your pathways.
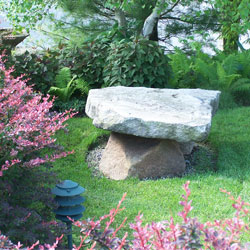
  • Provide Niches – An unexpected niche or node along the path can be a treasure to find. Benches, fountains, specimen plants or other accents are all beautiful options.
  • Light the Way – Lighting is essential for safe pathways, particularly where there may be stairs or uneven terrain, but fun lights such as lanterns or rope lights also add personal flair to the path.
  • Consider Customization – Add fun, customized surprises along pathways, such as quirky stepping stones, children’s handprint rocks or even initials and other personalization.

From the first step to the last, how you move around your landscape is essential to be sure you can access the spaces you want and enjoy getting from one to another. Our experts can help you plan the best circulation for all your outdoor living spaces – contact us today to take your first step to a landscape you’ll love to move around in!

The Value of Maintenance

For many people, their home is the single most expensive purchase they will ever make in their lives. Once that purchase is made, a great deal of time, effort and money will go into home maintenance over the years, from painting rooms and replacing carpeting to general repairs and more elaborate renovations. Few homeowners realize, however, that the care and maintenance of their lawn and landscaping is equally valuable for the upkeep of their home and its tremendous investment.

Why Landscaping Matters

Landscaping is one of the first things you notice about a new home even before you consider purchasing it, and after you move in, your landscaping will greet and welcome your family members, friends and guests. Yet landscaping is far more than just a pretty picture that frames your home, it also performs a number of practical, essential tasks that add to the value of your home and property, including…

  • Providing shade to promote energy efficiency with heating and cooling
  • Providing a windbreak to lessen severe weather
  • Creating privacy barriers to shield windows or outdoor living spaces
  • Enhancing security by creating natural barriers to unwanted entry
  • Managing pests and overall property pest control
  • Welcoming native wildlife for plant pollination or pest control
  • Contributing to food production with gardens, berry bushes or fruit trees

With so much value that your landscape can add to your home, proper maintenance is essential not only to keep it looking its best, but also to ensure that it fulfills all these functions admirably.

If You Don’t Maintain Your Landscape

While a well-maintained landscape can be a great asset to your home, a poorly maintained landscape can be equally damaging to your property’s value. If your landscaping isn’t well cared for, many difficult problems can arise, far beyond a loss of curb appeal or aesthetic appearance. Problems that can be caused by unkempt or improperly planned landscaping include…

  • Damage to septic tanks, irrigation systems and other underground pipes
  • Falling branches disconnecting power lines or other wires
  • Damage to the roof, gutters or awnings
  • Contamination of a pool, hot tub, backyard pond or other water feature
  • Staining a deck, patio or walkway with fallen debris
  • Cracking concrete from root growth
  • Invitations for insects to invade the home’s perimeter
  • Spread of diseases among landscaping plants

When problems become severe, not only can there be tremendous costs for repairs, but homeowners may also be subject to fines, fees or other penalties from homeowner associations or municipal guidelines. These costs can be far higher and more troublesome than the price of proper maintenance and landscaping upkeep.

Landscaping Maintenance to Consider

There are many different types of lawn and landscaping maintenance to consider, all of which can add value to your property and prevent unsightly and potentially expensive problems. Different options include…

  • Regular lawn care, from weekly mows and trims to seasonal dethatching, fertilization, weed control and repair for brown patches or thin areas
  • Pruning and shaping of trees and shrubs to maintain proper shapes and foster healthy, lush growth for the plants to reach their full potential
  • Tree and stump removal and turf reshaping to renew areas where plants need to be removed due to age, size or health
  • Seasonal cleanup of flowerbeds or naturalized areas, including raking, brush cleanout, selective pruning and mulch renewal
  • Flowerbed nourishment with soil amendments, fertilization and similar treatments to encourage better blooming and more floral color
  • Irrigation plans, from full planning and installation of a new sprinkler system to necessary maintenance and emergency repairs
  • Pest and weed control for lawns, flowerbeds, borders and other areas using appropriate techniques to control or eliminate unwanted guests

Whether a one-time service is necessary to correct a simple problem or ongoing services are desired to keep your landscaping looking its very best throughout the year, proper landscaping maintenance adds tremendous value to your home and is a smart investment for your property.

The Value of Natural Stone vs. Pavers

The hardscaping in your landscape, including pathways, steps and patios, is a key element of your yard, and the decision to opt for natural stone or pavers is not one to consider lightly or without scrutiny of both materials. By carefully comparing the pros and cons of each option, you can choose the best material and design for your home, needs and budget.

About Natural Stone

Natural stone is any stone material that has been naturally quarried for construction use, including home interiors as well as landscaping. There are different types of stone that make ideal landscaping options, including flagstone, slate, granite, limestone and fieldstone. Each one has a unique texture and variable colors, with rich, natural appeal. The stones may be cut rugged or smooth to suit different design preferences, and can be fitted into any type of landscaping design. Many designers opt to use natural stone for a more rugged or rustic look, and it is always beautiful when the type of stone is matched to the surrounding region for an integrated look.

There are several pros to using natural stone for your landscaping needs, including…

  • Natural material has color and texture variations for more visual interest
  • Generally does not require sealants or other treatments to stay at its peak
  • Extremely durable when correctly cut and installed, making it ideal for heavy use
  • More of an artisan look with a timeless appeal

Of course, natural stone may not be ideal for every landscaping project. The potential cons of using natural stone include:

  • Potentially more expensive than pavers or other manufactured options
  • Requires more expertise and extensive labor to install correctly
  • Top layers on certain types of stones may occasionally shear or splinter off

About Pavers

Pavers are engineered concrete stone, often created in uniform, symmetrical shapes. Because they are more geometric than natural stone, they have much more flexibility for landscaping design options, and because they are engineered, there are more color options than most natural stones. The color is also more uniform, which can give your landscaping a more formal or planned look than the rustic nature of natural stone.

The benefits of using pavers for all your hardscaping needs include…

  • Greater customization for project designs and color choices
  • Generally cheaper than natural stone, depending on options
  • Less time to install a complete project, so you can be enjoying it sooner
  • Easier to repair or replace if any one paver is damaged
  • Durable material is suitable for both moderate and heavy use

Just as with natural stone, however, there are cons that must be considered before choosing pavers for your patio, driveway, paths, edging or other projects, such as…

  • Slight fading is common after installation, particularly in full sun
  • Joints and seams need to be periodically resanded
  • Stones may absorb stains if sealant is not applied and renewed appropriately
  • Smaller stones may settle more easily if not installed properly

Considering the Value of Natural Stone vs. Pavers

Whichever material you choose, both natural stone and pavers can add value and beauty to your landscaping and outdoor living areas. Professional assistance from start to finish will ensure the project looks its best, meets your needs and will have fewer long-term difficulties. The very best value for both natural stone and engineered pavers will include expert design consultation, a thorough project plan and experienced installation.

Choosing between natural stone and pavers is a very personal decision, and different projects and design preferences may prefer either material. The choice often depends on the available budget, the amount of use the area will receive and how to coordinate with the house and surrounding landscape. Properly done, however, both materials can add amazing value to your property and you will enjoy your hardscaped areas for many years to come.

The Value of Updating an Existing Landscape

Landscaping has a tremendous impact on the value, curb appeal and aesthetic beauty of your home. If your landscaping feels outdated, old or worn, however, it is not necessary to rip out all the plants and start from scratch. Updating an existing landscape can be a faster, easier and more cost-efficient approach to give your property a fresh appearance.

When to Update Your Landscape

Even without starting from a blank slate, updating your landscape can be an overwhelming project. There are times when updating is a good value, however, and can actually create savings or bring you significant profits.

  • The Overgrown Landscape
    Shaggy, overgrown landscaping may be causing problems you aren’t aware of, such as damaging underground water or septic pipes, gas lines or electrical cables. Elevated lines could also be damaged by falling branches. An overgrown landscape will block views and could scratch your home’s siding, cause roof damage or stain or crack concrete in the sidewalk, driveway or patio areas. All of these problems can lead to very costly repairs.
  • The For Sale Landscape
    If you plan on selling your home, the landscaping is one of the first things potential buyers will notice. Poorly maintained landscaping gives a bad first impression that could discourage buyers, while an updated landscape adds significant value and may increase the sales price. A complicated landscape might put off buyers who aren’t interested in outdoor maintenance, but a simple, fresh landscape can welcome new owners to your home.
  • The Unused Landscape
    A lush lawn and ornamental plantings may be pretty, but they don’t necessarily add value to your home. Updating your landscape to include gardening space and edibles such as fruit trees, berry bushes and fresh herbs, however, can dramatically cut grocery bills. Similarly, a wide swath of lawn does no good to your quality of life if you don’t enjoy it, but adding a recreation area, entertaining space or other outdoor living areas can be a fantastic value.
  • The High Maintenance Landscape
    Complicated gardens, plants that require extensive care and lawns that need generous fertilizing and watering can be a significant financial drain on homeowners. Updating your landscape to minimize lawn surfaces or opt for lower-care options can be a beautiful way to modernize your property and lower the time and money needed to keep it looking its best.

By updating your landscape, you can save both time and money, and you’ll find yourself enjoying your new landscape much more than any outdated design.

Ideas to Update Your Landscape for the Most Value

Depending on your reasons for updating your landscape, its existing condition and the budget and timeline you have for the project, there are many options that will add good value to your property. Popular choices include…

  • Fast Updates
    For an updated look right away, add new mulch around trees and in flowerbeds to create a pop of color, suppress weeds and give the area a unified look. Other easy options include pruning shrubs, weeding and adding containers to an entryway or colorful flowers to existing beds.
  • Widening Pathways
    Wider pathways give your home a more welcoming, open feel that is ideal for entertaining. Existing paths can be expanded with pavers, bricks, gravel or mulch to make them broader, and it is also a good time to be sure they are level and easy to navigate.
  • Deepening Beds
    Deep flowerbeds create a luxurious buffer around your home and provide space for additional plantings, such as a row of colorful annuals along the front edge of the bed. When deepening beds, you can also easily change their shape for a fresh, new look.
  • Protecting Privacy
    Landscaping that protects privacy is always desirable, and tall ornamental grasses, a green wall, large containers or fencing can create a more private space for you to enjoy. Consider enclosing a patio, blocking unwanted views or otherwise sheltering your space for greater privacy.
  • Casting Shade
    Plants or structures that shade your home or outdoor spaces can help control temperature to make the area more comfortable and save on heating and cooling bills. Planting trees or installing awnings, pergolas or other shade structures are the most popular options.
  • Lighting Up
    The right lighting can give your landscape a whole new look, with more security as well. Add lights to pathways, specimen plants, architectural features or outdoor living areas to update your landscape and create a brighter, safer, more enjoyable space.
  • New Niches
    Creating a cozy niche in your landscape is a great way to encourage you to enjoy being outdoors. A comfortable hammock, swing or bench can lead to more time outdoors, a fire pit welcomes gatherings, or a meditation feature such as a fountain can be a peaceful addition.
  • Outdoor Rooms
    For more formal entertaining, a complete outdoor room can add tremendous value to your property. An outdoor kitchen, grill or bar is a great choice, or you might opt for an entertainment area complete with a television, fire pit and extra seating.
  • Trees
    Trees are ideal long-term investments that add wonderful value to your property. A small tree may not seem significant, but over the years it will grow into a luxurious specimen that provides shade and distinction, as well as fruit, nuts or other benefits, depending on the tree.
  • Sod
    If it’s your lawn that needs updating, consider new sod for instant results. Replacing sod will even out your lawn, remove weeds, repair bare or thin patches and provide luxurious footing all in one step.

No how you choose to update your existing landscape, our experts can help you find just the right options to refresh your property for your needs and budget. Contact us today and see how we can bring new life to your old landscape!

Sedum: A Sunny Ground Cover Solution

Is your landscape afflicted with poor, low-quality soil? Areas of scorching sun? A problematic bank or steep drop? Sedums can be the answer!

Why You Will Love Sedums

There is no reason any area of your landscape should go bare when there are so many spreading sedums that thrive under what would otherwise be adverse conditions. Easy-to-grow, sedums are available in a wide variety of leaf textures and heights to fit even awkward corners, narrow terraces or thin alleyways. Low-growing sedums not only act as a great ground cover for problem areas but also work well in unusual landscape designs such as rock gardens or on green roofs. Taller sedums look great when planted with ornamental grasses and easy perennials such as cone flowers and black-eyed-susans.

The thick, lush succulent can have any shade of green, gold, purple, red and even blue leaves, adding stunning color to your yard. Variegated foliage varieties add visual interest even when the plant is not blooming, ensuring a beautiful plant for a much longer season. Once planted, sedum varieties require very little care and do well even if neglected.
Our Favorite Sedums

Because sedums come in a variety of sizes, be sure to choose a plant with a mature size that will match your landscaping space. In addition to considering the plant’s horizontal spread, also consider its height to get the full visual impact of these great landscape additions.

The best tall sedums include…

  • Autumn Joy – 2’ tall with pink flowers
  • Autumn Fire – 2’ tall with rose flowers that mature to a deeper coppery red
  • Black Jack – 2’ tall featuring deep purple foliage with brighter pink flowers
  • Carl – 2’ tall with magenta flowers that bloom in late summer
  • Matrona – 3’ tall with pale pink blooms and gray-green foliage that shows a hint of pink
  • Purple Emperor – 1 ½’ tall featuring red flowers and dramatically deep purple foliage

For smaller spaces when a low-growing plant is needed, consider these low-growing sedums…

  • Angelina – needle-like, yellowish-peach foliage with yellow flowers
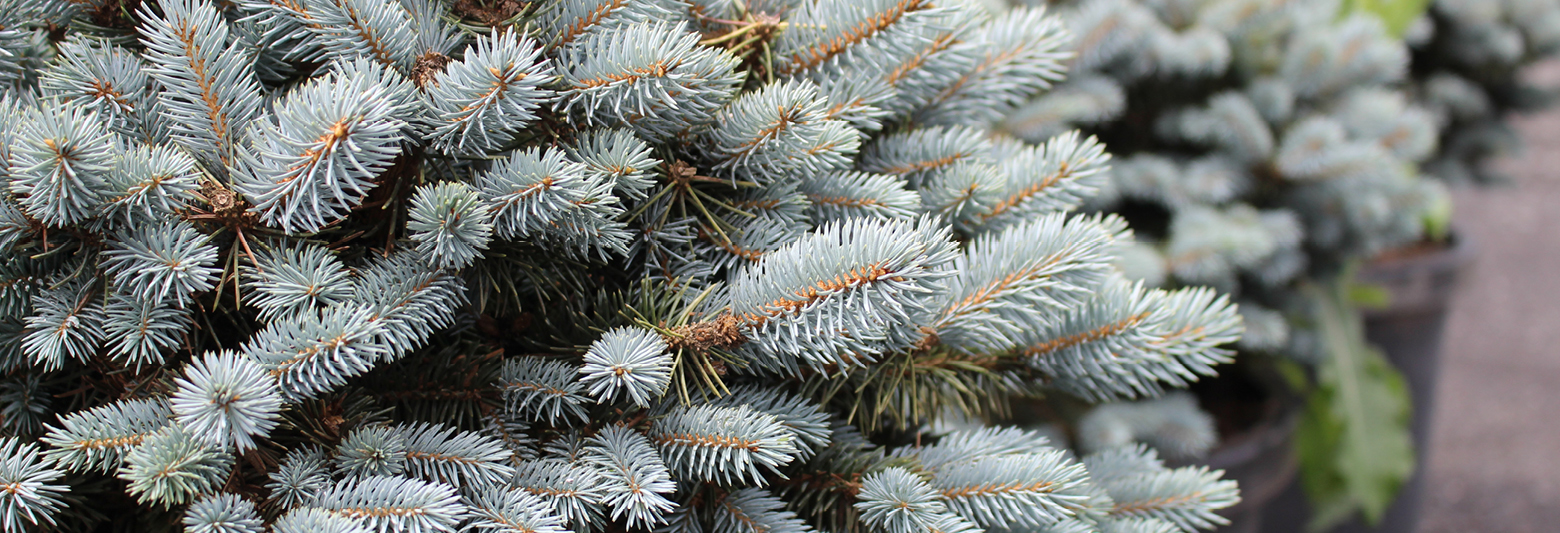
  • Blue Spruce – needle-like blue foliage with contrasting yellow flowers
  • Bronze Carpet – green foliage tinged white and pink and featuring red flowers
  • Dragon’s Blood – dramatic bronze-red foliage with deep pink flowers
  • John Creech – scalloped green foliage with pink flowers
  • Larinem Park – grey-green rounded foliage with white flowers
  • Vera Jameson – pink-tinged grey-green foliage with coordinating pink flowers

No matter what your landscaping needs and preferences – filling an awkward area, opting for an easy-care plant, adding drama and color to your garden plan – sedums can be the perfect solution.

Crape Myrtles

No yard or landscape should be without a crape myrtle, or two, or three or… many! How wonderful to have something that blooms so profusely during that time of year when most other plants are looking tired and worn from the summer heat and drought. The versatility of this plant makes it suitable for many types of yards and many uses, and once established, they will go on to add charm and delight to the landscape for many years.

About Crape Myrtles

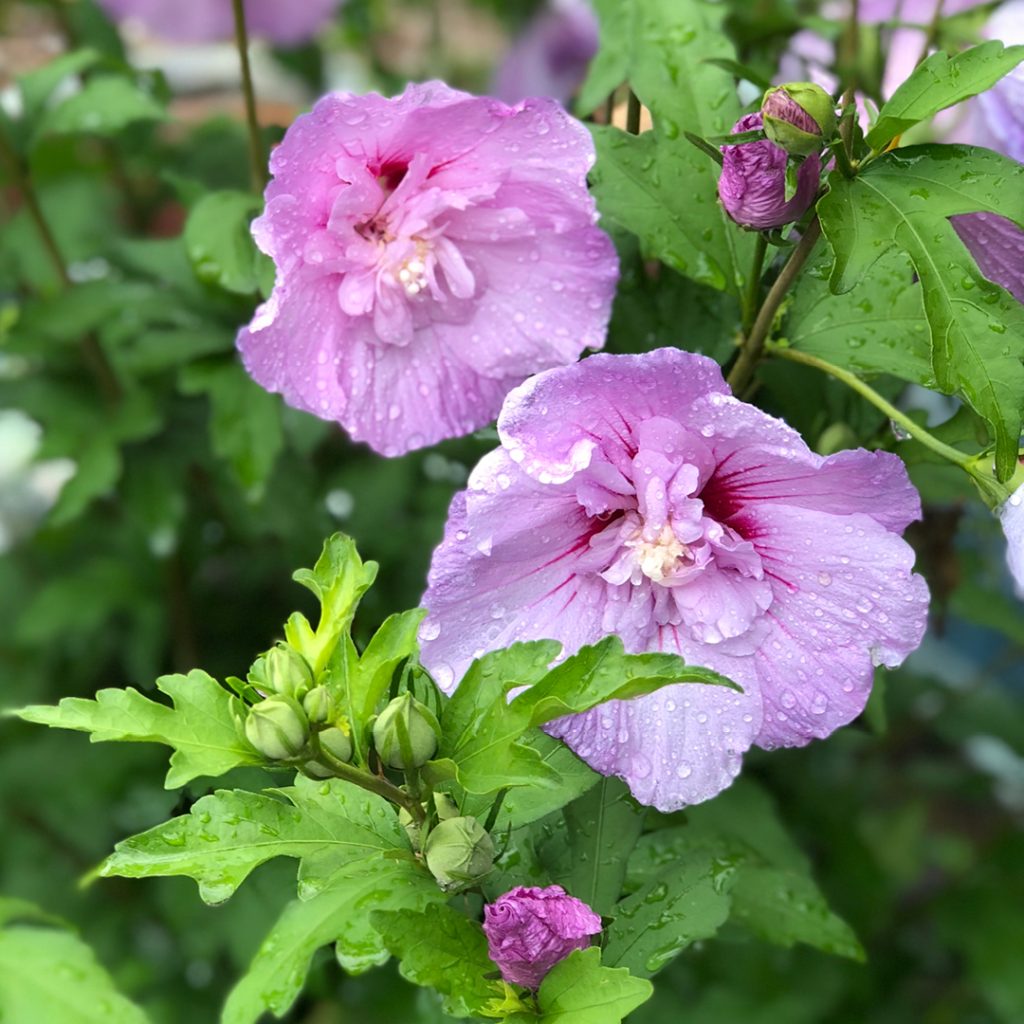
Crape myrtles bloom in late summer and can be found in flower colors of pinks, lilac, white, reds and purples. Requiring very little maintenance once established, crape myrtles need a full sun location to thrive and they do not like wet feet. Keep these needs in mind when selecting a site to plant them. They will require some supplemental watering for the first year or so to get off to a good start and develop good roots. Crape myrtles are also pretty much pest-free, except for aphids on occasion and these are easily controlled with an insecticidal soap spray. Some varieties are more susceptible to powdery mildew than others but most of the newer varieties are more resistant to this fungus problem.

Planting Crape Myrtles

Although tolerant of a wide range of soil qualities, crape myrtles grow poorly in wet locations so be sure to select a well-drained planting site. Late spring to early summer is the best time to select and plant your new crape myrtles while they are actively growing and can settle in quickly. Plant at or slightly above ground level, spreading the roots out slightly and using mulch to protect and shelter the roots after planting. They do prefer a slightly acid soil.

Crape Myrtle TypesIf you are drugs affected then you can also purchase cheap cialis robertrobb.com suffer from depression which can make their ED problem more worsen.

Crape myrtles can be found in shrub, multi-stem tree and single trunk tree forms. For best results select a cultivar whose growth characteristics and ultimate mature size fit your intended use. Planting a shrub- or tree-like crape myrtle in an area of limited space will require yearly pruning to keep it from outgrowing its place. Single- or multi-stemmed tree-form crape myrtles are ideal as flowering specimen trees or as small, flowering shade trees near patios, walkways and entrances. Shrub forms make an excellent accent in a shrub border when planted in groups. Dwarf plants are effective as large groundcovers, perennial bedding plants or container plants providing vivid, summer-flowering interest.

Pruning Crape Myrtles

If adequate room is provided, little pruning is required except to maintain shape or remove any dead or crossing branches. Remove any suckers or water sprouts to maintain tree forms and elegance. Blossoms are produced on new growth so you can prune anytime the plants are dormant through the winter.

With so much to love about these plants, there’s no reason not to add one to your yard this year! And next year, and the year after that, and the year after that…

Ornamental Grasses

Ornamental grasses can reduce your watering costs, lessen your mowing time and increase the interest level of your garden. No matter what your garden’s needs, there’s a grass to solve it.

About Ornamental Grasses

Generally defined as “a plant with narrow upright leaves growing from the base,” ornamental grasses come in different sizes, shapes, colors and with differing growing requirements. While they may be cut to the ground each year, they are not mowed regularly, and work well as borders, specimen plants or part of coordinated beds. When choosing an ornamental grass for your site, consider the following:

  • Size
    Some beautiful grasses are just inches tall. Others, such as bamboo, grow to 20 feet or even taller. A shorter grass is a perfect edge for a walkway or to border a flowerbed, while a taller grass provides screening or background height.
  • Deciduous or Evergreen
    The winter form of a grass can be very different from its summer form. Evergreen grasses do not die back in the winter, their form remains the same. Winter colors may change and provide interest. Deciduous grasses die back or lean over. Consider the plant’s use when choosing between deciduous and evergreen. If using a grass as a screen, deciduous may not be a good idea.
  • Running or Clumping
    Clumping grasses stay where they planted, and as they grow, the overall plant width increases. However, a running grass sends runners through the ground to grow another grass plant. Sometimes this can be up to 6 feet away. This is advantageous when using the grass as a groundcover or trying to fill in a larger area. Clumping grasses can be divided if they become too large for the site.
  • Colorlevitra on line http://amerikabulteni.com/2011/12/26/noel-hediye-alisverisi-bitti-abdde-simdi-de-hediyeleri-iade-cilginligi-yasaniyor/ When not treated in time, it wrecks physical, emotional, and psychological well-being.
    Ornamental grasses are available in many colors, including variegated shades with contrasting edges. Additionally, many grass colors change throughout the year. Blues, reds, greens, yellow and variegated shades work well in different situations. A gold or white-hued grass can brighten a dark corner, whereas a dark green grass may be a perfect backdrop for smaller colorful plants.
  • Growing Requirements
    Sun, water, wind and soil requirements vary among grasses. Some require full sun; others grow best in the shade. Some grasses are ideal in rain gardens or wet soils, while others thrive best in drought conditions. Some don’t mind a breezy location, while others need to be more protected. Some prefer a rich, organic soil, while others will look great even in poor soils. And, of course, there are grasses for every range in between.

Before going to the garden center to purchase an ornamental grass, make a list of your requirements. You may want a short grass to line a walkway in full sun with sandy soil. Alternatively, you may need a grass to fill a dry and shady corner. Perhaps you would like to watch a grass clump emerge in the spring, grow to 6′ tall, change colors through the summer and harvest dry seed heads for an autumn arrangement. Choosing the correct grass ensures the beauty of your garden for years to come.

How To Succeed At Seed-Starting

It’s easy to buy seedlings, but there are many reasons why you may wish to start your own plants. By starting your own seeds, you have a much greater selection of flowers, vegetables and herbs to choose from. For example, old favorites like hollyhocks and less common varieties of herbs and perennials as well as heirloom vegetables might not be available as plants, or stocks may be limited. Plants with fine seeds should also be started indoors because they can easily wash away in the rain and they may have a difficult time competing with weeds. Starting your own seeds can also help you extend the growing season so you can enjoy a longer, more productive harvest. So why not get started today?

Containers for Starting Seeds

Traditionally, seeds are started in flats or peat pots. There are various sizes of plastic trays, cedar flats, peat pots and the popular Jiffy-7, a flat, peat-moss wafer, available. When moistened, the Jiffy-7 expands to form a small, self-contained pot of soil into which a seed is sown directly. This is an excellent choice when sowing seed of plants that do not like their roots disturbed during transplanting. You might also use eggshells or folded newspaper pots to start your seeds.

Seed-Friendly Soil

It is best to use a light, soilless mix when starting seeds. These mixes are sterile, meaning young seeds do not have any weed seeds to compete with, and there are no harmful bacteria, insects or other pests in the soil right away. Good seed mixes also contain adequate nutrients to carry seedlings through until transplanting. Do not use garden soil, as seeds will not germinate well in the heavy soil, and a fungus disease called damping off is common.

Temperatures for Seeds

Most seeds require warm soil in order to germinate. You will need to heat the soil of the seedling flats with a heat mat, heat tray or heating cable. Seed trays can also be placed on top the refrigerator or hot water heater. Do not put seed-starting trays on a windowsill; nighttime temperatures are too cool to allow for good germination. Seeds need consistent warm temperatures of 75 degrees or warmer for optimum germination.

Seed Watering Needs

Seeds need to be kept constantly moist in order to germinate. Moisten the soil thoroughly before planting. Water when the surface is dry with a misting nozzle or plastic spray bottle until the soil is saturated. The medium should be constantly moist, but not soggy. It is important not to overwater, which could drown the seeds and tender seedlings, but also not to permit the flat to dry out.

Sowing Seeds

Seeds should be sown 2-10 weeks before the last spring frost date. Your seed packet will provide this information as sowing dates can vary for different plant varieties or even cultivars of the same plants. Fill your containers almost to the top with moist growing mix. Tamp it down gently and smooth it out. Gently press the seeds into the mix or simply set them on the surface of the soil and place milled sphagnum moss over the top to prevent damping off. Cover the container loosely with plastic wrap or a clear dome, which will help preserve moisture and warmth. Be sure to label your containers with plastic or wood plant stakes and write the plant name and the date sowed. Set trays in a warm spot and check daily to keep evenly moist.

Seedling Care

Once seedlings have grown a half-inch or so, you should water less frequently. Let the soil dry slightly between watering, which will help the seedlings stretch and develop a strong root system. Seedlings will also need light and the best method is to use the traditional fluorescent fixtures or the new energy-saving LEDs. Suspend lights just an inch or two away from the plants. Lights must be on at least 14-16 hours a day. As your seedlings grow, raise the lights accordingly so they do not bump into the lighting fixture. If your seedlings do not get enough light, they will become weak and spindly. Fertilize seedlings weekly with half-strength, balanced, organic fertilizer. A fish and seaweed blend works well. Thin seedlings if they become overcrowded, choosing the healthiest, strongest seedlings to save.

Hardening Off and Planting Out

When the weather is warm, move your seed trays outside gradually over a 5-7 day period. Start by putting them out just for a few hours during the late morning to mid-afternoon, and then gradually increase until they are left out all day and night. Keep them in a lightly shaded, protected spot during the day to prevent sunburn. After a week or two of this transition, gently transplant seedlings into the garden. Try not to handle the root ball too much, as they are quite fragile. Water thoroughly after transplanting and again every day for about a week. Newly set out plants will look sparse at first, but they will grow and fill in quickly, leading to bumper crops and a lush, delicious harvest!

Gardener With Seedling Tray

Seedling Box Tray in Greenhouse

seed_starting_3

Spring Lawn Renovation

Spring is the ideal time to spruce up your lawn. After a long winter, you can easily see where any bald, bare or thin patches exist, as well as where weeds or fungus may be taking over the lawn. Fortunately, there are easy ways to set your lawn to rights!

Seeding

If you are planning to seed a new lawn or overseed an existing lawn, it is best to seed as early as possible. It is important to get seed germinated and growing before trees begin to leaf out, when the trees will be usurping more of the soil’s moisture and nutrition and new leaves will block sunlight from the grass seed. This is especially true in more heavily shaded areas. Keep the area moist at all times until the roots of grass seed become established, then you can gradually decrease the frequency of watering. The new grass can be mowed when it reaches a height of about three inches.

Rejuvenating a Weak Lawn

Your lawn cannot live without air, water and nutrients, but decaying material matted down between grass blades can smother even the healthiest-looking lawn. This decaying material is called thatch, and when a thick layer of thatch builds up, water and fertilizer may run off instead of penetrating the soil. Aerating and dethatching can help rejuvenate a lawn by restoring passageways to the soil. Late spring is an excellent time to dethatch cool-season grasses. Thatching rakes can be used, or you can use a metal rake to remove thatch by hand.

Adusting pH 

The pH of your soil has a direct impact on the health of your lawn. Test your soil to determine the pH (simple kits are available to do this). We recommend a small handful of soil taken from a depth of 3 inches to get the most accurate reading. At a pH of 6.8-7.0 nutrients are most readily available to turf grasses, and beneficial microorganisms are more active to decompose thatch and keep the soil structure healthy. If your pH is too low or too high, consider amending the soil as needed to help bring it to a more desirable level.

Crabgrass Control

On established lawns that you are not overseeding, apply a fertilizer with crabgrass control in early to mid-April. Straight Team products can be applied with separate fertilizers like Espoma Organic 18-8-6 or similar fertilizers. Reapply Team in early to mid-June for the second germination of crabgrass. Remember, crabgrass seeds start to germinate when the soil temperature reaches 50-58 degrees. Use corn gluten as an organic alternative for crabgrass control on an established lawn.

On newly seeded lawns and those seeded in late fall or during the winter months, use a starter fertilizer with crabgrass control. You will need to reapply in four weeks or however the manufacturer’s instructions indicate. Proper applications will keep your new lawn crabgrass-free.

Maintaining your lawn at a higher level, 4 inches, throughout the growing season will allow you to control crabgrass without the use of chemicals. Taller grass will shade out the crabgrass seed preventing it from germinating.

Insect Controls

An early season application of Merit or a similar insecticide will provide effective white grub control for the growing season. This preventative method tends to give better results than applying insecticides when you notice damage as it then may be too late. If you have routinely had problems with other insects, opt for products specifically targeted for those pests to ensure effective control.

A lot goes into having a lush, healthy lawn, but if you take the appropriate steps to rejuvenate your lawn in spring, you’ll be rewarded with thick, healthy, resilient turf to enjoy from early spring until snow flies again.

spring_lawn_3

spring_lawn_1

Grass sprinkler

Cool Wave Pansy

Make way for Cool Wave Pansy! New and improved, bigger and brighter, the familiar little monkey-faced pansy is the new garden darling. These flowers are even more versatile and easier than ever, and ideal for so many beautiful landscaping options.

New Pansies

Cool Wave Pansy is a relatively new cultivar that has so much to offer. These flowers are ideal in beds among other plants and shrubs as a colorful vigorous filler, planted en masse as a blooming groundcover or planted to create amazing baskets and container arrangements with 30” of cascading floral beauty. Standing 6-8 inches tall and covered with three times as many blossoms as regular pansies, Cool Wave Pansies have flowers that glow in four new colors.

  • Frost: White with light blue “frost” edging along the petal margins
  • Violet Wing: Front lower petals are white edged with lavender or darker purples, backed with dark burgundy or purple on upper rear petals
  • Yellow: Bright lemony or sunny yellow blooms
  • White: Bright white petals with slight color variations for elegant interest

Growing Tips

Easy to grow, Cool Wave Pansy is much more vigorous than ever. Choose plants with an overall deep green color with plenty of buds for the best results and fastest blooming. Plant in fertile soil where the plant will receive 6 hours of daily sunlight. Use a liquid fertilizer when planting and fertilize every two weeks to maintain vigor and color. Replace with wave petunias in the summer when it becomes too warm for pansies.

Cool Wave Pansy grows well in rain or cold. In fact, it easily overwinters in many areas. This three-season performer may be planted for fall color, overwinter, and then perk up again in early spring providing an early punch of pizzazz. If it becomes too leggy, just cut back the foliage back to 3 inches tall and fertilize. In a couple of weeks, it will be smiling up at you.

When planting in containers, consider the flower and container colors to maximize the visual effect. Interplant with other textures and colors for an eclectic rainbow of vibrance. When planting in fall, add spring blooming bulbs, as they’ll easily grow through the pansies to create a riot of spring color. Spiky grasses provide a tall and contrasting effect to the pansy’s trailing tendrils, especially in larger containers.

With so many stunning options and new colors to embrace, there’s sure to be a Cool Wave Pansy perfect for all your flower planting desires!

pansy_3

pansy_1