Author Archives: GCSDev

Eastern North American Native Ferns

Ferns are magnificent, whether in the wild or under cultivation. Among the oldest plants on earth, ferns can be traced back to the Coal Age, over 300 million years ago. Today, ferns are one of the most overlooked and under-utilized perennials in the garden.

Types of Ferns

Eastern North American native ferns are available in a vast array of sizes, forms and textures and thrive in a variety of habitats. Many ferns present a combination of both fertile (with spores) and infertile (without spores) fronds that add an additional element of interest to their growth and texture. Some ferns prefer sun, some shade. Some prefer moist soil, some dry. Some spread quickly, some stay put. Some are easy to grow, some… not so much. You get the picture – the versatility of this plant group ensures a selection for every gardener and every garden situation.

With so many ferns to choose from, which is right for your landscaping needs? Consider the following popular varieties, or come in to consult with our landscaping experts to find the perfect fern to complement your landscape.

  • Cinnamon Fern (Osmunda cinnamomea) – Grows 24-36 inches tall. The stiff fertile fronds appear in spring, first green and later turning cinnamon-brown. The plant grows neatly in a symmetrical clump. This fern does best in a shady site with moist soil.
  • Christmas Fern (Polystichum acrostichoides) – This is one of the few evergreen ferns native to the eastern United States. The leathery fronds of this durable fern reach 18 inches in height. The Christmas fern is not an aggressive spreader and is easy to nurture in a moist, shady garden.
  • Hay-Scented Fern (Dennstaedtia punctilobula) – This lovely fern grows to about two feet in height and spreads rapidly. Spreading may be controlled by pulling out some of the growth in spring. This fern does best in full sun to partial shade and will tolerate somewhat hot, dry sites. Hay-scented fern produces lightly scented, apple-green, lacy fronds that add delicacy to the garden.
  • Interrupted Fern (Osmunda claytoniana) – This fern is unusual for its sterile, three-foot tall fronds that have brown spore cases in the middle of the frond with pale green leaflets both above and below. Interrupted fern grows best in a shady site with moist soil. This fern will tolerate more light and drier soil than most, and it is remarkably easy to grow.
  • Lady Fern (Athyrium filix-femina) – This fern can reach up to 36 inches, although its height can be quite variable. This easy-to-grow fern is an excellent choice for beginners. In the spring, Lady ferns produce a hearty flush of reddish-green growth. This is when the plant is most beautiful. Lady fern does best in shady conditions with slightly acid, moist to wet soil.
  • Maidenhair Fern (Adiantum pedatum) – At 18 inches tall, this specimen is the daintiest of the Eastern North American native ferns. The fan-like leaves are borne on delicate, curving, black stems. This fern does best in filtered light and well-drained, cool soil. This fern spreads fairly slowly.
  • Ostrich Fern (Matteuccia struthiopteris) – This fern produces light-green, gracefully arching fronds that reach up to 40 inches or more. This is an excellent choice for background planting. Underground runners extend in all directions and will colonize large areas, so it needs abundant space. The early spring fiddleheads are edible. Ostrich fern does best in sun to partial shade and moist soil. It is native to marshy areas.
  • Royal Fern (Osmunda regalis) – This fern forms a three-foot, vase-shaped clump of bright green fronds. Light brown spores are borne on the top of the fertile fronds. Royal fern does best in shade or sun and a moist organic soil.
  • Sensitive Fern (Onoclea sensibilis) – This fern makes a spectacular ground cover of 18 inch high, light green fronds. The fronds emerge in the spring tinged pinkish-purple until maturity. This fern prefers average moisture and part sun.

Keeping Cats Out of the Garden

Do you love cats but don’t love them in your garden? Outdoor cats will seek out a nice patch of soil to do their business or to roll around and play. Cats will mark their territories on sheds, fences or plants, and may even raise a new litter under a deck or in an open shed. Fortunately, there are a number of safe yet effective ways to keep our furry friends, or those of our neighbors, from messing up the garden.

Discouraging Cats

Whether the cats visiting your garden are prowling pets, lost strays or wild-bred feral cats, the same techniques can be used to make your garden and landscape less cat-friendly. Popular options include…

  • Commercial Repellents
    There are a many effective odor and taste repellents on the market. Seek out a product that is safe for humans and animals made from botanical oils. You will need to reapply this type of repellent after a heavy rain but usage will decrease once the cat is retrained to go elsewhere.
  • Citrus Smells
    Cats don’t like the sharp, tangy smell of citrus. Instead of composting them, throw the peels of oranges, lemons, limes and grapefruit on the ground where cats tend to visit.
  • Heavily Scented Plants
    Some plants are known to repel cats by their scent, particularly plants with strong odors that will irritate sensitive feline noses. Try planting Coleus canina, otherwise known as scaredy cat plant, along with pennyroyal, rue, lemon-thyme, geranium or lavender throughout the yard and garden.
  • Uncomfortable Ground
    Use stones instead of mulch as a ground cover to prevent cats from digging. Sharper, larger stones are best and will be uncomfortable for cats to walk across or lay on as well. You can also lay chicken wire on top of the mulch to make it less comfortable for cats and to prevent digging.
  • Opt for Thorns
    Plant low growing, thorny plants such as carpet roses, barberry or prickly pear at the base of your bird feeder to protect your feathered friends from predatory cats. Use thorny plants in borders or alongside fences to help keep cats away as well. Even plants with sharp, stiff foliage, such as holly, can be effective.
  • Sprinklers
    Install a motion-activated sprinkler. This method is used to frighten cats away, not to soak them. As the cat is retrained to go elsewhere its use eventually becomes unnecessary.
  • Sound Deterrents
    Install an ultrasound device containing a motion sensor which, when triggered, gives off a high-pitched sound that is imperceptible to humans but bothersome to cats. With their sensitive ears, cats may avoid any area where the sound is strongest.
  • Remove Food
    Be sure there are no food sources for outdoor cats in your yard. Do not feed your own pets outside, and keep trash cans tightly covered or inside a garage where cats cannot reach them. Keep compost piles behind a fence and under a mesh cover as well so cats cannot forage for scraps.

Using several techniques simultaneously will have the best effect at discouraging cats. These are clever, intelligent creatures that can easily overcome one obstacle, but when you have used several tactics at once, the cats will take the easier route of simply staying away.

What You Should Never Do

While there are many ways to keep cats out of your yard, you should never take steps that could deliberately injure or kill the animals. Avoid harmful traps, toxic poisons or setting your dogs on outdoor cats, as these methods can easily backfire and hurt local wildlife instead. With patience and perseverance, it is possible to keep cats out of your garden safely.

Needled Evergreens for a Shady Space

Evergreens are a very important addition to the winter landscape. During the coldest months of the year, when most other plants have been stripped of their leaves or have died back to the ground, evergreens are the stronghold in the garden that provide stunning texture and color, shelter for winter wildlife and the hope of spring for everyone.

Choosing a broad-leafed evergreen for a shady location in the garden is simple. There are so very many to choose from: Rhododendron, azalea, camellia, aucuba and cherry laurel are just the beginning, and there are many more options for any size or shape of shady space. It’s a different story when it comes to hunting for a needled evergreen for that darker corner of the landscape, but it is not impossible.

Popular needled evergreen options for shady spaces include…

  • Canadian Hemlock (Tsuga canandensis) – Broadly conical and gracefully branched, reaching up to 75 feet high.
  • Dragon’s Eye Pine (Pinus densiflora ‘Oculus-draconis’) – Part shade. A very unique, asymmetrically shaped pine with a pale halo on the needles.
  • Dwarf Hinoki Cypress (Chamaecyparis obtuse ‘Nana Gracillis’) – Slowing growing, compact plant with dark green scale-like leaves.
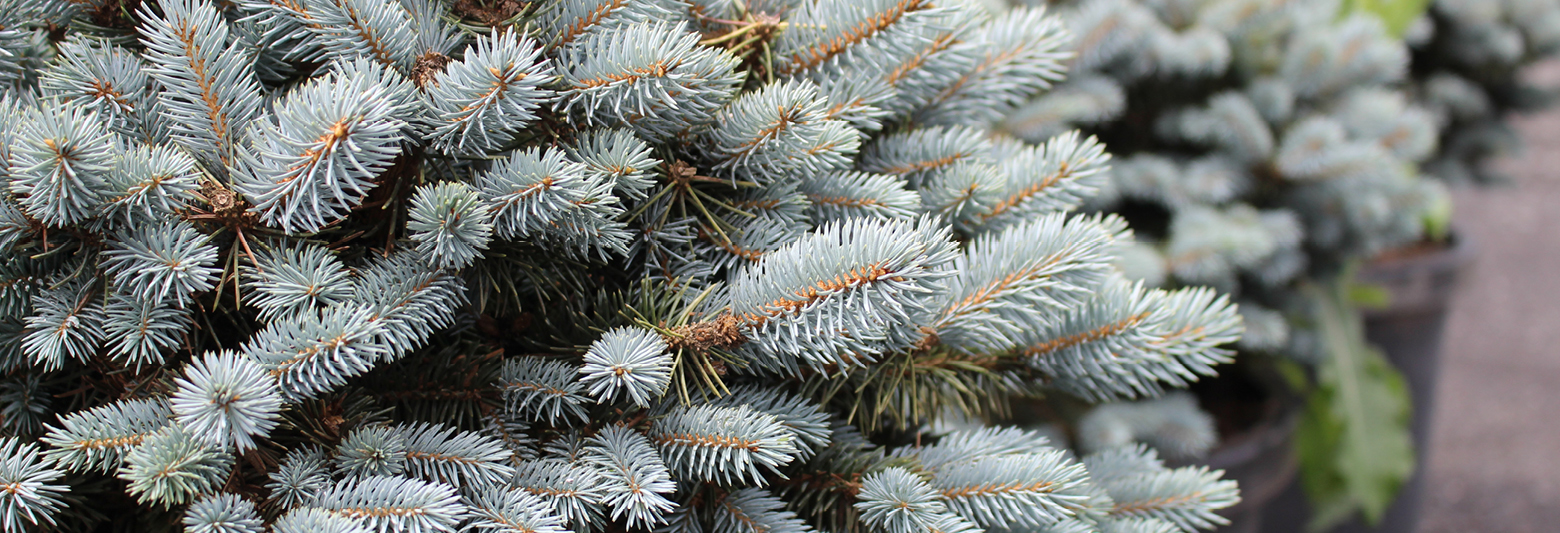
  • Japanese Cedar (Cryptomeria japonica) – Light shade. Graceful, pyramidal tree with bluish-green scaly foliage and exfoliating cinnamon-colored bark. Growing to 65 feet tall.
  • Japanese Umbrella Pine (Sciadopitys verticillata) – Light Shade. Needles are thick and succulent, whorled around the branches.
  • Nootka False Cypress (Chamaecyparis nootkatensis) – Light to part shade. Narrowly pyramidal growing up to 60 feet tall.
  • Russian Cypress (Microbiota decussate) – Part shade to full shade. Low to the ground forming a rosette of soft, graceful branches. Great ground cover for a shady location.
  • Spreading English Yew (Taxas bacata repandans) – Part shade to full shade. Three feet high and mounding. Great foundation plant in front of windows or at the back of borders.
  • Upright Japanese Plum Yew (Cephalotaxus harringtonia ‘Fastigiata’) – Part to full shade. Four foot tall, stiff, linear form.
  • American White Cedar (Thuja occidentalis) – Light to part shade. Scale-like foliage formed into flat plane fans. Grows up to 40 feet tall.
  • False Arborvitae (Thujopsis dolabrata) – Light to part shade. Pale green leaf scales with white undersides. Grow up to 65 feet tall.

Not sure which of these evergreens may do well in your landscape? There are different cultivars to explore, and our experts can help you make the best choice for your landscaping needs.

shady_3

shady_1

shady_2

Butterfly Bush

What could be more enjoyable than relaxing in your favorite lawn chair or hammock, your sunglasses on and a cool beverage in hand, staring at an enchanting array of colorful butterflies milling around their favorite plant? What could possibly be an easier way to accomplish this vision than by planting a simple butterfly bush?

About Butterfly Bush

Buddleia davidii, the butterfly bush, is a flowering maniac. It pushes its proliferation of perfumed blooms straight through summer and well into fall, providing nourishment to butterflies all season long. Available in a multitude of colors ranging from white to pink to red to purple, there are colorful butterfly bushes to match any garden or landscape color scheme. The fragrant, long, spiked panicles are borne in profusion on long, gracefully arching branches that add drama and elegance to the yard. And it really is a butterfly magnet!

Growing Butterfly Bush

This quick growing, deciduous, woody shrub is winter hardy in zones 5-10. In the northernmost areas of its hardiness range, Buddleia behaves like a herbaceous perennial, dying back to the ground in very cold winters. In the southernmost areas, Buddleia is grown as large shrub and can flourish all year. In either location, however, you should treat this plant as a cut back shrub. Because butterfly bush blooms on new wood, it benefits the plant to be cut back to the ground each spring. This judicious pruning will stimulate lavish new growth and an abundance of flowers. It will also keep some of the larger varieties at a manageable size, particularly in smaller yards, corners or other confined spaces.

Plant your butterfly bush in full sun in just about any type of soil and it will thrive. Don’t worry about fertilizing as over-fertilization can encourage too much leaf growth over flower formation. Deadheading will encourage additional growth and new flower buds to extend the blooming season. Buddleia has a good tolerance for drought once established, but should be carefully watered when young. A good, thick layer of mulch will help maintain soil moisture and keep weeds down to keep the shrub healthy. Just be sure not to use insecticides or pesticides on your butterfly bush or you may be harming the very fluttering fliers you hope to attract.

Not sure which butterfly bush to try? Consider these varieties to choose the perfect color and style to suit your yard.

Recommended Buddleia Varieties by Color

White Butterfly Bushes

  • ‘Nanho Alba’: 6-8’ height, blue-green leaves, mildly fragrant
  • ‘Silver Frost’: 5-6’ height, silver-gray leaves
  • ‘White Ball’: 3-4’ height, silver foliage, compact habit
  • ‘White Bouquet’: 8-10’ height, gray-green leaves, flowers have orange throat
  • ‘White Cloud’: 8-10’ height, gray-green leaves, flowers have yellow eye
  • ‘White Harlequin’: 8-10’ height, variegated leaves

Pink Butterfly Bushes

  • ‘Charming’: 6-10’ height, blue-green leaves, flowers have orange throat
  • ‘Fascination’: 8-12’ height, lilac-pink flowers with cupped petals
  • ‘Pink Delight’: 4-7’ height, gray-green leaves, true pink flowers, fragrant
  • ‘Summer Beauty’: 5-6’ height, silvery leaves, pink-rose flowers
  • ‘Summer Roae’: 8-10’ height, mauve-rose flowers, strong fragrance

Red Butterfly Bushes

  • ‘Burgundy’: 8-10’ height, magenta-red flowers, fragrant
  • ‘Dartmoor’: 8-10’ height, magenta flowers
  • ‘Harlequin’: 6-8’ height, variegated leaves, reddish-purple flowers
  • ‘Royal Red’: 10-12’ height, purple-red flowers, fragrant

Purple / Blue Butterfly Bushes

  • ‘Black Knight’: 8-10’ height, deep violet-dark purple flowers
  • ‘Bonnie’: 8-10’ height, light lavender flowers with orange eye, sweet fragrance
  • ‘Ellen’s Blue’: 5-6’ height, silver leaves, deep blue flowers, orange eye, fragrant
  • ‘Moon Shadow’: 3-4’ height, lilac purple buds open to lavender flowers
  • ‘Nanho Blue’: 6-8’ height, gray-green leaves, mauve-blue flowers, fragrant
  • ‘Orchid Beauty’: 6-8’ height, lavender-blue flowers, fragrant
  • ‘Potter’s Purple’: 6-10’ height, deep purple flowers, mild fragrance

Attracting Hummingbirds

It is an awesome sight to capture a glimpse of a ruby-throated hummingbird hovering over the flower garden on a sunny summer morning. One or two a year may be seen seeking food in the landscape, sampling everything in their path. Unfortunately, they leave as rapidly as they arrive. This season, attract more of these miniature avian anomalies and keep them returning year after year. 
What Hummingbirds Want 

You can charm hummingbirds to your yard with a selection of their favorite nectar-producing flowers. Hummingbirds are not attracted by scent but by color. Red happens to be their favorite, however, pink, purple, blue, orange and yellow will also catch their eye. Tubular flowers accommodate these birds’ long, narrow bills. Select a wide variety of plants that bloom at different times to keep hummers well fed all season long. Refrain from using insecticides when attracting hummingbirds, as they rely on insects for protein in their diets – especially during the summer nesting season when young hummers need extra protein for healthy growth. 
Hanging a feeder is another way to encourage these visitors. Choose one with red parts to resemble the flowers that they prefer. Fill the feeder with a mixture of one part sugar to four parts hot water to help the sugar dissolve. Fill the feeders after the mixture has cooled. Easier yet, fill with instant nectar purchased at our store. Clean feeders every 2-3 days early and late in the season, and daily in hot weather. 

Plants That Attract Hummingbirds 

The easiest way to keep hummingbirds fed without the hassle of refilling and cleaning feeders is to provide a lush landscape filled with their favorite flowers. Fortunately, that’s easy to do because these birds will sample nectar from a wide variety of blooms. No matter what your yard size, soil type, sun exposure or moisture levels, there are plants you can add to the landscape to entice hungry hummers to stop for a snack. 

Annuals

  • Flowering Tobacco
  • Four-O-Clocks
  • Fuchsia
  • Geraniums
  • Impatiens
  • Mealy Blue Sage
  • Mexican Bush Sage
  • Nasturtium
  • Petunia
  • Pineapple Sage
  • Red Salvia
  • Zinnia

Bulbs

  • Canna
  • Gladiolus

Perennials & Biennials

  • Bugleweed
  • Bee Balm
  • Beard Tongue
  • Cardinal Flower
  • Columbine
  • Coral Bells
  • Daylily
  • Delphinium
  • Gaura
  • Hollyhocks
  • Hosta
  • Phlox
  • It is often reported that expanding qualities of youthful men are taking Visit This Link (viagra online) or Kamagra in spite of their analysis of erectile brokenness.

  • Spiked Gayfeather
  • Lily
  • Rose Mallow
  • Russell Hybrid Lupine

Vines

  • Cypress Vine
  • Honeysuckle
  • Morning Glory
  • Scarlet Runner Bean
  • Trumpet Vine

Shrubs

  • Azalea
  • Butterfly Bush
  • Glossy Abelia
  • Lilac
  • Weigelax

Trees

  • Bottlebrush Buckeye
  • Catalpa

Fun Hummingbird Facts 

Why not learn a little more about these fascinating birds? The more you know about their amazing abilities and unique characteristics, the more you’ll appreciate having them visit your yard! 

  •  Hummingbirds are the smallest birds in the world.
  • There are over 340 species of hummingbirds and they are found only in the western hemisphere. Most species are found in the tropics.
  • Hummers can hover as well as fly straight up and down, sideways, backwards and even upside down.
  • Hummingbirds beat their wings about 75 times per second.
  • They can drink eight times their body weight and consume about 500 insects daily.
hummingbird2

hummingbird3

hummingbird1

The Use of Focal Points in the Landscape

We have all used focal points in our daily lives, from showcasing favorite photos in a gallery wall to throw pillows adding a pop of color on the sofa to choosing accessories to highlight our best features. But did you know you can use landscape focal points in a similar way, drawing the eye to the very best features of your home and property to accentuate its unique characteristics and highlight its beauty? Learn how to truly showcase your landscaping with the best focal points to give your home extra flair.

What Is a Focal Point?

A focal point is a highlighted, outstanding feature that draws the eye and grabs attention. In the landscape, this can be nearly any type of feature, from plants to structures to hardscaping to ornamentation. Popular landscaping focal points include…

  • Unique specimen plants, either unusual varieties, unique shapes or exceptional sizes
  • Water features such as ponds, waterfalls or fountains
  • Boulders, terraces or other dramatic hardscape details
  • A bird feeding station or other wildlife-oriented feature
  • A colorful flowerbed, container garden or even a dramatic window box
  • A statue or sculpture, even as simple as a gazing ball or sundial
  • Inviting structures such as gates, arbors, pergolas or arches
  • A seating area or other outdoor gathering space
  • A uniquely designed pathway, such as a mosaic, stepping stones or bridge
  • Specially designed pavers, such as a mural-like feature

A focal point can be anything unique, whether it is a naturally-occurring feature of the existing landscape or something you have dreamed of adding to your yard or garden.

The Purpose of a Focal Point

While a focal point initially draws the eye, it actually does far more than just attract attention. A well designed landscape will work with focal points to bring order and dimension to the yard, centralizing the view and directing guests’ viewpoints. A focal point can add character to the yard as well, whether it creates a sense of natural elegance, adds a chic, modern touch or even introduces a bit of whimsy to the landscape. Focal points can also help distract from less aesthetically pleasing views, such as drawing attention away from a neighbor’s yard, minimizing the appearance of a trouble spot or redirecting sightlines away from a utility box or air conditioning unit.

Choosing a Landscaping Focal Point

Which focal point you choose for your landscape will depend on several factors, and you want to consider each one carefully when planning to use a focal point.

  • Yard Size: The focal point should be proportionally sized to the yard. A too-large focal point will overwhelm a small, intimate yard, making it seem more crowded and cramped, while a too-small focal point can be lost in a larger space.
  • Landscape Style: A focal point should coordinate with the style of the yard and garden. A cozy cottage garden can look great when focused around a romantic statue or elegant bird bath, but a stark obelisk would look out of place.
  • Seasonal Changes: Ideally, a focal point will remain attractive and eye-catching throughout the year, even with seasonal changes in nearby plants and light levels. Opt for a focal point that can be enjoyed year-round for the best results.
  • Viewing Angles: A good focal point will draw the eye in a pleasing way no matter where it is viewed from, including different angles, windows or approaches. Paying attention to every viewpoint will ensure the focal point serves its purpose however it is viewed.

Once these factors are considered, a landscape may have one or more focal points. So long as they are balanced and appropriate to the yard’s design, they can be beautiful features that will be stunning highlights in the landscape.

Designing Your Landscape Around a Focal Point

Once you have selected a focal point for the landscape, it is best to coordinate the landscape’s overall design to enhance and complement that focus. This will ensure its beauty and prominence in the landscape without creating an overwhelming or dominating effect. Easy ways to design your landscape around a focal point include…

  • Paying attention to symmetry to draw the eye to the focal point. You may opt for a completely symmetrical, geometric layout to lead the eye to the focal point, or choose a deliberately asymmetrical design that builds dramatically to the focus.
  • Coordinate colors, plants and other features to work with the focal point rather than contrast and detract from it. Coordinated colors, shapes and textures – even when used in variety – can add to your focal point and enhance its beauty and drama.
  • Highlight the focal point without blocking it from view, particularly when considering views from different angles and in different seasons. This may include regular pruning and other care to keep the surrounding landscape in check.
  • Keep the focal point in good condition so it is not a disappointment when it draws the eye. Plants should be properly pruned and shaped, while statues and other accents may need regular cleaning. Structures may need regular repairs or repainting to look their best.
  • Consider muting nearby landscaping features to further highlight the focal point. Opt for more subtle plants and fewer accents away from the focal point to ensure no other areas of the landscape compete with the intended focus.
  • Design pathways, borders and lighting to highlight the focal point and draw attention to the appropriate space, both visually and physically. This will keep your focal point centralized in the landscape at all times, serving its purpose as your landscape highlight.

A focal point is more than just a highlight of your yard, it can become the centerpiece of your landscape, set the mood for your outdoor space and showcase the beauty of your home. Working with a focal point can help you draw together the entire space in an eye-catching way you’ll always be proud to see.

Want to design your landscape around an appropriate focal point? Our design experts can help you choose just the right focus and create a stunning look to highlight your landscape’s best features!

Phased Landscape Installation

Redoing your landscape, whether you are starting from scratch, updating parts of an existing design or completely renovating your yard, can be a lengthy and expensive process. Phased landscape installation can help you adjust your time, labor and budget to create your dream landscape in easy-to-manage steps.

How Phased Landscape Installation Works

Instead of doing an entire large landscape at one time from start to finish, phased landscape installation breaks the project into more manageable pieces. It may take several weeks, months or years to complete the landscape installation in phases, depending on the size of the project and what resources are available to complete it.

Phased landscape installation can be beneficial in several ways. Not only does it make a large project more manageable, but it also allows for tweaks and refinements throughout the process as needs, preferences and living styles may change over time. Installing a landscape in phases can also better accommodate a limited budget or limited time with shorter seasons, while still allowing for the yard, garden and landscape to be used and enjoyed before the full project is complete.

Designing a Master Landscaping Plan

Creating a master landscaping plan is a critical first step in phased landscape installation. A master plan is necessary to keep the landscape’s end result in mind, and that plan can be adjusted as needed throughout the different phases. When the full project can be envisioned, it is also easier to plan the order of phases to be installed with the greatest efficiency so there is less disruption to established parts of the landscape when a new phase is begun.

The first part of a master plan should involve a comprehensive evaluation of the site and its landscaping needs. This should include soil condition and quality, drainage concerns, sunlight levels, potential erosion problems and more. This evaluation can help direct the landscape installation to correct difficulties with each step. After the overall evaluation, the first phases of landscape installation need to be sufficiently detailed for the project to get underway. Later phases and finishing touches may change by the time the final phase of installation is ready to begin, and so those phases may not necessarily be as firm when the landscaping plan is first developed.

It is important to keep the master plan accessible, especially when it may take several years to fully install a larger, more elaborate landscape. Notes, changes, suggestions and updates should all be documented. This will ensure that all contractors and experts – who may change over the years – are aware of the overall landscape vision.

Landscape Phases to Plan

The order of projects in phased installation will vary depending on the overall master plan for the landscape, as well as how each phase is integrated into the overall process. Needs and preferences can also influence which phases are implemented first to ensure the landscape is usable and enjoyable from the very first phase. Typical phases in a landscape plan may include…

  • Surfaces – Sod, seeding, groundcovers, or mulching for erosion control and visual appeal.
  • Hardscapes – Borders and edging, terraces, retaining walls, etc.
  • Gas and Electrical Lines – Support for water feature pumps, lighting, outdoor kitchens, etc.
  • Irrigation – Sprinkler systems and drip plans as well as drainage adjustments.
  • Shade – Large trees and plants to provide shade for outdoor living spaces as well as structures.
  • Entertaining Space – Patios, decks, pool surrounds and similar high use spaces.
  • Structures – Pergolas, trellises, arbors, sheds, play structures, etc.
  • Waterscapes – Ponds or pondless waterfalls, creeks and streams, or fountains.
  • Garden Space – Raised beds or dedicated growing areas for practical harvests, fruit trees, etc.
  • Pathways – Connections between parts of the landscape or around the entire home.
  • Plantings – Shrubbery and flowerbeds, specimen plants, etc.

While the order of phase installation can vary greatly, many plans opt to put surfaces, hardscapes and shade early in the master plan. Surfaces are often used right away and help a landscape look attractive even as the plan is being implemented, while hardscapes establish the borders that will gradually frame the entire landscape. Shade is also important to implement early, as larger trees have slower growth cycles and will take longer to mature and provide their full benefits, so the sooner they are planted the sooner they will be providing that shade. Of course, depending on the exact budget and master landscaping plan, several phases may be implemented at once, or smaller phases may be spread out over a greater period.

In addition to these potential phases, it is important to consider the final phase of landscape installation – care and maintenance. Particularly when plants are young and the ground may still be settling, extra care may be needed to nurture plants and ensure they adjust to their new environment. Proper care, including pruning, fertilization and pest control, will help keep the landscape looking just as attractive and inviting as it is from the first moment of installation.

Are you considering phased landscape installation? Our experts can help develop your master landscaping plan and recommend the best phases to create your dream landscape!

Creating Depth and Character in the Garden

No matter what you grow, your garden does not have to be a bland, predictable space. With careful planning, it is easy to create depth and character in the garden to reflect your personal flair and the enjoyment you find among your flowers, fruits, vegetables and herbs.

Understanding Your Foreground, Middle Ground and Background

Before planning your garden to enhance its depth and character, it is important to understand the different levels of space you have to work with. Your garden’s location, size and shape, as well as the overall layout, are part of these levels and can help you plan the best design to reflect your personal style.

  • Foreground – The front of your garden, including borders, edging, fences, and entryways, as well as the first plants a visitor encounters when stepping into the space. Visually, this area is the welcome to your gardening or landscaping space.
  • Middle Ground – The bulk of the garden or landscape, the center or middle areas. This will include most open spaces and the most heavily used parts of your garden, those that are accessed and admired the most.
  • Background – The furthest, rear point of your gardening space, that provides a backdrop or endpoint for the design. This can include rear fences, walls or property borders and is the stopping point for your garden.

As you design your garden, each of these areas can be enhanced to create a more aesthetically pleasing space and an overall design rich in texture, color and creativity.

Depth in the Garden

Adding depth to the garden varies the space and makes the garden appear larger and more spacious. This can easily improve a narrow landscaping area or open up a small garden, and it maximizes growing space to allow for more plants. Great options to add more garden depth include…

  • Tiers
    Tiers, with taller plants at the back and shorter plants in the foreground, expand the space and give it a better scale. Taller plants can be added in corners or at the sides, with shorter plants filling in the center. Terraces, containers and raised beds can all create tiers.
  • Colors
    Warm colors, such as red, yellow and orange, are bold and filling, and are best used at the front of the garden to create a welcoming flow. Cooler tones, such as greens and blues, are best in the background where they recede from the eye and give an illusion of greater depth and openness.
  • Contrasting Textures
    Gardens and landscapes look smaller when they are uniform. Textural contrasts, however, break up sightlines and add more visual interest, enhancing depth. Opt for finer textures and airy plant structures to increase depth in the middle ground and background, while fuller, more compact textures are best in the foreground.
  • Plant Size
    Positioning larger, taller plants in the background and reserving smaller plants for the foreground of your garden will enhance its depth. In small gardens, dwarf or miniature plant varieties immediately create greater depth and make the space seem more generous.
  • Secret Spaces
    Adding a secret space will create depth as it draws the eye into the landscaping design and encourages more detailed examination of the area. Meditation niches, cozy benches or swings, or other places invite more interest in the garden and improve the depth.
  • Reflections
    Just like a mirror creates more depth in a small room, reflections create more depth in a garden. Gazing balls, reflecting pools or mosaics are great options, but be sure there are no overly focused reflections that might damage nearby plants with excess glare.
  • Views
    If your garden overlooks a dramatic view, such as a mountain range, ocean cliff or adjacent park, take advantage of that view for more personal garden depth. Avoid blocking the view, and instead frame it to draw the eye deeper into your space.
  • Vertical Gardening
    Taking your garden vertical with climbing plants on a green wall, trellis or other support is a great way to increase depth and add more gardening space. Many vegetables and flowering vines can easily be trained to grow vertically.

Character in the Garden

Adding character to the garden personalizes it to reflect your unique style and flair. This adds a meaningful touch to your space, no matter how big or small it may be. Fun ways to give your garden more character include…

  • Specimen Plants
    Unusual plants create a focal point in your garden and draw the eye into the space. Even in a veggie garden or berry patch, an unexpected specimen can be an interesting feature.
  • Unique Shapes
    Give your garden extra flair by incorporating unusual shapes, such as topiaries or plants with unexpected foliage or flower shapes. This extra texture will also enhance the garden’s depth.
  • Curves
    Gardens and landscaping don’t need to follow straight lines. Help your landscape flow with curved garden rows, curving beds or other smooth, elegant lines.
  • Fill-Ins
    Bare spaces cause a disjointed look in the garden, but you can easily fill in patches with extra herbs, flowers or ornamental grasses. This will add even more texture and interest to the area.
  • Welcomes
    Welcome visitors to your garden with a fun, customized gate, quirky arbor or unique archway. This feature will draw the eye and encourage visitors to enter and enjoy the space.
  • Curbing
    Get creative with curbing to border your garden area with personal flair. Instead of predictable options, choose colored curbing or add accents such as glass bottles or stepping stones.
  • Wildlife
    Welcome wildlife to your garden to add life to the space. Bird feeders and baths, a butterfly, bee or toad house, or even a koi pond can bring movement and life to your garden.
  • Surprises
    There’s always room in the garden for a surprise or two. It might be a hidden gnome peeking out at guests, scattered sunflowers that grow through other plantings, exotic edibles or flowers with potent perfumes to lure guests in to seek out the surprise.

You can add depth and character to your garden in many ways. If you aren’t sure just how to go about personalizing and enhancing your garden, ask our experts for help to create the garden of your dreams!

Freshen Up Your Patio

Is your patio dingy or dated? Does it need repairs? Does it no longer meet your outdoor needs or reflect your changing preferences and evolving style? No matter what the issue, it is easy to freshen up your patio and give it a new, amazing look you’ll love.

What Do You Want From Your Patio?

Your outdoor lifestyle will change as new friends and neighbors come and go, your family grows, and your hobbies shift to new interests. Perhaps you’ve discovered the great taste of grilling and want to expand your outdoor cookery options, or your new passion for container gardens requires more space for growing herbs, vegetables, berries and flowers. The play area and toy box that was perfect for toddlers hasn’t been used in years, but your teens would love a place to hang out with their friends. Perhaps your aging skin doesn’t appreciate as much time in the sun, and you need a shadier space to enjoy without giving up your outdoor entertaining. Before you make any changes to your patio, it is important to really determine your needs, keeping in mind how your outdoor living may continue to change so you can make adjustments that you’ll enjoy for many years.

Assess What Your Patio Offers

When you’re ready to change up your patio, first take a good look at what the space already offers. How large is the existing patio, and does it need to be larger or smaller? Is it oriented toward the best views of your yard or do you need more privacy? What condition is it in? If any repairs are needed, now is the time to do basic maintenance to repair settling, reseal the concrete, stone or pavers, and replace any cracked stones or broken railings to be sure the space is safe and usable.

Giving Your Patio a Fresh Face

There are many ways to give your patio a fantastic makeover, no matter what your budget or timeline may be.

  • Cleaning – It is amazing how much difference a thorough cleaning can make to your patio. Powerwash the area, using appropriate treatments to remove mold or rust stains. Resand joints between pavers, and repaint or stain any railings or wood accents. If you already love your patio space, a good cleaning may be all the refreshing you need.
  • Pruning Plants – Overgrown plants near your patio can encroach on the outdoor living space. Shape plants attractively, and consider removing or replacing any damaged or unsalvageable plants. Add new mulch around the patio for a fresh look and to discourage weeds that detract from the area.
  • Get Edgy – Update the edging around your patio to better define its space. You might slightly expand the patio by adding a wide paver edging, or you could deepen the beds surrounding the patio to give it a cozier, more private feel. Different edging, such as bricks, slate or log-like options, can completely change your patio’s appearance.
  • Light It Up – Without proper lighting, you won’t enjoy your patio after dark. Consider fun string lights or an outdoor chandelier for amazing flair, or use solar lights or rope lights to define the edges of your patio. Clean the covers of existing lights so they look new, and update bulbs for better energy efficiency and light levels.
  • Contain Your Enthusiasm – Adding containers is a great way to instantly update your patio with natural elements. Large containers of tall grasses or shrubs can create privacy, or opt for fun edibles, dramatic flowers or even a whimsical fairy garden in a patio container. Don’t forget a small container to accent a patio table.
  • Have a Seat – New seating can give your patio a whole new vibe. You might consider deep, cushioned seating, lounge chairs, storage benches, intimate bistro chairs or even cozy hammocks. If you already like your seating, changing covers, cushions or accent pillows can give it a fresh look.
  • Fire and Water – Add elemental life to your patio by incorporating fire or water into the space. Heat it up with a portable fire pit, chimenea, fire table or even fun torches or lanterns. For watery options, consider a container water garden or miniature pond, tabletop fountain or a weeping wall for relaxing splashes that will refresh your space.
  • Shade for Sure – Providing shade over your patio will make your outdoor living space more comfortable in all weathers by reducing glare, blocking harmful UV rays and controlling the temperature. Options include patio umbrellas, awnings, pergolas or screens that can help top off your patio perfectly.
  • Fun With Flooring – Your patio doesn’t have to have the same old concrete slab. You can resurface the concrete, top it with pavers, cover it with wood tiles, paint a pattern or even add an outdoor rug to cover cracks or stains. Consider adding your initials or children’s handprints for fun personalization you’ll smile at for years.
  • Create an Entrance – Make your patio more welcoming by freshening up its entrance. Painting the doorway or adjacent windowsills or shutters can change the patio’s look. Adding an archway or putting fun and colorful containers on stairs or paths leading to your patio can visually define and expand the space.
  • Add an Accent – Let your patio reflect your personal flair with fun accents. You could opt for a practical touch, such as an outdoor clock, thermometer, barometer or a functional chalkboard wall. A sculpture, outdoor outwork, gazing ball, bird feeder, toad house or other fun accent can give life and whimsy to your patio.
  • Pest Control – No matter how you freshen up your patio, you won’t enjoy it if pests take over. Consider insect traps as needed, or use citronella or other essential oil candles or torches to help minimize gnats and mosquitoes. Be sure there is no space for snakes, mice or other pests, and you won’t have to share your updated patio with unwelcome guests.

Want help giving your patio new life? Our outdoor living experts can help you find great ways to freshen up your patio space so you’ll spend more time outdoors enjoying it!

How to Size an Outdoor Space

An outdoor living area offers many possibilities for enjoyment, entertainment and relaxation, but is your space big enough for everything you want to do? You don’t necessarily need a large area to meet your needs, but it is crucial that you size your outdoor space appropriately and comfortably.

How Much Space Do You Really Have?

The size of your outdoor space isn’t as simple as your property size, and you need to carefully assess exactly how much space you have to work with when planning an outdoor living area. For example, some portion of the lawn and landscaping is always unable to be turned into more practical spaces, as many homeowner or community associations, as well as municipality regulations, require some percentage of a property’s space to remain green. Flowerbeds, sheds, borders, side yards, driveways, pathways and the footprint of the house also usurp space and change the flow of your yard, impacting how you size an outdoor space. The overall shape of the yard will also help determine how much available space you have to work with. By carefully appraising the available space – taking into account mature sizes of landscaping and how larger plants may overgrow an area – you will be able to more efficiently size your outdoor space to create a living area you’ll love.

Sizing Your Outdoor Space

There are many different sizing factors you need to consider when planning an outdoor living area. By carefully considering these different needs, you will be able to choose a size appropriate to your budget, needs and preferences.

  • Proportion: One of the most important factors in sizing an outdoor space is its proportion to the overall property and landscape. A huge patio, deck or other outdoor space can overwhelm a small yard and house, while a tiny patio can look awkward next to a huge, elaborate structure.
  • Activity Level: The more you plan to move around your outdoor space, the larger it will need to be to accommodate that movement safely and comfortably. Consider active children, energetic pets, and any activities you may want to do, such as frequent entertaining.
  • Furniture: Your space needs to be large enough to accommodate outdoor furniture, including seating, tables or storage benches, plus room to move around that furniture without stumbling. Also consider whether furniture will be used only on special occasions or more frequently.
  • Seating Type: The seating you choose for your space will affect the necessary size of the area. A hammock, for example, needs room to swing and sway, while folding chairs are more compact. Recliners or deep seating need extra space, while benches are great options for smaller spaces.
  • Table Size: If a table will be part of your outdoor space, be sure there is enough room for seating around the table as well as for guests to move to their seats. A large outdoor dining table requires more space than a café set, while end tables can create blocks or fill in tight corners.
  • Fire Pits: A fire pit can be a great centerpiece for your outdoor space, but it needs room for the flames as well as a safety buffer so there is no risk of unwanted fires. A larger pit will require a broader space so guests don’t feel too much heat when they gather around.
  • Play Areas: If you plan to incorporate a play area such as a jungle gym, playhouse, sandbox, basketball hoop, putting green or other active area into your space, you need to have room not only to use the area, but to move around it when others are using it as well.
  • Gardening Zone: A garden can be a great use of yard space and a fun addition to your outdoor living area, but be sure to account for space between garden rows as well as storage for tools. Container gardens or raised beds are the most compact options for small spaces.
  • Room for Plants: Even if you aren’t a gardener, you will likely want some plants as part of your outdoor space, from window boxes to specimen plants. Plan for their mature size, as well as proper spacing for air circulation and to keep the plants disease- and pest-free.
  • Storage: Consider how much storage space you need outside for garden tools, children’s toys, sports equipment, patio cushions, a grill and other accessories. Storage benches, dock boxes, sheds or storage carts are great options that can fit into many different spaces.
  • Traffic Flow: How you get around your outdoor living area has to be factored into sizing considerations. Note pathways, stairs and how doors or gates open into the area, and also take into account how people will move in relation to nearby windows or other doorways.
  • Null Space: Every well-designed outdoor space will have some null areas, space taken up by planters, a fountain, steps, pillars or other features. This limits the functional space in the area, and should be carefully considered so the space isn’t too small.
  • Versatility: If your outdoor dreams include many different activities, a larger, more versatile space may be necessary so you can shift around furniture or planters to accommodate different uses. Screen walls can help create a more functional space that can easily be arranged.
  • Cost: Your budget should definitely be factored in to your outdoor space sizing, but price doesn’t need to define the space. Larger spaces can be built incrementally as the budget permits, and qualified experts can suggest alternatives to work with the budget you have without compromising quality,

Need some help determining the best size for all your outdoor ambitions? Let our experts help you assess your space and plan the perfect size for all the outdoor living you want to do!