Monthly Archives: August 2025

Fall Chrysanthemums

No flower is more iconic of autumn than the chrysanthemum, and these beautiful mounding perennials are ideal for fall flowerbeds, pots, window boxes, borders, and many other uses. How will you get creative with chrysanthemums this fall?

Why We Love Chrysanthemums

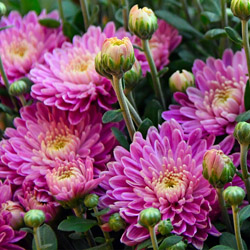
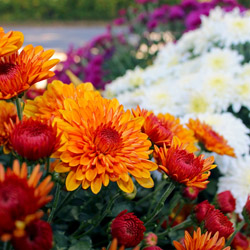
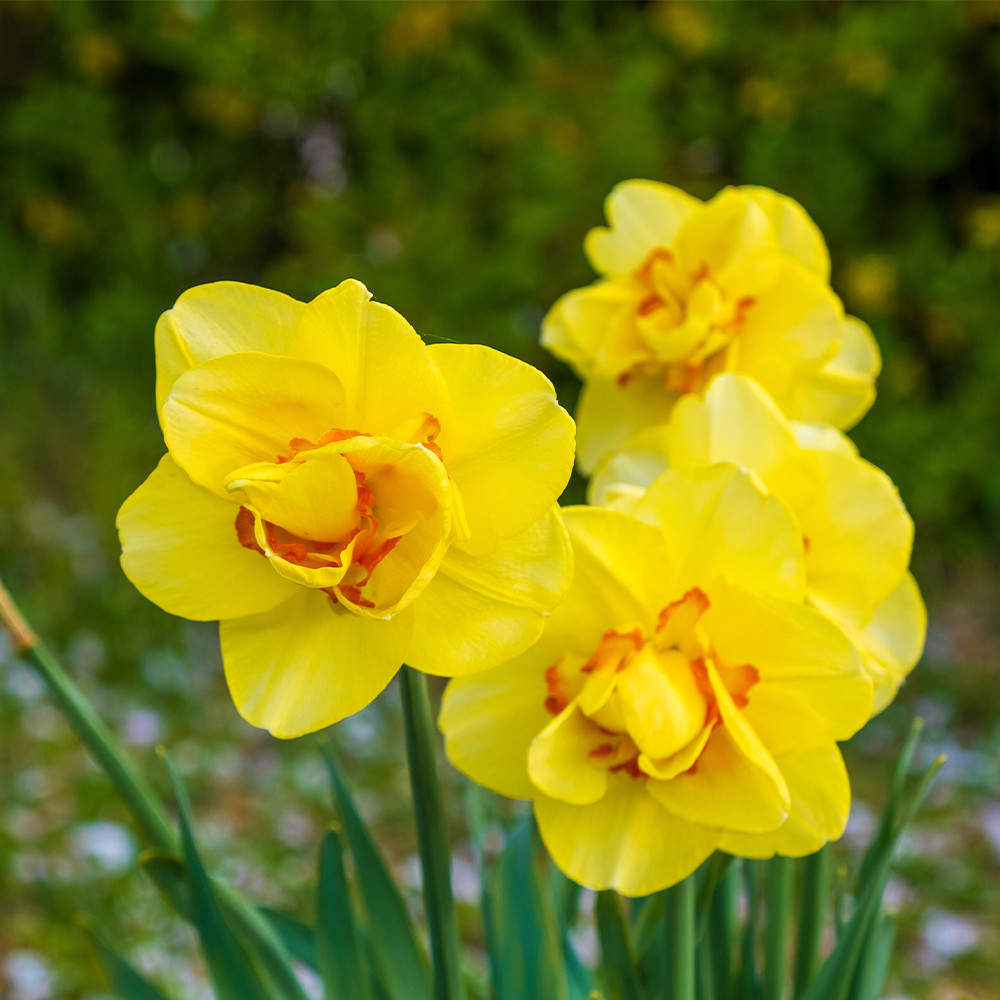
Just when many other flowers are fading at the end of summer, chrysanthemums, or mums, are coming into their glory with a range of stunning autumn colors. Depending on the cultivar, these plants sport yellow, white, red, orange, bronze, pink, peach, wine, purple, and bicolored blooms. The flowers range from small, button-like blossoms to larger blooms reminiscent of daisies. Mum blooms are long-lasting when cut and they’re just as lovely in floral arrangements and bouquets as they are planted in containers, flowerbeds, and the landscape. This makes mums extremely useful for all manner of autumn décor.

Chrysanthemums are native to east Asia and northern Europe and were first domestically cultivated in China nearly 600 years ago. Today, there are more than 20,000 chrysanthemum cultivars worldwide. They are deer- and rabbit-resistant, making them a hardy option for landscaping beds, and with a bit of thoughtful care, these tender perennials can be a wonderful addition to any flower garden or fall containers.

Caring for Chrysanthemums

The hardiness of chrysanthemums depends on the cultivar as well as the local climate and even the microclimate in your landscape. These flowers prefer well-drained, rich soil with a neutral pH, so it is best to use a good quality potting soil in containers. When planting chrysanthemums in the garden or landscape, mixing compost or peat moss in the planting hole will help increase drainage and nourish the soil to promote the best blooms. A good rule of thumb is that if soil is good for vegetables, it will also be good for mums – making them a wonderful choice to refresh a garden after the summer harvest has finished.

Chrysanthemums grow best in full sun requiring a minimum of six hours per day. If mums are planted in containers, consider using a mobile plant cart or a stand with casters so  that the pots may be moved to brighter areas, if needed, as the season progresses.

Chrysanthemums prefer evenly moist, but not soggy, soil. Because of their thick, mounding habit, it is best to water mums from below suing a soaker hose or irrigation drip system in garden beds. In pots, mums should again be watered from below the plant but above the soil line. A watering wand will make this job direct and easy. Be sure to drain excess water from saucers after watering so the roots do not remain continually wet.

Fertilizing chrysanthemums every month through the spring and early summer, with a balanced fertilizer, will help them grow and bloom well, but if mums are planted in the Fall, they should not need extra feeding as long as they were planted in rich, nutritious soil. Deadheading spent blooms by pinching them back can encourage more flowering and help mums maintain their compact, mounding habit.

Decorating with Fall Mums

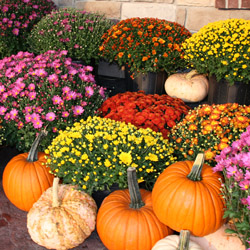
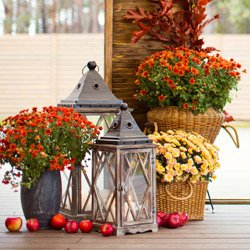
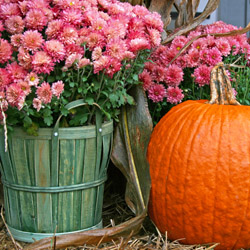
Chrysanthemums are a beautiful choice not only in the garden, but are equally lovely in welcoming porch pots, deck or patio containers, or even small indoor pots and arrangements. Add an extra touch of fall with rustic containers, such as wine barrels, baskets, or terra cotta pots, or glam up your mums in hammered copper or bronze pots that will accentuate their color. A burlap ribbon or bow can be a charming accent, and you can give more seasonal flair to mum arrangements or flowerbeds by adding pumpkins and gourds as fun decorations. Indoors, use small pails or pots for petit mum arrangements, or add them to larger arrangements with grain sprigs, dried pods, colorful leaves, or twists of grapevine for additional texture.

Fall chrysanthemums can be a pleasant burst of autumn color, whether they are part of the landscape or are used in containers, pots, or arrangements and we carry a wide selection to make your fall home suit the season!

Growing Garlic

Richly flavorful and packed with health benefits, garlic is a great ingredient for all your favorite savory dishes. Growing garlic is very easy and helps you keep a ready supply of this root vegetable (often also referred to as an herb or spice) on hand for quick access and instant flavoring.

Health Benefits of Garlic

Garlic, which is related to onions, shallots, and leeks, has many documented health benefits, making it a worthwhile addition to your diet. This bulb vegetable is segmented into cloves, and may yield 10-20 cloves per bulb. Just a clove or two added to different dishes can…

  • Boost immune function, minimizing colds and other minor ailments
  • Reduce blood pressure to improve cardiovascular health
  • Lower bad cholesterol levels and the risk of heart attack or stroke
  • Reduce bone loss risk, particularly in older women
  • Lower inflammation to improve arthritis and joint function

The health benefits of garlic are so well known that the plant has featured prominently in the medical treatments of different cultures for centuries, including the ancient Babylonians, Egyptians, Greeks, Romans, and Chinese. Today, many doctors continue to promote garlic as part of a healthy diet.

Tips for Growing Garlic

Fresh garlic has the most health benefits and is the most flavorful. It’s easy to grow garlic either in the garden – it is resistant to both deer and rabbits, making it ideal for borders to protect other produce – or in kitchen pots for easy access for all your cooking. To make the most of growing garlic…

  • Choose organic or locally grown garlic to grow. These cloves won’t have chemical treatments that could inhibit growth, and you will be able to monitor exactly what care your garlic receives.
  • Opt for hardneck garlic in northern climates because it is hardier, whereas softneck garlic can easily be grown in mild climates. If you will grow garlic indoors, either variety is suitable.
  • Choose large, firm cloves without any signs of damage, softening, or bruising for the best growth and largest crop to harvest.
  • Provide a cooling period of 6-8 weeks in the refrigerator for hardneck garlic, which requires a dormant period for optimal sprouting. Softneck garlic does not need as much cooling.
  • Use a pot at least eight inches deep so cloves have plenty of room to develop, and the pot should have abundant drainage holes to prevent root rot.
  • Space cloves at least 3-4 inches apart, or plant just one clove in each pot so the bulbs have adequate room for full development.
  • Use organically rich potting soil, or amend garden soil with compost to nourish young garlic. The soil should be loose and well-draining so garlic bulbs aren’t cramped.
  • Leave the papery skin on cloves for planting, and position cloves pointy-side up, 3 inches down into the soil. Cover the soil with a light layer of mulch or straw for protection.
  • Position garlic where it will receive 6-8 hours of sunlight per day. Indoors, a south- or west-facing window is ideal, or use a supplement grow light to help garlic grow best.
  • Feed garlic carefully, using natural fertilizer, compost, or a high-phosphorus blend specially formulated for larger, healthy bulbs.
  • Water garlic well. The soil should be uniformly moist but not overly soggy, or the bulbs will rot and be unable to flourish.
  • If temperatures drop, protect garlic pots by wrapping them in insulating bubble wrap, carpet, or straw bales. For garden garlic, a layer of mulch will help keep soil temperatures even.

Harvesting Your Garlic

Garlic is slow-growing and will take 7-9 months before fresh bulbs can be harvested. When approximately 50-70 percent of the green tops of garlic plants begin to turn yellow or brown, the bulb is mature and ready to harvest. Use a hand rank or garden fork to carefully loosen soil around the garlic, gently lifting the bulb. Avoid bruising, scratching, or breaking the bulb, which would cause it to rot.

Gently wipe off excess dirt from the bulb, but leave the paper covering intact. Trim off the roots and stalks, and place the fresh bulbs loosely in paper bags in a cool, dry spot for 1-2 weeks. Air circulation should be good to cure the bulbs evenly, and garlic should be stored in a cool, dry place until it is ready to use, or until the best resulting cloves have been dormant long enough to plant and start the cycle over again for even more fresh garlic to enjoy.

Delightful Daffodils

Spring flowering bulbs are a must for every garden. They provide cheerful early-season color at a time when it is most needed, both in the landscape and by our winter weary souls. Daffodils are some of the most delightful Spring flowering bulbs! What makes them so delightful is their ease of care, diversity in their flower color, size, shape and fragrance, resistance to pests and disease, and their carefree ability to increase and return year after year, with little effort.

Daffodil Selection

Did you know that there are over 32,000 registered cultivars of daffodils? This number gives us some indication of the immense diversity of this flowering bulb with some varieties being easier to find than others. As you become more familiar with, and addicted to delightful daffodils, you will never get tired of adding more of these intriguing bulbs to your collection, possibly seeking out a few hard-to-find ones as well.

Note: All daffodils are narcissus, but not all narcissus are daffodils. For the sake of simplicity, we will refer to all narcissus and daffodils mentioned in this article as daffodils. Their care is the same and separating them will only complicate matters.

Daffodils require a cold period to bloom. Most daffodils will flower best in USDA Hardiness Zone 7 and lower. If you live in USDA Hardiness Zone 8 and higher, there are some daffodils that will do well in your area, or you may purchase pre-chilled bulbs. It will help to work with your local garden center to determine which daffodils do best in your particular area.

All daffodils bloom in the Spring. Within the Spring season, some will bloom early, mid-season, and late. Knowing when a particular daffodil flowers, will allow you to plant varieties for a succession of blooms to extend the whole season. As you begin growing daffodils, it may be easiest to choose some of the most popular and easy-to-find varieties

Early-season Bloomers

  • Barrette Browning – white petals with small orange cup, 1 to 2 feet tall, lightly fragrant.
  • Rijnveld – golden yellow, 15 inches tall, delightfully fragrant.
  • Tete a Tete – buttercup yellow, multi-flowering, miniature at 6 to 8 inches tall, fragrant.

Mid-season Bloomers

  • Dutch Master – large, golden-yellow daffodil, 1 to 2 feet tall, lightly fragrant.
  • Ice Follies – creamy white petals with a pale-yellow cup, 20 inches tall, lightly scented.
  • Pink Charm – ivory petals with a coral-colored cup, 18 inches tall, fragrant.
  • Professor Einstein – snow white petals with a reddish-orange cup, 16 to 18 inches tall, fragrant.

Late-season Bloomers

  • Acetaea – pure white petals with a small gold cup rimmed in red, 1 to 1 ½ feet tall, fragrant.
  • Cheerfulness – small flowering, multi-flowering and multi-stemmed, white double flowers with pale yellow flecks, 1 to 2 feet tall, very fragrant.
  • Tahiti – large, double flowering daffodil, bright golden-yellow with bright orange ruffled cup, 16 inches tall, fragrant.
  • Thalia – downward facing, pure white flowers with 2 to 3 flowers per stem, 1 foot tall, very fragrant.

Planting Daffodils

Daffodils are purchased and planted in the Fall for Spring blooms and are extremely easy to plant…. easy as dig, drop and done!

  • Plant daffodils in a sunny to part-shady, well-drained site.
  • Daffodils may be planted in single holes, rows, or in groupings.
  • Place daffodil bulbs 6 inches deep, pointy side up.
  • If the native soil is of poor quality or does not drain well, consider amending the soil with a quality compost.
  • Add bone meal to the planting area, to stimulate strong root development, before backfilling the area or holes with soil.
  • No need for deer or rodent protection, these bulbs are pest proof!
  • Water area after planting daffodils and wait for Spring!

With such wide diversity in one group of flowering bulbs, considerable beauty, ample fragrance, significant bloom time, and substantial pest resistance, wouldn’t you agree that daffodils are delightful?

DaffodilsDaffodils

Daffodils

Daffodils

Creating a Low-Maintenance Landscape

Looking for a landscape design that delivers curb appeal without demanding your weekends? It might be time to discover the benefits of decorative stone! Stone, rock, and gravel offer practical, polished solutions that minimize upkeep, maximize style, and provide significant long-term savings. If you’re eager to take yard maintenance off your to-do list without sacrificing an attractive outdoor space, you’re in the right place! Farm & Garden Station is here to guide you through everything you need to know about creating a stunning, low-maintenance landscape with rock.

Why Choose Rock?

Decorative rock landscapes go far beyond simple aesthetics. When you invest in a rock-based design, you’re choosing function, longevity, and a welcome break from repetitive yard work. Here are some core reasons why more property owners are switching to rock:

Long-Lasting Impact

Unlike wood mulch, which decomposes and demands frequent replenishing, decorative stone persists for five years, a decade, or even longer. Rock holds its color, resists breakdown, and keeps your yard looking consistent year after year. This translates into more time and money saved on outdoor upkeep.

Excellent Weed Suppression

When properly installed over quality landscape fabric, decorative rock forms a powerful physical barrier that blocks most weeds from emerging. This simple step reduces your need for herbicides and slashes your time spent on hands-and-knees weeding.

Minimal Watering

While organic mulch can help retain moisture, it often requires maintenance and doesn’t reduce the need for watering as much as you might think. Rock needs no watering at all. When paired with drought-tolerant plants, such as succulents, or xeriscaping, a rock landscape becomes a water-efficient solution offering both immediate and long-term environmental benefits.

No Decomposition or Pest Risk

Mulch is organic, which means it breaks down over time and can invite termites, ants, and pests. Rock, on the other hand, never decomposes, attracts fewer pests, and stays put even during heavy storms or wind. This results in a cleaner, more predictable landscape.

Fire Resistant & Durable

Decorative stone adds a layer of fire resistance to your property, which is especially critical in wildfire-prone regions. Rocks don’t burn, and they serve as a natural buffer near outbuildings, fences, or homes.

Where to Use Rock?

At Farm & Garden Station, we often hear customers ask, “Where exactly should I use decorative rock?” The answer is almost anywhere! Rock is one of the most versatile materials in landscaping, offering beauty and durability in every corner of your outdoor space.

Long-Term Garden Beds

Start by replacing mulch in your permanent garden beds. Decorative stone stays in place longer, resists fading, and won’t break down like wood chips, making it a significant upgrade around shrubs, trees, and perennials.

Patios, Paths, & Seating Areas

Rock is also ideal around patios, along walkways, and under outdoor seating or play areas where grass struggles to grow. It provides a smart, low-maintenance solution that maintains high curb appeal. It also performs beautifully in high-traffic zones, such as front entrances, signage beds, or along driveways, especially where you want a tidy, professional look without constant upkeep.

Types of Landscape Rock

With such variety in shape, color, and texture, landscape rock is more than just functional—it’s a stunning design element. Some popular options include:

  • River Rock: Smooth, rounded stones available in multiple colors and sizes. Perfect for naturalistic designs, dry creek beds, and defining garden borders.
  • Crushed Limestone: Clean and tightly compacting, making it ideal for driveways, walkways, and fire pit zones.
  • Pea Gravel: Small pebbles that provide comfort underfoot. Excellent for patios, playgrounds, or paths.
  • Slate Chips: Angular and modern, often used for high-contrast, contemporary beds and commercial plantings.
  • Decomposed Granite: A firm, drainage-friendly surface that packs tightly for paths, patios, or even outdoor seating areas.
  • Lava Rock: Lightweight, porous, and bold in color. Offers excellent drainage and a distinctive aesthetic for specific applications.

Selecting the right rock can enhance both function and visual appeal, so consider the colors and textures that harmonize with your home’s exterior or business brand.

Maintenance Tips

A landscape built with stone offers impressive reductions in maintenance, but a little effort goes a long way toward keeping it pristine. Consider these proven tips:

  • Install High Quality Landscape Fabric: Always start with a professional-grade fabric beneath the stone. This keeps weeds at bay, allows rainwater through, and prevents rocks from mixing with the soil below.
  • Refresh the Surface Layer Occasionally: Over time, tracks and settling may cause heavily trafficked areas to thin out. Adding a fresh top layer every few years will restore uniformity and color vibrancy.
  • Use Proper Edging for Containment: Edge beds with steel, concrete, or stone borders to prevent rock migration into lawns or other planting areas.
  • Keep Debris Under Control: Use a blower or light rake to clear leaves and organic matter in fall and spring.
  • Apply Pre-Emergent Herbicide: For added security against weeds, treat beds with pre-emergent product once or twice a year, or as needed.
  • Rinse Rocks: If dust or mud builds up, rinse with a garden hose or use a pressure washer on the lowest setting to restore their natural look as needed.

How to Select the Right Materials

How does decorative stone compare with organic mulch or a turf-heavy yard? Here’s a breakdown:

Material Maintenance Level Best Applications Longevity
Rock Very Low Permanent Beds 5 – 10+ years
Mulch Moderate Flower Beds
Annual Gardens
1 – 2 years
Turf High Play Areas
Lawns
Dog Runs
Ongoing

If your goals include lasting impact, hassle-free ownership, or improved property value, rock is typically the standout choice.

Stunning Results with Minimal Effort

A well-designed rock landscape offers lasting beauty with minimal work. The right mix of stones can add dynamic texture, highlight architectural features, and give your property a cohesive, professional appearance. By making smart choices up front, you can achieve eye-catching curb appeal and enjoy true low-maintenance living for years to come.

Farm & Garden Station provides an extensive range of landscape stone, from classic river rock to dramatic granite chips. Our staff is ready to help you calculate quantities, select complementary rock types, and even assist you with installation. Whether you’re revamping a single bed or tackling a multi-acre project, we’re here to help every step of the way.