Monthly Archives: June 2025

Watering When Away

It’s vacation time! You’re going to be gone for two weeks or more, your friends, neighbors and family members are all busy and the weatherman says it’s going to be “hot, hot, hot.” What about your houseplants?

Fear not! A few minutes of thoughtful planning and a quick trip to the garden center will ensure meeting your plants’ watering requirements even when you can’t be home for daily moisture checks. Popular and effective solutions include…

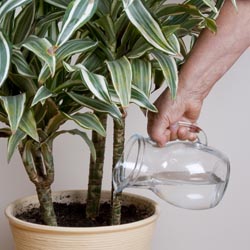
  • Pre-Watering: Before you leave on your trip, make sure your plants are well-watered. Many houseplants can withstand some watering neglect, and if you aren’t gone too long, they may not need any supplemental solutions if you’re watered them right before your trip. Take care not to overwater, however, or you could be compounding the problem.
  • Anti-Drought Solution: Prior to leaving, water with an anti-drought solution. It temporarily forces the plant into dormancy. This reduces the water requirement for roughly two weeks (effective control will vary by product and plant type) while the solution gradually wears off. This can affect blooming or growth periods, however, so read instructions carefully and use the solution exactly as directed.
  • Self-Watering Containers: Planting your houseplants in self-watering pots is truly looking ahead. A reservoir holds water under the pot, and this water gradually travels to the soil via a wick, always keeping the soil moist so long as the reservoir contains water. If you want to use a specific pot without a built-in reservoir, use a conversion kit. Various sizes are available and some use fill tubes. Consider adding liquid fertilizer to the reservoir water to ensure your plant gets proper nutrition while you are away.
  • Individual Pot Drippers: These generally hold water above the plant. Various sizes and styles provide water to small and large pots. From beautiful blown glass globes to simple plastic bottles, these allow water to drip down into the soil through a drip-tip inserted in the soil. One style even looks like a flask attached to the side of the pot with a tube dripping water to the soil. Because they show above the plant, many people only use them during their vacation.
  • Automatic Watering Systems: These are more elaborate but very effective options. A large water reservoir feeds to clustered houseplants through small tubing attached to drippers inserted in the soil. Larger pots use two or more drippers. These systems pump water on a regular basis using a battery and timer, making them ideal for regular watering when you may be taking a longer trip. These also allow liquid fertilizer in the reservoir so your plants are properly nourished.

Go ahead and enjoy your trip…your plants should be fine!

The N-P-K of Fertilizer

Once upon a time, Mary, Mary, Quite Contrary grew her garden with silver bells and cockleshells, but nowadays, most gardeners use some other forms of fertilizer that are better formulated than nursery rhymes. But what important components make up a fertilizer, and why are those components important for your plants?

Understanding Fertilizer

Simply put, a fertilizer has nutrients to make a plant grow better. Years ago, farmers used composted manure, ashes and urine. Today, most of us buy our fertilizer, but a trip to the store can be confusing. What do those numbers on the fertilizer bag mean? Should I buy liquid or granular? Which is better, slow or quick release? Let’s investigate…

Without getting too technical, the three numbers show the percentage of available nitrogen (N), phosphate (P) and potassium (K) in a fertilizer blend. By law, it always goes in that order. If you see a fertilizer with 20-5-10, it means the fertilizer contains 20 percent available nitrogen, 5 percent phosphate and 10 percent potassium. Other nutrients and filler make up the difference and are often chosen for specific types of plants, such as roses or flowers, vegetables, trees, etc.

What does that mean to your plants?

  • Nitrogen promotes chlorophyll, producing greener, more quickly growing plants. If your plants aren’t as green as they should be, use a fertilizer with nitrogen. Most lawn fertilizers have a relatively high nitrogen content and cause mowing to be more frequent as lawns “green up” and grass blades grow more quickly.
  • Phosphate improves root growth, flowering ability and bloom size. Use a fertilizer with a larger middle number (phosphate percentage) to encourage root growth during transplanting or to encourage blooms. This is especially important when initially planting so root systems become strongly established.
  • Potassium enables the photosynthesis process and improves plant resistance to cold spells, drought and insect attacks. Many people use a potassium fertilizer when the seasons change to help plants resist the stresses of those transitions.

Liquid or Granular? Fast or Slow?

Fertilizers come in liquid and granular forms. Generally speaking, liquids are highly concentrated and need to be mixed with water before being fed to plants, but they are absorbed more quickly and are easy to apply more evenly. Granular formulas have small beads or grains that must be spread around and watered into the soil, and it can be difficult to spread an even layer over large areas unless a spreader is used. Granular forms need time to dissolve or decompose before they can be absorbed, but they last longer in the soil and can nourish plants for weeks or months.

Similarly, fertilizers come in fast or quick release forms as well as slow release forms. Both can work well in any garden, depending on your fertilizing needs, plant nutritional requirements and condition of your soil.

Read the label carefully for specific instructions and uses. It may seem boring, but reading that label will prevent bad results, as overuse or misuse of fertilizer can kill your plants, upset the balance of your soil and even cause environmental contamination – not the results you planned. Once you know more about fertilizer and how to use it correctly, however, you’ll enjoy the results this extra treat can give to your garden.

Sunflowers

Grow one of the oldest American cultivated plants and join the Incas and Aztecs who grew – and revered – sunflowers more than 4,600 years ago.

Types of Sunflowers

While there wasn’t much variety in the sunflowers for ancient civilizations to grow, there certainly is now. ‘Russian Giant’ quickly grows to 12′ tall with a huge medium brown “face” surrounded by bright yellow petals. On the other hand, ‘Choco Sun’ looks similar but only grows to 15″ tall and with a 5″ face.

Don’t think all sunflowers are vertically growing brown and yellow either. ‘Cherry Rose’ has the familiar brown face, however deep red petals with tips of bright yellow-gold surround it. ‘Pastiche’ glows in reds, oranges and buffs. ‘Black Magic’ is completely dark. And ‘Inca Gold’ trails downward!

Kids love planting and watching their sunflower grow, grow and grow, and there are plenty of fun science projects kids can experiment with sunflower seeds. Later, eating the seeds is a healthy snack.

The folks in Kansas chose the sunflower as their state flower. As an American native plant, its diverse uses make it one of the economic forces in the agricultural world. As a crop, its seeds are in human and bird snacks, the oil is used for cooking and the remaining pulp is a popular livestock feed. Sunflowers also make gorgeous cut flowers in summer and fall.

Growing Sunflowers

Many sunflower varieties are available as seeds. Also, many garden centers often offer a selection of well-rooted seedlings or small plants. Tall or short, yellow or red, upright or trailing, the growing requirements are the same.

Start seeds indoors six weeks before the last frost date or sow seeds directly into the garden after all danger of frost has passed. Cover seed with 1/2″ of soil. Improve growth and bloom by working compost into the outdoor bed or pot. If you are growing giant sunflowers, provide a support such as a trellis or stake. Otherwise, they may fall over as they grow when the large heads get heavy with seeds.

Chose an outdoor location in full sun. As these plants develop, the flower heads will “track” the sun daily. However, contrary to popular myth, after the face develops, it stops and puts energy into seed production. To see the plant’s face, choose a location where you will see the flower facing eastwardly. At least six hours of sunlight produces beautiful flowers and abundant seeds. Provide regular water or plant seeds in a naturally moist location. They bloom from midsummer into autumn.

Birds love sunflower seeds. Therefore, cover the heads with netting if you plan to harvest. When harvesting, cut 12″ of stem with the head, hang it upside down and allow the head to dry. The seeds will loosen and be easy to rub off once dry. Alternatively, you may leave the flower on the plant to provide bird food through the fall and winter, or give the whole cut head to hungry birds. They’ll thank you for it. Just be sure to save a few seeds for next year’s sunflower garden!

Summer Lavenders

Do you enjoy making herbal or floral bouquets and wands to scent the house? Maybe you’re into the lavender cooking trend or like to infuse playful summer drinks with a floral touch. Perhaps you recognize the aromatherapy or medicinal qualities of lavender.

In other words, do you love lavender and are frustrated because the bloom season is so short?

Whatever you do with your lavender, you may have planted one and it bloomed for a few weeks. Now you think you have to wait another year to enjoy the beauty and fragrance. That’s no fun! But here’s a secret to prolong your passion during lavender season…

About Lavenders

There are actually three groups of lavenders. Members of each group bloom around the same length of time, but each group blooms at different times. By planting at least one member of each group, you can enjoy lavender from early spring to mid-summer (and sometimes even longer with careful watering).

Members of the “Non-English Lavenders” bloom from early to late spring. “English Lavenders” follow and bloom from late spring to early summer. True summer lavenders, known as “Lavendins,” continue blooming into the hottest days of summer.

Also called “English Lavender hybrids,” the varieties in this summer group are crosses between the Portuguese and English Lavenders. They all have large gray leaves, grow into large plants, and grow best in the heat. They are all very fragrant, making them welcome additions to any lavender garden.

Abriali Lavender was one of the first hybrids. It produced cosmetic-grade oil until Grosso Lavender replaced it with superior oil production. Happily, gardeners can also enjoy Grosso in their gardens, as it’s frequently available at garden centers.

White Grosso Lavender, with the same beauty and fragrance, provides a nice background for a mixed flower border. Edelweiss Lavender, a smaller white lavender, mixes nicely in the garden, without a reduction of fragrance.

Hidcote Giant Lavender and Provence Lavender are garden center favorites. Approximately the same size, the Hidcote Giant has darker flowers than the Provence, which has a longer flower wand. Sachets usually contain Provance buds because they are exceptionally easy to remove from the stalk. Other popular varieties include Grappenhall, Dutch Mill, Seal and Fred Boutin lavenders.

Lavenders In the Garden

Growing lavenders could not be easier. All thrive in full sun in warm, well-drained, average quality soil. Dampness, either through poor drainage or humidity, will kill them. They grow well in pots with good drainage and fair soil. Prune after blooming to shape the plants and promote future blooming. While lavender is drought resistant, if the soil is dry, it is necessary to water well. Water again only when the soil is dry. Using compost as fertilizer will provide critical nutrients and improve soil drainage.

Using Lavender

Lavenders are very attractive to bees. They happily buzz from flower to flower while collecting pollen. Some honey producers site their hives in the middle of lavender fields to produce lavender-scented honey. The honey’s aroma is a great way to start the day!

Drying lavender for future use is easy. Cut bundles of wands from the plants without cutting into the older woody part of the plant. Use a rubber band to hold the bundles together and hang them upside down in a dark, dry room such as an attic or closet. The darkness helps retain the bloom color. The bundle should be dry in 7-10 days.

Although lavender’s taste isn’t the same as its fragrance, lavender dishes appear in many trendy restaurants. Lavender martinis and teas, ice cream, cookies and other desserts accompany lavender-sauced meats and vegetarian dishes. Lavender is an ingredient in the herbs de Provence mix and replaces strong tasting herbs such as rosemary, thyme or mint in many cookbooks for meats, breads and general seasonings.

Some folks even use lavender as an antibacterial antiseptic to treat wounds and insect stings.

Even if you just want to enjoy lavender for the sake of its beauty and ease of maintenance, remember… Planting one of each of the three groups lets you love your lavender for three times as long. Enjoy!

Lyme Disease

For those of us who work and play outdoors in deer tick-infested areas, Lyme disease is a reality. If caught early, the disease is usually cured with antibiotics. If not detected and treated early, Lyme disease can be a debilitating condition that may linger for months or years.

Lyme disease is transmitted through the bite of a deer tick. The tick becomes infected with the disease by biting an animal that is carrying the bacteria. The main culprits in our area are the white-tailed deer and white-footed mouse. Not every deer tick is a carrier of Lyme disease but it is wise to always take precautions to prevent potential infections.

Protect yourself and your family by:

  • Wearing light-colored clothes to help spot and identify deer ticks before they attach to spread the infection.
  • Wearing long sleeves and pants to minimize exposed skin that can attract deer ticks. Tuck your pants into your boots or socks. Include a hat for added protection.
  • Spraying exposed skin with a product that contains at least 20 percent DEET and spraying clothing, and all other cloth gear, with a product containing Permethrin. Always follow the product label when applying repellents.
  • Removing clothing and immediately laundering it when coming back indoors. Dry clothing at a high temperature for at least 30 minutes, since ticks are sensitive to dryness and will die quickly without appropriate moisture.
  • Showering immediately and thoroughly after being in a tick-prone area. Inspect all skin surfaces, especially hard-to-see areas like behind the knees, the back of the neck and in arm pits. Ticks that carry Lyme disease are very small and therefore hard to see. Ticks must be attached for at least 18 hours in order to transmit Lyme disease.
  • Protecting pets from ticks with appropriate collars, drops, powders or dips, and inspecting pets’ fur regularly for ticks or other pests.

Protect your yard by:

  • Mowing the grass regularly. Ticks thrive in longer grasses with moist soils, but are not as abundant in groomed areas.
  • Keeping leaves raked and keeping the yard free of refuse that can create moist patches in the soil where ticks will thrive.
  • Creating a protective barrier, at least 3-4 feet wide of mulch or stone, between yard and wooded area. Ticks are not easily able to cross these open areas.
  • Stacking wood neatly in a dry area where it is less likely to harbor a tick infestation.
  • Spraying your yard with a tick control product like bifenthin. Always follow the product label when applying pesticides.
  • Taking steps to discourage deer and mice in your yard, such as choosing deer-resistant plants and using traps responsibly to eliminate rodents.

By taking appropriate precautions to protect you, your family and your yard, you can minimize any risk of contracting Lyme disease.

mow

The Cotinus Craze

Smoketree, the common name for the genus Cotinus, aptly describes the hazy, smoky look of the flowers sported by this fabulous plant. Best described as a deciduous large shrub or small tree, Cotinus boasts species with varying heights, unique summer flowers, outstanding fall color and low maintenance requirements, all features that can make it an excellent addition to your landscape.

Cotinus Care

Thriving in full sun, the smoketree isn’t particular about soil conditions; it is drought tolerant and virtually disease and pest-free. Cotinus does, however, require excellent drainage, and it is important that the soil not be soggy or compacted which will choke off roots. Although this plant may be pruned for size it is important to remember that the flowers appear in the late spring on old wood, therefore, fall or early spring pruning will eliminate the smoky flowers. When pruning is required to maintain size or shape, consider coppicing (cutting entire bush down to 12″ tall in early spring) every other year. This allows you to enjoy the flowers on alternate years but keep the plant to a manageable size.

Cotinus Varieties

We recommend two species and various varieties of Cotinus because of their sizes, colors and landscape beauty. The large C. obovatus, American Smoketree, is native to the eastern United States. A large specimen grows to 20′ tall and wide, with large bluish dark green leaves. In the fall, the leaves turn bright yellow, orange and bronzed red.

The smaller C. coggygria generally grows to 15-20′. The flower puffs of the purple-leaved cultivars ‘Purpureaus’, ‘Royal Purple’, ‘Norcutt’s Variety’ and ‘Velvet Cloak’ appear even stronger purple than the dramatic leaves. Especially when positioned against a light colored fence or wall, the purples seem to glow.

On the other hand, ‘Golden Spirit’, growing to only 7′ tall with lime green spring leaves, stands out against dark walls and fences, whether in the ground or in a container. ‘Pink Champagne’ pairs tannish-pink flower puffs with green leaves for a 10′ tall and wide, clean, contemporary look.

One of our favorites, ‘Grace’, is a hybrid of the two species. Growing to 15′ tall and wide, the purple leaves create a beautiful backdrop to large, deep pink smoke puffs. Autumn foliage colors include orange and a stunning red/purple/bronze.

Choosing Your Cotinus

With so many varieties of this stunning plant available, it can be difficult to choose your best Cotinus. Check the specific growing conditions for each variety, as well as its mature size, when selecting one for your landscape. Care for it meticulously until established, and you’ll be rewarded with many years of dramatic beauty to enjoy.

continus-1continus-2

Summer Watering Tips

As the days heat up, watering can become a dreaded garden chore and too many gardeners use wasteful techniques that use plenty of water but don’t give their plants the moisture they really need. Make watering plants easier and more efficient with the proper practices and tools…

  • Mulches not only make plantings look more attractive, but their most important functions are to help retain soil moisture and minimize weeds, which would also usurp moisture from your plants. Mulch around plants to a depth of 2-4 inches, refreshing mulch as needed to maintain that depth and attractiveness.
  • Watering cans and small containers work great for spot watering plants with different watering needs by hand. You don’t always need to get out a hose or sprinkler to get the watering done.
  • Check to make sure that you have the proper length hose(s) to reach every corner of your garden. Take into account any obstacles in the way, and be sure you aren’t dragging the hose over any delicate plantings to reach more distant dry spots.
  • Add a water wand to the hose to get the water where it’s most needed – the base of the plants – without needing to bend over repeatedly, which can cause back strain.
  • The best time to water is during the early morning hours of a sunny day. This will allow plants to absorb more water before it evaporates when temperatures rise, but won’t leave water to sit on plants overnight when mold can develop.
  • Always water plants and container gardens thoroughly and deeply to encourage deeper, more drought-tolerant root systems. It is better to water less frequently but more deeply rather than more often but with less water.
  • In the landscape, a good rule of thumb is to provide an inch of water per week minimum. Keep track of precipitation with a rain gauge to avoid wasting water by overwatering when Mother Nature does the job.
  • New individual plants that are set out, direct sown seed beds, sodding, etc. often require daily care, including watering, until established. Check moisture levels carefully during this period so the plants are well cared for.
  • Use soaker hoses to provide slow drip watering. This allows plants to absorb water easily without wasting water by evaporating from foliage or spraying into the air. Soaker hoses can even be layered beneath mulch to preserve as much moisture as possible.
  • Pay extra attention to plants in containers and hanging baskets as they tend to dry out faster and with greater frequency. These plantings will likely need to be watered daily or even multiple times a day during heat waves.
  • Place Tree Gators, a drip irrigation bag, on newly planted trees for slow, steady watering that will soak down to the root system without draining away along the surface of the soil.

If you’ll be away on an extended vacation, or even just for a few days, make arrangements with a trusted friend or neighbor to “plant sit” while you are gone. There’s nothing worse than worrying about your garden while you’re away – except coming home to crisp plants that haven’t been watered properly!

wisewatering1

wisewatering1

What to Do During a Drought

Dire warnings about drought conditions can worry even experienced gardeners, but there are easy ways to save water and save your trees, flowers, vegetable patches, herb gardens and decorative landscaping at the same time.

  • Spray Trees & Shrubs With an Anti-Transpirant
    If pruning, only remove dead material from trees and shrubs, anything more will encourage new growth. This takes energy that a drought-stressed plant cannot afford. Instead, spray leaves with an anti-transpirant or anti-dessicant to help leaves retain what moisture they have.
  • Water Early
    Morning temperatures are cooler and the sun is not as intense as later in the day so there is less moisture loss due to evaporation. Also, water sitting on foliage will have a chance to dry during the day minimizing the chance of fungal infection, especially during humid weather.
  • Water Slowly & Deeply
    Watering slowly will allow the moisture to penetrate more deeply into the root zone rather than running off the soil surface. Create depressions or water traps around larger plants to hold the water where you want it until it can saturate the soil. Remember to water trees at the drip line, not at the trunk base, as this is where the roots are most active. Drip irrigation bags are excellent for watering newly planted trees.
  • Thoughtfully Add to Landscaping
    If you are adding to your landscaping during a drought, choose water-wise, drought-resistant plants or consider xeriscaping techniques that minimize water use. Native plants, succulents and cacti are all great choices and require minimal water. In very severe drought conditions, it may be best to not replace plants, at least until watering conditions improve.
  • Water the Soil, Not the Leaves
    Plants take up water through their roots. Water landing on the foliage will be lost due to evaporation. The more water you direct to the soil, the less you will waste – drip systems and soaker hoses are ideal options. The key is infrequent but heavy watering rather than lighter, more frequent watering. This encourages deep root growth, which increases drought tolerance.
  • Conserve Precious Water
    Place a rain barrel under downspouts to collect rainwater. Wash the car on the lawn rather than on the driveway. Reuse “gray water” such as bathtub or dishwater and rinse cycle water from your laundry to water your garden. Collect the drip water from an air conditioner (may produce up to 5 gallons in 24 hours) for watering. Replace leaky hoses and sprinklers and use washers to correct leaks at fittings. Shorten showers, turn off the faucet when brushing your teeth and take other steps in the home to reduce water use so more is available for landscaping needs.

No matter how severe a drought or how low water supplies may be, there are ways you can deal with it and still keep your landscaping well cared for.

Drought_5Drought_1

Long-Blooming Perennials for Summer

By choosing long-blooming perennial plants, you can capitalize on the best of both worlds – plants that come back from growing season to growing season, and those that bloom for an extended length of time. This also means you’ll have more time to appreciate the gardens you create!

Here is just a sampling of long-blooming perennial plants perfect for the sunny summer garden:

  • Achillea (Yarrow) is a very drought and heat resistant plant once established. The flower heads are long-lasting and many colors are available including yellow, gold, pink and pastels in apricot, lilac, salmon, cream and white. Plants grow from 8-36″ tall, depending on variety. The flat-topped flower heads grow up to several inches across, and make excellent cut and dried flowers. The fern-like, gray to gray-green foliage is somewhat aromatic and attractive even when the plant is not in bloom.
  • Coreopsis (Tickseed) is one of the easiest and most rewarding garden flowers. The thread leaf varieties are usually the longest blooming, typically from June through fall. The pale yellow, bright yellow or rosy-pink daisy flowers smother the slender stems and thread-like leaves. Plant height, from 15-24″, is variety dependent. A mid-summer shearing of the seed heads will keep these plants blooming for many more weeks.
  • Echinacea purpurea (Purple Coneflower) is a sturdy, bold-textured favorite with dark foliage that grows to 2-3′ tall and wide. The flowers are large, daisy-like with unique standings of dark-rose purple and lighter in color. Birds and butterflies also love these flowers, adding even more beauty to your garden with their visits.
  • Rudbeckia (Black-Eyed Susan) is an old-fashioned garden favorite. It is hardy, reliable, insect and disease-free and an exceptionally long-blooming plant – typically from July through fall. This medium-green, bold-foliaged plant grows to about 3′ tall and bears golden yellow, daisy-like flowers with dark brown centers. Both Echinacea and Rudbeckia flowers make excellent cut flowers and a wonderful place for butterflies to sit and eat.
  • Gallardia (Blanket Flower) is an American native plant which thrives in the hot sun and has beautiful yellow-orange flowers, marked with red. Height varies according to variety. Some favorites include “Baby Cole” which is a dwarf only 8″ high, “Goblin,” a 12-15” grower, and “Burgundy,” which reaches 18-24” and whose flowers are a gorgeous shade of burgundy red.
  • Ceratostigma plumbaginoides (Plumbago) features intense blue flowers from mid-summer to September. Plumbago spreads quickly to form a neat groundcover and as an added bonus, leaves turn a brilliant red in the fall before dropping. This excellent perennial grows well in light shade also.
  • Veronica (Speedwell) has neat, attractive foliage and abundant flowers in densely packed spikes. Look for the cultivars ‘Goodness Grows’ and taller ‘Sunny Border Blue’ for a beautiful addition of blue to your summer garden, and pair it with red or white favorites for a patriotic theme.

Remember, this is just a brief glimpse of the long-blooming perennials available to choose from. Stop by to see our wide selection of perennials so we can help you determine which plants are best suited to your garden.

Long_3Long_4

Long_5

Long_1

Long_2

Growing and Storing Herbs

Growing herbs, whether inside or out, may be one of gardening’s most gratifying experiences. Because of their beauty and versatility, herbs may be grown amid vegetables, ornamentals or in a garden dedicated strictly to their kind. They may be nurtured in a sunny window box, strawberry pot, whiskey barrel or just about any container you choose. Situate your herbs for easy access: on the patio, deck, a sunny windowsill or in the kitchen garden. Herbs are relatively carefree and have a multitude of uses that include but are not limited to: culinary, aromatic, ornamental, medicinal and insect control.

Herb Growing Tips

Choose a full sun location, 4-6 hours per day is best. Herbs will grow in a shadier location, but plants will be weak and thin. Most herbs are not demanding of soil fertility. One thing that they will not tolerate, however, is wet or poorly drained soil, so be sure not to overwater your herbs.

Locate herbs in or near the kitchen for easy access when cooking. Be aware of the ultimate size, height and spread of the herbs that you plan to grow. If you take this into consideration you can assure room for the plants to reach their full potential. Position taller herbs to the back of the garden or container and shorter herbs to the front; this will allow for easier access and prevent shading.

Water pots before planting. Remove plants from their pots and loosen roots to stimulate new root growth. Place plants at the same soil depth that they were in the pot, or slightly higher to avoid rotting. Gently firm soil around each plant, water carefully and mulch if desired. Feed monthly with a mild, organic fertilizer such as Neptune’s Harvest Fish & Seaweed Fertilizer 3-2-1.

Some herbs, such as mints, have a tendency to be invasive and may take over an entire herb garden or even spread into the lawn or other parts of the landscaping. Sink aggressive potted herbs directly into the garden to minimize this overgrowth. Pull up pots each spring to replenish their soil, then sink the containers back into the garden for another season.

Growing herbs indoors is also quite simple. Choose herbs that will not get too large to handle inside. The same soil requirements apply for both indoor and outdoor planting. Select a south or west window to situate your plants so they receive adequate sunlight. It may be beneficial or necessary to supplement with artificial lighting during the winter months. Provide humidity by grouping plants together and misting daily. Another option is placing potted herbs on a humidity tray. Fertilize monthly with Neptune’s Harvest to provide the best nutrition.

Harvesting

Fresh herb leaves are ready to be harvested as soon as there is enough foliage to maintain the plant. Try to harvest in the morning, after the dew has dried but before the sun becomes too hot, using a sharp knife or scissors to make each cut. It is a good idea to harvest only what you plan to use at time of cutting, as herbs do not store well in the refrigerator. With most herbs it is beneficial to harvest before the plants go to flower, as the taste is better at this stage of growth. Rinse with cold water and pat dry before using.

Drying

If you have excess herbs, you may want to dry them for future use. After gently rinsing the harvested herbs, drain them on absorbent towels, tie in bunches and dry thoroughly by hanging bunches up in the sun just until all water evaporates from the surface of the herbs. Remove plants from sun and hang in a clean, dark, dry location with good air circulation for 1-2 weeks until herbs are completely dry and brittle. If not dried completely the herbs will become moldy in storage. Remove leaves from the stem and store them in an airtight container in a cool, dry, low light environment. Check container in a few days for condensation. If there is any moisture in the container you must start the drying process again, after checking carefully for any mold or mildew.

You can also dry herbs in a conventional or microwave oven. With a conventional oven, position clean herbs in a single layer on a shallow pan. Place baking pan in a 180°F oven for 2 to 4 hours. When using a microwave, place clean herbs in a single layer on a paper towel or plate. Cook herbs on high for 1 to 3 minutes, rotating the plate every 30 seconds or moving the leaves around on the plate until thoroughly dry. Store these herbs just as you would air-dried herbs.

Freezing

Freezing herbs is also easy to accomplish. Wash herbs and blanch them in boiling water for one minute. Cool herbs very quickly in ice water then drain. Package herbs in airtight plastic bags and store in the freezer.

Herbs can be delightfully easy to grow and they are an even more delightful addition to salads, sauces, pastas, teas and many other treats you can enjoy year-round.

Herbs_1Herbs_3

Herbs_2