Monthly Archives: April 2017

Worm-Casting Tea

Perhaps you have used compost tea on your plants and saw the amazing effect it had. However, if you think your plants loved their compost tea, try giving them a drink of worm-casting tea. No, it’s not the liquid dripping from the bottom of an elevated worm bin – so what is it?

Making Worm-Casting Tea

This “tea” is a liquid concoction made by steeping worm castings (worm poop) in water. This is an extracting process that draws the nutrients from the castings into the water so they can be more easily and quickly absorbed by thirsty plants. Use it on your plants by drenching the soil around the roots or spray onto the leaves for foliar absorption. Both spraying and drenching eliminate the labor of spreading solid compost. And, applied as a liquid, plant resistance to pests and diseases and microbial activity in the soil are all increased. While compost tea contains many beneficial microbes, it’s nothing compared to worm-casting tea that contains a much larger and diverse microbial population due to the various physiological life processes of the worm.

To really kick up the benefits of worm-casting tea, try aerobically brewing a batch. This simple process increases the microbial populations by circulating the microbes in a nutritious and aerated solution to double the population every 20 minutes. This method also eliminates any possibility of E. coli, which can be present in both compost and worm-casting tea brewed by extraction.

To brew your worm-casting tea…

  1. Connect 3’ of tubing to an air stone. Attach other end to small air pump.
  2. Put 4 gallons of water into a clean 5-gallon bucket. Let sit for 24 hours to allow chlorine to dissipate. Alternatively, use non-chlorinated water.
  3. Add:
    1. ¼ cup sulfur free molasses or corn syrup
    2. 1 tablespoon water-soluble sea plant extract
    3. 2 tablespoons soluble fish power or liquid fish
  4. Plug in pump and place air stone at bottom of bucket to begin agitation.
  5. Add 4-8 cups earthworm castings, crushed into small bits, if possible.
  6. Brew until a froth or slime appears on the water surface. The smell should now be gone or very weak. This indicates the maximum population has been reached and no food remains for the microbes to eat. This solution may contain over one billion microbes per teaspoon of solution! The overall brewing time is temperature dependent, however, and warmer solutions will brew more quickly. At all times, leave the bubbler on to continue oxygenating the microbes.
  7. Strain the solution to remove any solid particles. Apply to plants as soon as possible to take maximum advantage of your tea’s nutritious properties.

Note: The odor should be minimal or vaguely pleasant. If the smell is strongly unpleasant or similar to sulfur, do not use. Pour it over some weeds for a natural herbicide instead.

You can use your worm casting tea anywhere in your garden: upper and lower sides of leaves, on flowers, vegetables, trees, shrubs or soil. Spray in the early morning or evening or in the shade during the rest of the day. Use the remaining castings as you would any compost, after all, they still contain a diverse microbial population!

Now, raise your teacup and toast to a healthy, luxurious garden and landscape, all thanks to nutritious worm-casting tea!

WormcastingTea_1

Vermicomposting

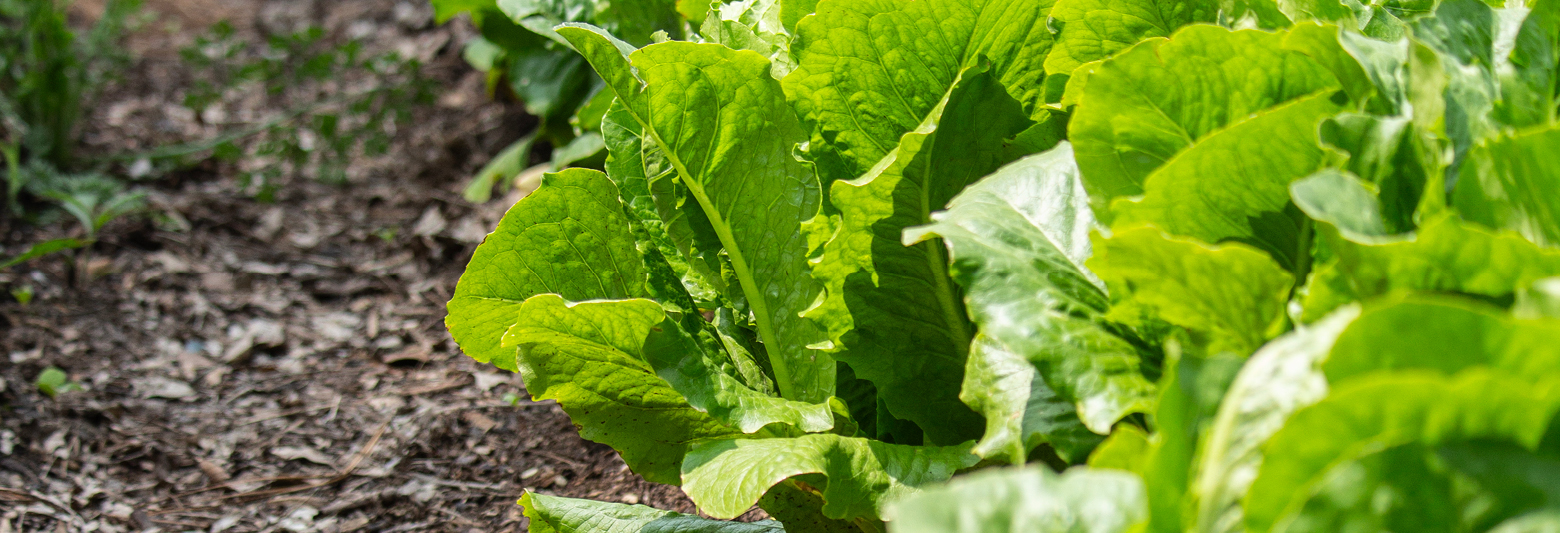
Have you tried vermicomposting, otherwise known as worm composting? This simple process mixes food scraps with yard waste and other organic materials in an enclosed area containing specific types of worms. The worms (and associated microorganisms) eat the organics and turn them into a beautiful light and fertile soil amendment. This compost is almost magical! It’s packed with nutrients, improves soil structure, increases drainage and appears to improve plant growth while decreasing pest damage and plant diseases. Not only environmentally friendly, vermicomposting doesn’t require much space, is inexpensive and easy, and it’s a fun hobby for the entire family.

The Worms

The two recommended worms for vermicomposting are Red Wigglers (Eisenia fetida) and European night crawlers (Eisenia hortensis). The latter grows bigger, eats coarser food and may be heartier. They each eat their own weight in food every other day. Do not use native earthworms, as they do not live well in bin conditions.

Most people begin with 1 lb (16 ounces) of worms. These will eat 8 ounces of food every day.

TIP: To determine your average daily food waste, weigh your food debris each day for a week. Add these amounts and divide by 7. (Do not include meat, fish, oily scraps, fat chunks, bones, or dairy products, as they are not suitable for the worms or compost.)

When you know your amount of food debris, buy twice as many pounds of worms. For example, if your average daily food debris is 1 pound, order 2 pounds of worms. If your average daily food debris is 4 ounces, order 8 ounces of worms.

The Worm Bin

Your worms will need a comfortable place to live. Provide a bin with a surface area that equals the weight of the worm order. In other words, if you order 2 pounds of worms, your worm container will require at least 2 square feet of bin surface (but should be larger). This could be 1’ wide by 2’ long.

Use non-treated wood, plastic, rubber or galvanized bins. A larger container houses more worms to compost more material. Worms do not burrow deeper than 24” therefore the bin should be less than 24” deep.

The bin needs a removable cover to protect from rain, light and drying out. Remove it if the bedding becomes too wet, but place a screen across the top to prevent worms from escaping. If needed, use a moistened strip of burlap or canvas to add moisture to the bin.

Unless using wood, which is naturally porous, provide ventilation in your bin by drilling 12-18 1/8” holes on all four sides. Drill holes on the bottom to prevent your worms drowning if moisture builds up.

Remember, your worm population will increase. When sizing your bin, allow an additional 40 percent of surface area for the increase in addition to the initial population’s requirement.

Positioning Your Bin

Where you put your bin should be convenient for both you and your worms. Elevate the container on bricks to improve ventilation and drainage of excess moisture.

Place the worm bin where it will not receive direct sunlight. In a shed or garage, under house eaves or other shade structure to maintain a temperature above freezing and below 85 degrees is perfect. In the winter, prevent freezing and insulate with sheets of foam on the top and sides, add a heating pad to one side, or move inside a building if needed.

Bin Bedding

Before adding your worms, you will need to add bedding to the container so they have a place to burrow. Soak and squeeze out the excess water from shredded fibrous materials such as newspaper, egg cartons or single-layer cardboard boxes. Mix in dry grass, brown leaves and/or straw. Add sawdust or aged manure, if available. Cover with a thin layer of well-moistened soil. This bedding will give your worms a great start and will help feed your compost.

Feeding Your Worms

Until your worms begin multiplying, only feed them once a week by adding a small amount of food scraps. Chopping or breaking food into small bits helps the worms eat the scraps faster and reduces any smells and fruit flies. Mix the food lightly into the bedding on one side of the worm bin.

Ideal foods to offer your worms include eggshells, non-citrus fruits, coffee grounds, unbleached used coffee filters, leafy green vegetables, rice, grits and vegetable scraps. Do not include meat, fish, oily scraps, fat chunks, bones, dairy products such as milk or cheese or cat or dog waste. Avoid eucalyptus leaves, as these contain a natural insecticide which could kill the worms. Additionally, if adding lawn clippings, be sure the grass hasn’t been chemically treated. Green foods such as leaves, vegetable tops and green grass add additional nitrogen to the finished compost. Eggshells increase the calcium in the final compost and brown foods such as paper, wood chips and leaves increase phosphate and carbon. The more varied your worms’ diet, the richer your compost will be.

When the worms begin to multiply, provide a weekly quart of food scraps per square foot of surface area. If your bin is 2’ square, provide 4 quarts of scraps per week to nourish your worms, but avoid overfeeding. One way to tell if you are feeding too much is by smell. If it smells bad, food is rotting instead of being eaten. Reduce the amount of food going into the bin until the smell disappears.

When adding food, be sure to check the amount of bedding. The bin was full of bedding when the worms were added. When reduced to half, add more newspaper or cardboard strips, hay, straw, etc.

Watering Your Worms

Check the bin every other day and moisten the material, if needed. It should be moist but not wet. Note that the types of scraps you add will contribute to the moisture in the bin, and you do not want any puddles or sopping that could suffocate and drown your worms.

Harvesting Compost

Your worm-assisted compost should be ready in 4-6 months. The easiest way to collect the compost is to scoop out small piles of the material and place onto a flat surface. Remove as many worms as possible and return the un-composted materials and worms to the bin. You may use a wire mesh netting as a screening device. Add more bedding and let the cycle begin again.

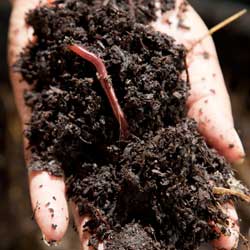
After removing the worms and chunks, what’s left? The grand prize of worm castings (poop)! This is the “magical compost.” Some people even call it “black gold” – it’s that fantastic for your garden.

Raising worms and producing your own super compost is easy and fun. Plus, it removes food waste from the local landfills and enriches your garden. What’s not to love?

Vermicomposting_1

Birdscaping

As wildlife habitats are threatened by development, the creation of a bird-friendly environment that provides food, water and shelter is crucial to the existence of our wild bird population. Caring for our feathered-friends is an educational and enjoyable activity for the entire family that brings beauty and song to our lives.

Benefits of Wild Birds

Birds are great guests to have in your yard, garden or landscape, and they provide more benefits than many homeowners and gardeners realize. Wild birds can…

  • Control insects by feasting on both flying and crawling insects, as well as spiders, slugs, snails and other creepy-crawlies.
  • Pollinate plants by flitting from flower to flower as they seek out insects or eat seeds, taking pollen along between blooms.
  • Manage weeds as they consume copious amounts of weed seeds before the seeds ever have a chance to sprout.
  • Control rodents when raptors visit the yard in search of mice, rats, gophers, voles or other unwanted pests.

Attracting Backyard Birds

Fortunately, it is easy to attract a wide variety of backyard birds when you offer them what they need most – food, water and shelter.

Food for Birds

Wild birds rely on both natural and supplemental food supplies so it is important to consider both when birdscaping. Feeding the birds is most important in the winter when natural food is scarcer, but they will visit feeders at any time of year. Migratory birds require additional food in the spring and fall as they pass through the region and nesting birds will utilize feeders in the summer.

Tips:

  • Provide a variety of natural foods for birds by planting berry bushes, seed-bearing flowers, nectar-rich flowers and sunflowers. Leave windfall fruit on the ground for birds to nibble. Minimize pesticide use so birds can feast on insects as well.
  • Add supplemental feeders to your yard, such as birdseed feeders, suet feeders and nectar feeders. Clean feeders weekly to avoid mold that can be dangerous to birds, and be sure feeders are full when birds need them most.

Water

Improve your backyard bird habitat by adding water. Birds require a constant supply of clean water for drinking and bathing. This is especially important in late summer, when water is scarce, and in the winter, when it is frequently frozen.

Tips:

  • Place bird baths in a protected location safe from predators, and keep the baths filled at all times so a fresh supply of water is constantly available.
  • Scrub off algae as soon as it is appears and thoroughly was the bird bath each week to minimize feces contamination or other messes in the water.
  • Provide motion for greater attraction by using a bubbler, wiggler, dripper or fountain. Birds will see the sparkles of the moving water and will hear the splashes from great distances, so more birds will visit.
  • Use Mosquito Dunks to safely prevent mosquito larvae in warm weather. A clean bird bath with moving water will also harbor fewer insects.
  • Add an outdoor-safe submersible heater to the bath in winter to keep the water liquid instead of frozen, or consider using a fully heated bird bath during the coldest months.

Shelter

It is important to offer safe and comfortable shelter for your wild birds to nurture their young, protect them from predators and shield them from the elements. Planting evergreen trees and shrubs and providing bird houses, along with roosting boxes and pockets, are all beneficial additions to your birdscape.

Tips:

  • Choose both deciduous and evergreen landscaping trees and shrubs to offer birds different types of shelter in all seasons.
  • Minimize pruning to give birds denser, more secure shelter to take advantage of when they feel threatened.
  • Plant in layers and create thicket-like pockets or corridors in your landscape so birds can move around freely without feeling exposed.
  • Supplement the shelter in your yard with good quality bird houses, winter roost boxes or nesting pockets to give birds even more options to stay safe and secure.

When you meet birds’ needs for food, water and shelter, your birdscape will soon be home to a fun and friendly flock of backyard birds.

Birdscaping_3

Birdscaping_1

Birdscaping_2

Fresh Cut Trees

There’s nothing quite like a fresh, vibrant Christmas tree with its bold branches, crisp scent and natural charm. But which tree is right for your holiday décor? There are several popular tree species that can be ideal decorations.

  • Douglas Fir
    This tree holds its dark green needles for a good while, making it an excellent choice for those who prefer to decorate their tree early or like to enjoy their tree into the new year. The soft branches and needles emit a faint lemon scent when rubbed. Douglas Firs have an airy open shape, great for lots of ornaments, garlands and lights.
  • Fraser Fir
    This pine is an aristocrat among Christmas trees with its short grey-green needles and majestic shape. Typically, this tree stays fresh the longest with long needle retention, ideal for longer periods indoors. The branches have a more open shape, great for displaying stunning ornaments. Fraser firs have a delicate evergreen fragrance.
  • When Your Fresh Cut Tree Isn’t So Fresh
    When Christmas is over and your tree starts to droop, you have many options to keep it useful. First, you can easily recycle your tree; many parks and towns sponsor tree recycling programs in January. If you live near a beach, there may be a program to install cut trees on sand dunes to help control erosion. If you prefer to use your tree at home, the boughs make perfect mulch for perennials and the trunk can also be chipped for mulch. Chunks of the trunk can even be made into simple bird feeders or similar garden crafts, or you can use the whole tree as an impromptu brush pile to provide protection and shelter for winter wildlife. You might even consider decorating your tree again using cranberry and popcorn strings, small birdseed ornaments and chunks of fruit to create a bird feeding station.Fresh cut trees are amazing holiday traditions for many families, and there is a perfect tree type to suit your decorating preferences to make amazing holiday memories.

fresh-cut-2

fresh-cut-3
fresh-cut-4

Preserving the Harvest

Was it a bumper crop this year? Do you have tasty fruits, vegetables and herbs overflowing your storage? Now that the harvest is in, the decision needs to be made as to what to do with the abundance.

Years ago, homes had root cellars to store winter squash and root vegetables such as onions, potatoes and carrots to keep them cool and dry for several weeks. As more homes refinish basements into living spaces and more urban gardeners expand their harvest, however, it may be difficult for gardeners to store their harvest this way. So, what can they do?

Here’s a quick little table to help:

Vegetable Store Freeze/Blanching Time Can Dry Pickle
Beets X (2 min) X X X
Broccoli (3 min) X X X
Brussels sprouts (3 min) X X X
Cabbage (90 sec for wedges) Pickle first X X
Carrots X (5 min) X X X
Cauliflower (3 min) X X X
Celery (3 min) X X
Fennel (1/2 min) Pickle first X
Horseradish X (shred) Prepare as sauce X X
Kohlrabi (3 min) Pickle first X X
Onions X (raw) Pickle first X X
Parsnips X (2 min) X X X
Potatoes X (cooked) X X X
Rutabagas X (2 min) X X X
Sweet Potatoes/Yams X (cooked) X X X
Turnip X (2 min) X X X
Winter Squash X (cooked) X X X
  • Storing: Only store mature and perfect vegetables. If there are soft spots or bruises, eat immediately or preserve. Leave several inches of stems on winter squash. It’s important to maintain temperatures between 32-40⁰ Fahrenheit with good air circulation and ventilation. To reduce spoilage, the humidity should be between 85-95 percent.
  • Freezing: Freezing maintains nutrients, flavor and texture. Most vegetables require blanching (cutting into pieces, a boiling water bath [see times above], followed by immersion into very cold water) prior to putting into freezer bags or containers in the freezer. Maintain a temperature of 0⁰ Most vegetables will store well in the freezer for up to 12 weeks.
  • Canning: Best method for vegetables with high water content such as fruits and tomatoes. Hot water baths or pressure cookers seal the contents in sterilized jars. Most vegetables are low acid foods and require using a pressure cooker. Use cleaned, fresh and tender vegetables. Follow all pressure cooker instructions carefully.
  • Drying: No special equipment required. Most people use ovens or dehydrators. It’s important to have good air circulation and all vegetables are cleaned and not bruised. Blanching in a hot water bath increases quality and cleanliness. Adding 1/4 teaspoon of citric acid to each quart of water will reduce darkening and discoloration.
  • Pickling: Used around the world to preserve foods, pickling also includes relishes and fermentation. Examples include Kim-chi, pickles, sauerkraut and chutneys. Follow all recipes carefully. Most use vinegar to stabilize acidity and prevent bacteria. Some recipes will suggest canning to preserve the product, others will recommend refrigerator or crock storage.

Have specific questions? The National Center for Home Food Preservation has many online publications to assist you.

Seed Starting

Starting seeds indoors is a rewarding gardening experience and can help extend your growing season to include more plant varieties than your outdoor season may permit. Furthermore, a larger selection of seed varieties doesn’t limit your opportunities to growing only those transplants that are available at planting time. The key to success in growing seedlings is in creating the proper environment.

What Seeds Need

Seeds are generally hardy, but to start them properly they do need gentle nurturing so they can produce healthy, vibrant plants. In general, seeds should be started 4-6 weeks before the recommended planting time so the seedlings will be large and strong enough to withstand the stresses of transplanting. Use a sterile growing mix which is light enough to encourage rich root growth. Sow the seeds thinly and cover lightly with sphagnum peat moss. Water using a fine spray but do not soak the seeds – they also need oxygen to germinate, and if they are overwatered they will drown. Cover the container with clear plastic to hold the moisture and increase humidity. Place the containers in a warm (70-80 degrees) spot and watch daily for germination. The top of the refrigerator is often an ideal location. When the first seeds germinate, place the seedlings in bright light or under artificial lights (tube lights should be 2-3” from seedling tops) for several hours each day, since late winter sunlight will not usually be sufficient to prevent weak, leggy seedlings. Daytime temperatures should range from 70-75 degrees. Night time temperatures should range from 60-65 degrees.

As Seeds Grow

When the seedlings develop their first true sets of leaves, add half-strength water soluble fertilizer to their water – organic fish emulsion or seaweed fertilizers are great to use. Repeat every second week to provide good nourishment. Thin the seedlings or transplant them to larger containers as they grow. Before planting outdoors, harden-off the plants at least one week before the planting date. Take the transplants outdoors in the daytime and bring them in at night if frost is likely. Gradually expose them to lower temperatures and more sunlight. The use of hotcaps and frost blankets to cover early plantings will also aid in the hardening off process so the seedlings can adjust well to their new outdoor environment.

Transplanting Seeds

Transplant seedlings into the garden after the safe planting date on a calm, overcast day. Pack the soil around the transplant with as little root disturbance as possible. Sprinkle the plants with water, keeping the soil moist until the plants become established.

Popular Indoor Seed Start Dates

The exact dates you want to start seeds will vary depending on your local growing season, the varieties of plants you choose and what their needs are. In general, dates for the most popular produce include…

Vegetable Seed Starting Dates

  • February – Asparagus, celery, onion
  • March 1 – Broccoli, Brussels sprouts, cabbage, cauliflower, collards, kale, lettuce
  • March 15 – Eggplant, peppers, tomatoes
  • April 1 – Summer squash
  • April 15 – Cantaloupes, cucumbers, winter squash

Flower Seed Starting Dates

  • January/February – Begonia, carnation, geranium, impatiens, nicotiana, pansy, rudbeckia, salvia, snapdragon, verbena, vinca
  • March 1 – Ageratum, dahlia, dianthus, petunia
  • April 15 – Aster, calendula, celosia, marigold, zinnia

Use seed starting dates as a general guide to ensure your seeds have plenty of time to reach their full harvest potential before the weather turns in autumn. At the same time, consider staggering seed starting every few days to lengthen your harvest and keep your favorite vegetables and flowers coming even longer during the growing season. As you gain more experience with starting seeds, you’ll be able to carefully plan your seed calendar to ensure a lush, rich, long harvest season.

Old wooden seed tray with plant seedlings of various kinds (Zinnia and Pea).

Bringing Butterflies to the Backyard

In spring, female butterflies will be mostly concerned with finding their species’ specific host plants on which to lay fertilized eggs. Instinctively, they know they must find plants to ensure that their caterpillars will have appropriate food for survival after hatching. Both male and female butterflies will be looking for flowers with nectar for their own survival. And, they will be searching for shelter from rainy or windy weather, a sunny place for basking, and a source of water. Because many natural butterfly habitats in North America are disappearing at an alarming rate, it is becoming increasingly difficult for butterflies to find these necessities of life.

Starting a butterfly garden can be simple and rewarding if you follow these pointers. The most important thing you can do as a gardener is to plant both nectar and host plants in your garden. Providing host plants for caterpillars to feed on, will allow you to watch the metamorphosis from caterpillar to chrysalis to butterfly. So, do not discourage caterpillars. They may make your garden plants look bad but it’s usually only temporary. Most important – do not use pesticides! You may be killing off the very insects you made the garden for. And, you don’t have to have a large area to get a response. Just a few select plants will spur some action. Choose the sunniest spot possible for your butterfly garden. It could be any size or shape; even a short border will work. A combination of woody shrubs, perennials and annual flowers works best, but using just a couple of plants can still yield results. Planting a section of wildflowers is an easy way to cover a problem area and lure some butterflies to your yard. If you don’t have the room for a garden, fuchsia, petunia or impatiens hanging baskets will attract butterflies as well as hummingbirds.

The following is a list of plants that attract butterflies:

Woody shrubs:

  • Glossy Abelia
  • Butterfly Bush
  • Japanese Privet
  • Honeysuckle
  • Weigela
  • Spiraea
  • Lilac
  • Deutzia
  • Trumpet vine

Perennials:

  • Achillea (Yarrow)
  • Butterfly Weed
  • Aster
  • Shasta Daisy
  • Cosmos
  • Carnation
  • Coneflower
  • Joe-Pye weed
  • Sunflower

Annuals and Tender

Perennials:

  • Heliotrope
  • Lantana
  • Rosemary
  • Marigolds
  • Petunias
  • Geraniums
  • Snapdragons
  • Portulaca
  • Zinnias
  • Allysum
  • Fucshia
  • Vinca
  • Balsam
  • Dahlia
  • Impatiens
  • Salvia
  • Verbena
backyard-butterfly-1

backyard-butterfly-2

backyard-butterfly-3