Monthly Archives: April 2017

Healthy Soil: Winter Cover Crops

It’s fall and our annual and vegetable gardens are winding down for the season. Now is the time to invest a little extra time and effort to prepare your soil for next year. Whether your garden is large or small, all annual planting beds will benefit from the addition of a winter cover crop.

Benefits of Cover Crops

A cover crop is a fast-growing, low-maintenance crop that can be used to protect your garden and landscaping beds in fall and winter. Depending on the crop you choose, it can provide many benefits to your garden, including…

  • Stabilizing soil and preventing erosion
  • Adding organic matter back into the soil to nurture later crops
  • Adding nutrients to the soil that have been used by previous crops
  • Suppressing disease that can wither new crops even before they start
  • Repressing weeds that will take over a garden
  • Improving soil structure with aeration and better drainage
  • Encouraging beneficial insects that will help later crops

Recommended Cover Crops

Different cover crops work best in different areas, and the climate, soil type and growing season will help determine which cover crops will work best for your gardening needs. The most popular recommended cover crops for our area are oats, rye and wheat.

  • Oats
    Sow 6-8 weeks before the first hard frost. Planted early, oats will provide a quick covering with the added benefit of providing an early planting time for next spring’s crops. Oats are not winter hardy, but they will grow in the fall and die in the winter, leaving behind nutritious mulch that will easily decompose when incorporated into the soil in the spring. This is a great cover crop choice for low- or no-till gardens. Sow at 2 lbs. per 1,000 sq. ft. for the best coverage.
  • Winter Rye
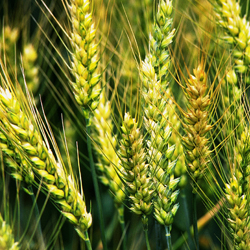
    Sow 2-4 weeks before the first hard frost. This is a good choice for gardeners who have late season crops and don’t want to cut off that last harvest. If hardened off before frost arrives, winter rye will continue to grow over the winter. Rye is a vigorous grower and can be difficult to turn in the spring, so bear that in mind depending on what crops you will be planting in spring. Sow at 3-4 lbs. per 1000 sq. ft. for appropriate coverage.
  • Winter Wheat
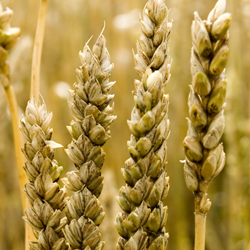
    Sow 2-4 weeks before the first hard frost. Wheat will cover quickly but is not as aggressive as winter rye. Winter wheat is also leafier, making it easier than winter rye to turn into the soil in the spring. Sow at 3 lbs. per 1000 sq. ft. to provide good coverage.

Cornell University provides a tool to assist you in choosing the correct cover crop for your situation. (http://covercrops.cals.cornell.edu/decision-tool.php)

Planting Cover Crops

Before planting a cover crop, clean out garden beds, removing all roots and plant material. Compost all plant matter that is not diseased. Broadcast seed evenly and cover with soil. Water thoroughly when planting and when necessary during dry periods. In the spring, till or fork oats into the planting bed and you are ready to plant. For winter rye and wheat, mow or chop tops 4 weeks before planting leaving cut cover crop on top to dry. Till or fork dried wheat and rye into the bed before planting.

With the appropriate cover crop, you can protect your garden’s most valuable asset – the soil – and be sure it is ready for spring planting.

oats_250x250

rye_250x250

wheat_250x250

The Great Squirrel Battle for the Bulbs

Autumn is the catalog time of year, when gardeners devour and drool over the spring-blooming bulb catalogs, eagerly fantasizing about next year’s flowerbeds. We picture drifts of crocus and gaily swaying tulips, lush daffodils and glorious hyacinths. Snowdrops, irises, daylilies… Ah, the garden will be great this next spring.

Then we remember last spring – hours of labor and dozens of bulbs meticulously planted, but only one or two emerged to flaunt their blooms. What happened?

Squirrels and Bulbs

Squirrels like flower bulbs just as much as gardeners, but unfortunately not for their beauty. From the looks of the remains – chewed remnants, dug up holes, battered foliage – those bulbs became expensive squirrel food. Fortunately, if you want to plant daffodils, alliums, scilla, hyacinths, squills or fritillaria, your bulbs should be safe. Generally, squirrels don’t eat these. But how can you protect the bulbs that make the tastiest squirrel treats?

Keeping Squirrels Out of the Flowerbeds

Go ahead and order your bulbs. While you’re waiting for delivery, decide which of the three basic methods you will use to prevent the squirrel attacks. A small investment of time and materials will protect your bulbs.

  1. Mesh Barriers
    Wire mesh is the best protection to keep squirrels away from bulbs. Dig the hole for several bulbs, make a “cage” using mesh around the bulbs and fill in the soil. If the squirrels dig, the mesh will prevent them from eating the bulbs. You may also plant the bulbs as usual and place a layer of mesh on the soil. You’ll have to secure it to keep it in place then cover with mulch. Be sure the mesh layer is wide enough so squirrels cannot easily dig around the sides to reach the bulbs.
  1. Repellants
    Garden centers sell many different squirrel repellants, and deer repellants also repel squirrels. Some gardeners swear to the effective use of red pepper flakes mixed in the soil around, and over, the bulbs. Many squirrels don’t like spicy tastes, but pepper flakes may need to be replaced after heavy spring rains to be the most effective.
  1. Sharp Gravel
    Adding sharp gravel to the soil around and over the bulbs also deters squirrels from digging. Not only do they not like the feel of the gravel on their sensitive paws, but the gravel – which is heavier than dirt or mulch – is more difficult to move, so the bulbs stay safer.

There is another option to keep squirrels away from bulbs without completely discouraging their visits. If you can’t beat ’em, join ’em – because squirrels look for the easiest food sources, a squirrel feeding station stocked with corn and peanuts may be just the thing to keep the squirrels from looking for your buried treasures!

squirreldigging_250x250

bulbs_250x250

Glorifying Garden Gloves

Many gardeners believe garden gloves are easy to do without. Those of us who love gardening enjoy the feel of soil running through our fingers, and we don’t mind the line of dirt under our fingernails. We prefer to not have anything impede the dexterity needed to sow small seeds or pinch a plant, and we like the textures of the plants we cultivate. We would rather spend our budgeted gardening dollars on the latest herbaceous sensation rather than unnecessary gloves, and, frankly, nobody likes sweaty hands.

Why Gloves Matter

Despite the prejudice against covering our hands, gloves are the single most important piece of garden clothing that a person should own. In addition to the fact that they come in every color and pattern under the sun, making them an attractive and matching accessory to your garden wardrobe, garden gloves provide many benefits, such as…

  • Improving your grip on tools, minimizing accidental drops that can damage expensive tools.
  • Keeping hands warm in cold weather so we can garden in comfort even in early spring or late fall.
  • Keeping hands dry in wet weather to prevent skin irritation and problems that could limit our gardening.
  • Preventing contact with animal waste that may carry bacteria, mites or other pests that could harbor diseases.
  • Helping avert calluses and blisters that can make even simple gardening tasks painful and unpleasant.
  • Protecting hands from cuts, splinters and thorn pricks from aggressive plants so we aren’t limited in our gardening choices.
  • Preventing contact with poisonous plant oils that cause rashes and allergic dermatitis.
  • Keeping nails clean and help prevent nail breakage so our hands can be as beautiful as our garden.
  • Protecting from soil borne fungal and bacterial infections that could be spread around the garden easily.

With so many great reasons to use garden gloves, which ones should you choose?

Selecting Gloves

Gardening gloves come in an almost limitless array of colors, styles and patterns. Features may include…

  • Different types of fabric or weave densities that affect air circulation to keep hands cool and comfortable
  • Anti-slip grips or rubber palms and fingers for excellent traction in all types of gardening conditions
  • Broad, wide cuffs for an easy fit or snug, form-fitting cuffs for a secure fit that won’t let in any dirt or debris
  • Different sizes and proportions to suit men, women and children

With so many gloves on the market there’s a style available for every garden chore, season, weather condition, hand size and preference. Check out our selection today. We are happy to help you choose a pair or two that work best for you and your gardening needs.

gloves_250x250

Holey Moley, Shrew or Vole!

Mole, vole or shrew: ever wonder what the difference is between these pests, or why you should care? All three of these mouse-like creatures may be seen in or around your garden. Identification is important in determining if and how you should control these critters.

Moles

  • Identification: A mature mole will grow 5-7 inches from snout to tail. Moles have soft, thick, velvety-gray fur, a long, blunt snout and an approximately 1-inch long tail. Their eyes and ears are inconspicuous, hidden under their fur. Their paddle-like front paws are two to three times wider then their rear paws.
  • Damage: Moles, in search of grubs, beetles and earthworms, burrow in the ground and create tunneling in the lawn and garden. They surface occasionally leaving small hills of loose soil. Moles are solitary, subterranean creatures.
  • Control: Reduce food supply by controlling grubs in the lawn. Use repellents containing castor oil, or toxic baits placed in the tunnel but out of reach of pets. There are several different styles of mole traps available on the market.

Voles

  • Identification: Voles, often called meadow mice, are a little larger than moles reaching 5-8 inches long at maturity. Their heads are rounded, their eyes are larger than shrews, their fur is brown, short and smooth, their front paws are about the same width as their rear paws and their tails are about 1 ¾ inches long.
  • Damage: Voles are herbivores that feed on bulbs, tubers and tender young plants. During the winter, often under the cover of snow, voles will eat surface roots and chew bark from the base of trees and shrubs often causing the plant to girdle and die. Voles, unlike moles and shrews, are social and where you find one, you will find many. Voles will often tunnel in mulch or ground cover above ground leaving surface trails. They sometimes run through old mole tunnels eating plant roots.
  • Control: Use Thiram-based repellents. Set up mouse traps baited with peanut butter or apple slices. Keep mulch away from tree trunks. Remove snow from the base of trees and shrubs in the winter. Protect young trees by wrapping the lower trunk in wire mesh. Apply predator urine to the area and reapply frequently. Do not use poisons.

Shrews

  • Identification: A mature shrew will reach 4-5 inches long. Shrews have a thin tail about 7/8 of an inch long, soft, grey, short fur, small beady eyes, small ears and a pointed snout.
  • Damage: Shrews, like moles, are insectivores. They eat earthworms, grubs and other insects. Shrews, however, are often seen above ground although they tend to use old mole and vole tunnels to get around. Shrews cause no real damage to plants and eat a variety of insects making them beneficial in the landscape and garden.
  • Control: None necessary.

Not sure what to do about these pesky garden visitors? Stop by to see our complete line of safe, effective pest control products and to ask for expert consultation about which visitors should be welcome in your garden and which ones you should gently encourage to leave.


Fall Horticultural Oil Application

Autumn is an excellent time to apply horticultural oil. The oil smothers many soft-bodied insects and hard-shelled scales that are impenetrable to many insecticides, and can therefore help control some of the most stubborn insect populations. But is it right for your plants?

About Horticultural Oil

Horticultural oil, or hort oil, is typically derived from petroleum, and is a type of ecologically-friendly mineral oil. Some cottonseed and soybean oils can also be effective horticultural oils. Emulsifying agents are typically added to these oils so they can be mixed with water and used as a spray, which helps distribute them evenly over plant foliage to be most effective.

Pests That Don’t Like Horticultural Oils

Different types of horticultural oils can be effective against many unwanted garden pests, including…

  • Spider mites
  • Aphids
  • Whiteflies
  • Mealy bugs
  • Psyllids
  • Lace bugs
  • Caterpillars

In addition to smothering the larvae or insects directly, the heavy oil also makes it difficult for many insects to crawl therefore starving them to death and preventing them from spreading diseases from plant to plant. Additionally, the oil repels many insects looking for winter homes. The oils also act as fungicide against powdery mildew, rust and leaf spot on some plants.

Applying Horticultural Oils

Application of horticultural oils is easy, requiring only a simple hose-attached sprayer. Because oil and water do not mix, frequent agitation by shaking is required even if the oils are mixed with other agents to be more sprayable. These products are most effective if applied when plants are dormant, since oil-based products can burn and harm actively growing foliage, buds, flowers and fruit. Some lighter weight, summer-formulated oils are available, but they should be used only sparingly and only if absolutely necessary. Autumn and winter are the best seasons to apply horticultural oils when insects are a problem, though autumn applications can occasionally cause problems with plants dying back and other winter damage. Because the oils can evaporate and dissipate quickly, they should only be used when insects are present, otherwise they will be ineffective. In freezing weather the oil coverage will be inconsistent, so cool but not bitterly cold temperatures are best.

Of course, always follow the instructions for proper application rates, plant sensitivity and ideal weather conditions to ensure the most effective treatment. Because these oils are still pesticides, protective gear such as gloves and goggles should also be worn to avoid accidental irritation or more severe contamination.

Using hort oils can be a great way to control insects on your plants, but only if the oils are used appropriately. Come in for a consultation to see if these products can help end your insect problems.

FallHortOIl_1

Getting Your Trees and Shrubs Ready For Winter

Winter wind and sun are responsible for much of the injuries your landscaping plants will sustain over the winter. The elements are especially hard on broadleaf evergreens such as rhododendrons, hollies, mountain laurel and boxwood. Being evergreen, these plants are constantly losing moisture through their leaves, but since the ground is frozen, the water in the soil is unavailable and they cannot replenish their supply. Drying winter winds and bright, reflecting sun only serve to compound the problem. Fortunately, there are a number of ways to prevent this.

  1. Make certain that the plants have plenty of water before the ground freezes as a plant in a water deficit situation is much more prone to winter injury. Keep watering plants until the first freeze, but water slowly so the ground is not saturated which would lead to ice heave and root damage.
  2. A heavy mulch of shredded bark or leaves, pine needles or straw can be spread around the plant to a depth of 3-5 inches. This will help preserve moisture in the soil and keep the soil warmer so delicate roots are not as easily damaged by ice and frost.
  3. To reduce the effects of the winds, wrap shrubs with burlap or other breathable fabric. This not only breaks the force of the wind, but also shades the plants from sun. Do not, however, wrap plants in plastic or tarps that would restrict air flow completely, or the plants may smother. Another option is to use Wilt-Pruf. It is sprayed on the plant to reduce the loss of moisture caused by wind and sun.
  4. Remember, younger plants, saplings and newly planted shrubs are more subject to winter damage so take special care of these. Plant as early as possible so they have more time to get established before winter sets in, and keep a close eye on them to minimize any storm damage through the season.
  5. After a heavy storm, inspect your trees and shrubs for damage. If boughs or branches have broken, prune them away immediately so they do not continue to tear and cause more injury to the plant. Use a soft broom to brush off a heavy accumulation of snow if needed, but do not try to melt away any accumulated ice or frost, as the temperature change can damage the plants.

With good preparation and conscientious care, your trees and shrubs can withstand even the cruelest of winter cold and storms, and they’ll be bursting into new spring growth before you know it.

shrubs_1trees_1

Bird Feeding Basics

Winter is the perfect time to think about attracting bird visitors to your yard. Bird watching is a great hobby that can be enjoyed by both younger and older members of the family and getting started is both easy and inexpensive.

Bird Feeders

The type of bird feeders you select will depend on where you want to observe your feathered friends, as well as the kinds of foods you are offering and the types of birds you want to attract.

Hanging feeders, suitable for smaller birds, can be hung from a tree, pole or hook. Platform feeders can be mounted on a pole/post, deck railing or fence, or even just set on the ground. There are also window feeders that can be mounted directly to a window for enjoyment close at hand plus suet feeders or cages which hold suet cakes – a must for attracting insect-eating woodpeckers and nuthatches.

Feeders should be located in a sheltered place where they are not exposed to strong winds or vulnerable to attack from predators such as hawks and cats. Try grouping several different feeders together to attract the maximum number of different birds. All feeders should be kept clean and in good repair.

Bird Seeds

Just like us, birds have certain food preferences. Black oil sunflower seed is one of the most popular seeds, attracting a large variety of different birds. Some seeds such as Nyjer (thistle) are very specific – if you want to attract colorful goldfinches, then this one is for you. Mixes containing sunflower, thistle, cracked corn, millet and other seeds are also available, to tempt many bird visitors. Larger birds that feed on the ground, such as doves, quail and wild turkeys, will love cracked corn.

Natural Food Sources

If you are serious about attracting birds to your yard throughout the year, then think about planting trees, shrubs, perennials and even annuals that will provide natural foods at different times. Birds love berry-producers such as crabapples, hollies, hawthorns and viburnums. Perennial favorites for seed eaters include members of the black-eyed susan family (Rudbeckia), coneflowers (Echinacea), goldenrod (Solidago) and coreopsis. Seed heads of ornamental grasses are also highly sought after. Of the annuals, sunflower (of course!), marigolds and cosmos are popular. Just be sure to leave seed heads on the plants so birds can take advantage of them.

Don’t Forget Water!

Water for bathing and drinking is one of the basic requirements for all birds, even for species that won’t visit feeders. If you already have a bird bath, be sure to keep it filled with clear, fresh water. A bird bath heater will keep water available even during freezing weather. A mister, dripper or bubbler will move the water around and attract even more birds with sparkling splashes.

From feeders and seeds to plants and water sources, we have everything you need to get started attracting birds. Come on in today and you’ll be able to enjoy your feathered friends this fall and winter!

bird-feeding-1

bird-feeding-2

bird-feeding-3

Choosing a Japanese Maple

We’re certain you’ve heard it numerous times: fall is the best time to buy your Japanese maple. Have you come into the garden center to pick one? Did the varieties overwhelm you? Let us make it easier for you by explaining Japanese maple differences. Then, when you come in, you’ll know exactly what you want.

The species Japanese maple, Acer palmatum, moderately grows to a 20′ by 20′ multi-trunked tree. The leaves have 5-9 finely cut lobes giving them a more delicate look than other maples. Red spring leaves turn to green in the summer and blaze with yellow, orange and red in the fall. All do best with protection from drying winds and hot overhead afternoon sun. During their centuries of use in gardens around the world, gardeners have discovered and propagated those selections with unusual growth habits and bark patterns, as well as leaf color and shape. With hundreds of Japanese maple varieties available at garden centers, we feel a little simplification is in order.

  • Leaf Shape
    The variation Dissectum or Laceleaf Japanese Maple has leaves are deeply cut and finely lobed giving a lace cutout look. These varieties generally grow best in shady locations as the leaves easily burn or scorch. The leaves of non-Dissectum varieties are much less lacy. They resemble the leaves of native maples but are smaller and more deeply cut.
  • Leaf Color
    The leaf color of different Japanese maples also varies. Many have red spring growth changing to green in the summer. However, some retain the red through the growing season. Some varieties have variegated leaves with white, cream, gold or pink. Variegated leaves burn easily in the sun but can revert to all green in too much shade. Green leaves tolerate more sun than red. Autumn is when Japanese maples really put on a show with a riot of blazing colors.
  • Tree Form
    Non-Dissectum varieties grow more quickly into upright forms. Some varieties remain less than 10′ tall but others can grow to 25′ tall by 20′ wide. Laceleaf maples slowly develop a weeping form approximately 8-10′ tall and 8-12′ wide. However, ‘Seiryu’ is an exception, growing into an upright form.

Laceleaf (Dissectum)

Non-Dissectum

Location

More shade

Less shade

Size

Smaller

10-25′ tall depending upon variety

Tree Form

Weeping

Upright

Leaf Shape

Lacy, fine cut

Lobed

Leaf Color

Red, green

Red, green, variegated

Now that you have identified a suitable planting location and the type of Japanese maple you prefer, come see us and let our friendly staff show you the varieties that meet your requirements. Autumn colors are blazing now so this is a great time to make your selection.

maple_choosing_4maple_choosing_1

maple_choosing_3

Entrance Way Evergreens

Cool and classic or chic and contemporary, no matter what your style, you’ll always be proud of an entrance flanked with beautiful containers highlighting just-right evergreens. In this case, “evergreen” doesn’t necessarily mean a conifer, either – many other shrubs remain green in the winter and can be beautiful showpieces welcoming guests to your home.

Planting Your Container

Entrance way evergreens are generally planted in containers and frame a doorway, walkway or arch. If you truly want your evergreens to take center stage, opt for more understated, neutral containers, but select shapes that match the architecture of your home. You can opt for a boldly colored container, but take care that the container’s decorations won’t overwhelm your evergreens.

You will want to use high quality potting soil for the container to provide adequate nutrition for your evergreens to thrive. Also pay careful attention to the moisture levels, watering the plants appropriately – containers often need more frequent watering than plants in your landscape. You can rotate the containers regularly to help the plants get even sun exposure, and regular fertilizing will help keep them healthy.

If you’re not sure how to plant a container, try this simple formula: “Use a thriller, filler and spiller.” Thriller refers to the tallest or showiest plant, the one that immediately catches the eye. The fillers are the plants surrounding the thriller that add more structure and bulk to the arrangement, filling in empty spaces. The spillers are plants to grow over, and soften, the edge of the container, giving it a more natural, organic look.

Here’s a listing of “thriller” plants to consider for your door decor. We can make recommendations of dwarf cultivars of many of these plants. Dwarfs will take longer to out-grow their container. Happy potting!

  • Shade
  • Azalea*
  • Boxwood
  • Camellia*
  • Evergreen Viburnum*
  • Japanese Andromeda*
  • Heavenly Bamboo*
  • Mountain Laurel*
  • Sun
  • Arborvitae
  • False Cypress
  • Juniper
  • Heavenly Bamboo*
  • Holly
  • Pine
  • Spruce
  • Yews
  • Yucca*


* These plants flower!

Accents for Your Entrance Evergreens

In addition to welcoming your visitors with a beautiful entrance, it’s easy to entertain them and show your style when you accessorize your evergreens. Festively dress your plants to coordinate with seasons or holidays. Fun and creative options include…

  • Spring: Small bunnies, silk spring blooms such as daffodils, pastel Easter eggs
  • Summer: Patriotic flags or ribbons for Memorial Day and the Fourth of July
  • Fall: Scarecrows, pumpkins, Indian corn, Halloween decorations
  • Winter: Holly sprigs, tiny twinkling lights, beaded garlands, snowflake ornaments

You can also personalize your entrance evergreens for birthdays, anniversaries or to showcase your favorite teams, colleges, hobbies and more. All are easy to do, fun, and affordable, and make your entrance truly eye-catching.

entrance_way_2entrance_way_1

Redbud Revelry

Gardeners love the Eastern redbud tree (Cercis canadensis). Native to North America, these hardy, slow-growing, small trees richly deserve their places front and center in the landscape. They flower very early in the spring (as early as April), provide beautiful fall color, remain reasonably small, are low maintenance and create quite a display when planted in groupings or as a single specimen. They even grow well in parking lots, sidewalk strips and in containers, making them ultimately versatile for all types of landscaping plans. What else could you ask for?

New and Exciting Redbud Varieties

As if the classic eastern redbud wasn’t beautiful enough, there are always new varieties that give these stunning trees even more charm and character. Which one will be the centerpiece of your landscape?

Recent introductions include ‘Lavender Twist’, which grows in an elegant weeping form, and the compact ‘Ace of Hearts’, which excels in a small garden or container as a blooming, dome-shaped, focal point. ‘Alba’ flowers in pure white and ‘Appalachian Red’ blooms with deep burgundy pink flowers. The leaves of ‘Hearts of Gold’ open red in the spring and slowly change to gold.

‘Rising Sun’ redbud, another new introduction, stops most people in their tracks. In spring, before leaves appear, lavender-pink pea-like flowers cover the trunk and branches. The show really starts when the leaves open and the heart-shaped, deep-apricot colored leaves transition through orange, yellow and gold to lime-green with all colors showing at the same time. In fall, the tree shimmers in shades of gold. Amazing!

Growing Your Redbud

No matter which type of redbud you choose, you’ll want to take good care of it to be sure it reaches its full beauty. First, be sure to plant your redbud in an area where it can stretch to its full size and show off the unique branching growth habit. You will also want to choose a position where the redbud won’t be crowded or overshadowed by other plants. These trees prefer at least four hours of direct, unfiltered sunlight each day, so full or partial sun positioning is best. These are hardy trees and grow well in most soil types, but adding organic material to the soil and mulching around the tree is always a wise idea to protect and nurture it.

Whether planted as a specimen, en masse, or in a container, we’re sure you’ll agree these little trees deserve consideration for a special place in your garden.

redbud_1 redbud_3