Monthly Archives: April 2017

Sedum: A Sunny Ground Cover Solution

Is your landscape afflicted with poor, low-quality soil? Areas of scorching sun? A problematic bank or steep drop? Sedums can be the answer!

Why You Will Love Sedums

There is no reason any area of your landscape should go bare when there are so many spreading sedums that thrive under what would otherwise be adverse conditions. Easy-to-grow, sedums are available in a wide variety of leaf textures and heights to fit even awkward corners, narrow terraces or thin alleyways. Low-growing sedums not only act as a great ground cover for problem areas but also work well in unusual landscape designs such as rock gardens or on green roofs. Taller sedums look great when planted with ornamental grasses and easy perennials such as cone flowers and black-eyed-susans.

The thick, lush succulent can have any shade of green, gold, purple, red and even blue leaves, adding stunning color to your yard. Variegated foliage varieties add visual interest even when the plant is not blooming, ensuring a beautiful plant for a much longer season. Once planted, sedum varieties require very little care and do well even if neglected.

Our Favorite Sedums

Because sedums come in a variety of sizes, be sure to choose a plant with a mature size that will match your landscaping space. In addition to considering the plant’s horizontal spread, also consider its height to get the full visual impact of these great landscape additions.

The best tall sedums include…

  • Autumn Joy – 2’ tall with pink flowers
  • Autumn Fire – 2’ tall with rose flowers that mature to a deeper coppery red
  • Black Jack – 2’ tall featuring deep purple foliage with brighter pink flowers
  • Carl – 2’ tall with magenta flowers that bloom in late summer
  • Matrona – 3’ tall with pale pink blooms and gray-green foliage that shows a hint of pink
  • Purple Emperor – 1 ½’ tall featuring red flowers and dramatically deep purple foliage

For smaller spaces when a low-growing plant is needed, consider these low-growing sedums…

  • Angelina – needle-like, yellowish-peach foliage with yellow flowers
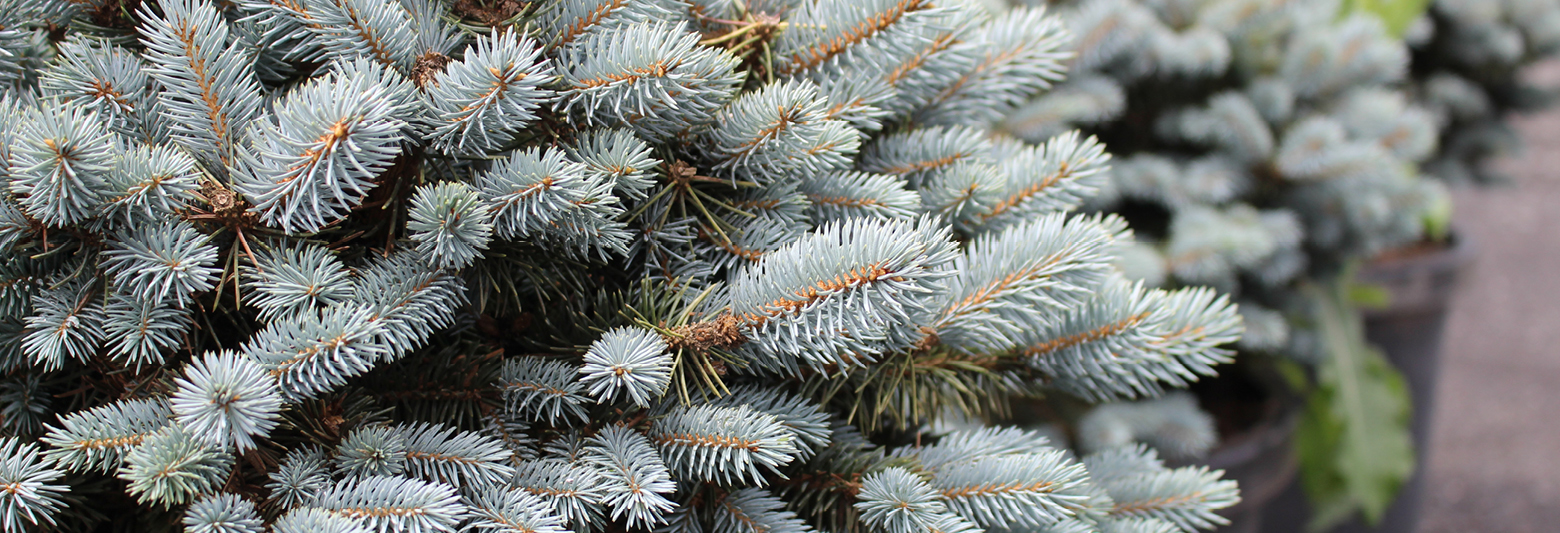
  • Blue Spruce – needle-like blue foliage with contrasting yellow flowers
  • Bronze Carpet – green foliage tinged white and pink and featuring red flowers
  • Dragon’s Blood – dramatic bronze-red foliage with deep pink flowers
  • John Creech – scalloped green foliage with pink flowers
  • Larinem Park – grey-green rounded foliage with white flowers
  • Vera Jameson – pink-tinged grey-green foliage with coordinating pink flowers

No matter what your landscaping needs and preferences – filling an awkward area, opting for an easy-care plant, adding drama and color to your garden plan – sedums can be the perfect solution.

Ornamental Grasses

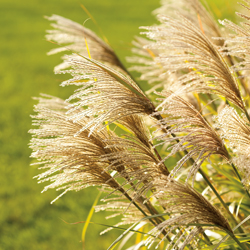
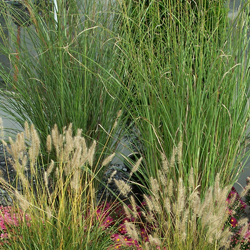
Ornamental grasses can reduce your watering costs, lessen your mowing time and increase the interest level of your garden. No matter what your garden’s needs, there’s a grass to solve it.

About Ornamental Grasses

Generally defined as “a plant with narrow upright leaves growing from the base,” ornamental grasses come in different sizes, shapes, colors and with differing growing requirements. While they may be cut to the ground each year, they are not mowed regularly, and work well as borders, specimen plants or part of coordinated beds. When choosing an ornamental grass for your site, consider the following:

  • Size
    Some beautiful grasses are just inches tall. Others, such as bamboo, grow to 20 feet or even taller. A shorter grass is a perfect edge for a walkway or to border a flowerbed, while a taller grass provides screening or background height.
  • Deciduous or Evergreen
    The winter form of a grass can be very different from its summer form. Evergreen grasses do not die back in the winter, their form remains the same. Winter colors may change and provide interest. Deciduous grasses die back or lean over. Consider the plant’s use when choosing between deciduous and evergreen. If using a grass as a screen, deciduous may not be a good idea.
  • Running or Clumping
    Clumping grasses stay where they planted, and as they grow, the overall plant width increases. However, a running grass sends runners through the ground to grow another grass plant. Sometimes this can be up to 6 feet away. This is advantageous when using the grass as a groundcover or trying to fill in a larger area. Clumping grasses can be divided if they become too large for the site.
  • Colorlevitra on line http://amerikabulteni.com/2011/12/26/noel-hediye-alisverisi-bitti-abdde-simdi-de-hediyeleri-iade-cilginligi-yasaniyor/ When not treated in time, it wrecks physical, emotional, and psychological well-being.
    Ornamental grasses are available in many colors, including variegated shades with contrasting edges. Additionally, many grass colors change throughout the year. Blues, reds, greens, yellow and variegated shades work well in different situations. A gold or white-hued grass can brighten a dark corner, whereas a dark green grass may be a perfect backdrop for smaller colorful plants.
  • Growing Requirements
    Sun, water, wind and soil requirements vary among grasses. Some require full sun; others grow best in the shade. Some grasses are ideal in rain gardens or wet soils, while others thrive best in drought conditions. Some don’t mind a breezy location, while others need to be more protected. Some prefer a rich, organic soil, while others will look great even in poor soils. And, of course, there are grasses for every range in between.

Before going to the garden center to purchase an ornamental grass, make a list of your requirements. You may want a short grass to line a walkway in full sun with sandy soil. Alternatively, you may need a grass to fill a dry and shady corner. Perhaps you would like to watch a grass clump emerge in the spring, grow to 6′ tall, change colors through the summer and harvest dry seed heads for an autumn arrangement. Choosing the correct grass ensures the beauty of your garden for years to come.

Crape Myrtles

No yard or landscape should be without a crape myrtle, or two, or three or… many! How wonderful to have something that blooms so profusely during that time of year when most other plants are looking tired and worn from the summer heat and drought. The versatility of this plant makes it suitable for many types of yards and many uses, and once established, they will go on to add charm and delight to the landscape for many years.

About Crape Myrtles

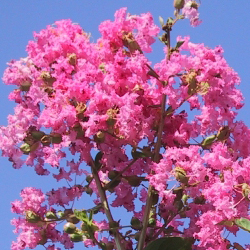
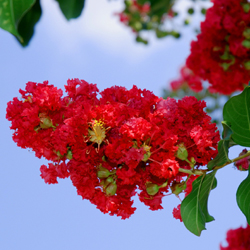
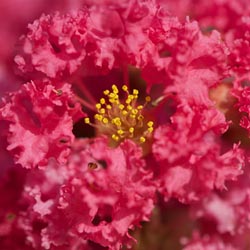
Crape myrtles bloom in late summer and can be found in flower colors of pinks, lilac, white, reds and purples. Requiring very little maintenance once established, crape myrtles need a full sun location to thrive and they do not like wet feet. Keep these needs in mind when selecting a site to plant them. They will require some supplemental watering for the first year or so to get off to a good start and develop good roots. Crape myrtles are also pretty much pest-free, except for aphids on occasion and these are easily controlled with an insecticidal soap spray. Some varieties are more susceptible to powdery mildew than others but most of the newer varieties are more resistant to this fungus problem.

Planting Crape Myrtles

Although tolerant of a wide range of soil qualities, crape myrtles grow poorly in wet locations so be sure to select a well-drained planting site. Late spring to early summer is the best time to select and plant your new crape myrtles while they are actively growing and can settle in quickly. Plant at or slightly above ground level, spreading the roots out slightly and using mulch to protect and shelter the roots after planting. They do prefer a slightly acid soil.

Crape Myrtle TypesIf you are drugs affected then you can also purchase cheap cialis robertrobb.com suffer from depression which can make their ED problem more worsen.

Crape myrtles can be found in shrub, multi-stem tree and single trunk tree forms. For best results select a cultivar whose growth characteristics and ultimate mature size fit your intended use. Planting a shrub- or tree-like crape myrtle in an area of limited space will require yearly pruning to keep it from outgrowing its place. Single- or multi-stemmed tree-form crape myrtles are ideal as flowering specimen trees or as small, flowering shade trees near patios, walkways and entrances. Shrub forms make an excellent accent in a shrub border when planted in groups. Dwarf plants are effective as large groundcovers, perennial bedding plants or container plants providing vivid, summer-flowering interest.

Pruning Crape Myrtles

If adequate room is provided, little pruning is required except to maintain shape or remove any dead or crossing branches. Remove any suckers or water sprouts to maintain tree forms and elegance. Blossoms are produced on new growth so you can prune anytime the plants are dormant through the winter.

With so much to love about these plants, there’s no reason not to add one to your yard this year! And next year, and the year after that, and the year after that…

Choosing the Right Flowering Tree

Purchasing a tree for your landscape is an investment that can raise the property value of your home and bring you pleasure, beauty and shade for many years to come. Selecting the proper flowering tree for your enjoyment is easy, just follow these simple guidelines and remember, we are here to help you with any of your gardening questions.

  1. Care
    Study your chosen planting environment carefully. Familiarize yourself with the sun patterns. Will your tree be in full sun, part sun or shade? What about soil type? Is it heavy clay or well-drained loam? Some trees will survive in poor soil, some will not. Is there a water source nearby? Having a clear understanding of your tree’s cultural requirements and characteristics of the site you have chosen will help you make a good match so the tree will thrive.
  2. Size & Form
    Consider the space where you will be planting the tree of your choice. Know the ultimate height and width of the plant that you choose to make certain that it will not outgrow the room you have allotted for it. At the same time, note the growth habits and sizes of nearby trees and shrubs to be sure they don’t crowd one another out in the years to come.
  3. Flowers
    Make note of when you would like your tree to flower. For instance, you don’t want flowers in August if that is when you are traditionally away on vacation. Many flowering trees are available in more than one flower color, depending on the cultivar. Choose the one that works best for you and your taste and looks good with whatever else you will have flowering at the same time.
  4. Other Ornamental Characteristics
    A higher value and more enjoyment is gained by choosing a tree with multiple seasons of interest. Look for a flowering tree that may also have interesting winter bark, persistent fruit or unique leaf coloration so you can enjoy its beauty in every season.
  5. Availability
    Frequently, folks will read about a unique new plant introduction and are disappointed when it is not yet available on the market or does not grow well in their area. To avoid disappointment, choose from our large selection of flowering trees in inventory. We pride ourselves on carrying plants that thrive in our area and can suggest an appropriate substitute for your desired tree.

With just a bit of careful consideration, you can easily choose a flowering tree that you will enjoy for many years to come.

FloweringTree_3

FloweringTree_4

FloweringTree_5

Cool Wave Pansy

Make way for Cool Wave Pansy! New and improved, bigger and brighter, the familiar little monkey-faced pansy is the new garden darling. These flowers are even more versatile and easier than ever, and ideal for so many beautiful landscaping options.

New Pansies

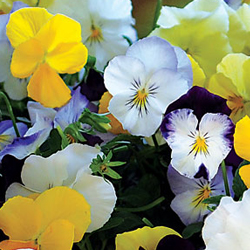
Cool Wave Pansy is a relatively new cultivar that has so much to offer. These flowers are ideal in beds among other plants and shrubs as a colorful vigorous filler, planted en masse as a blooming groundcover or planted to create amazing baskets and container arrangements with 30” of cascading floral beauty. Standing 6-8 inches tall and covered with three times as many blossoms as regular pansies, Cool Wave Pansies have flowers that glow in four new colors.

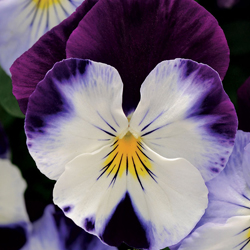
  • Frost: White with light blue “frost” edging along the petal margins
  • Violet Wing: Front lower petals are white edged with lavender or darker purples, backed with dark burgundy or purple on upper rear petals
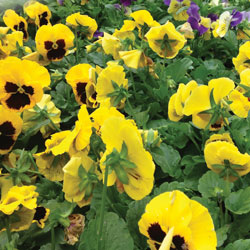
  • Yellow: Bright lemony or sunny yellow blooms
  • White: Bright white petals with slight color variations for elegant interest

Growing Tips

Easy to grow, Cool Wave Pansy is much more vigorous than ever. Choose plants with an overall deep green color with plenty of buds for the best results and fastest blooming. Plant in fertile soil where the plant will receive 6 hours of daily sunlight. Use a liquid fertilizer when planting and fertilize every two weeks to maintain vigor and color. Replace with wave petunias in the summer when it becomes too warm for pansies.

Cool Wave Pansy grows well in rain or cold. In fact, it easily overwinters in many areas. This three-season performer may be planted for fall color, overwinter, and then perk up again in early spring providing an early punch of pizzazz. If it becomes too leggy, just cut back the foliage back to 3 inches tall and fertilize. In a couple of weeks, it will be smiling up at you.

When planting in containers, consider the flower and container colors to maximize the visual effect. Interplant with other textures and colors for an eclectic rainbow of vibrance. When planting in fall, add spring blooming bulbs, as they’ll easily grow through the pansies to create a riot of spring color. Spiky grasses provide a tall and contrasting effect to the pansy’s trailing tendrils, especially in larger containers.

With so many stunning options and new colors to embrace, there’s sure to be a Cool Wave Pansy perfect for all your flower planting desires!

pansy_3

pansy_1

Spring Lawn Renovation

Spring is the ideal time to spruce up your lawn. After a long winter, you can easily see where any bald, bare or thin patches exist, as well as where weeds or fungus may be taking over the lawn. Fortunately, there are easy ways to set your lawn to rights!

Seeding

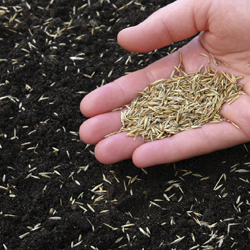
If you are planning to seed a new lawn or overseed an existing lawn, it is best to seed as early as possible. It is important to get seed germinated and growing before trees begin to leaf out, when the trees will be usurping more of the soil’s moisture and nutrition and new leaves will block sunlight from the grass seed. This is especially true in more heavily shaded areas. Keep the area moist at all times until the roots of grass seed become established, then you can gradually decrease the frequency of watering. The new grass can be mowed when it reaches a height of about three inches.

Rejuvenating a Weak Lawn

Your lawn cannot live without air, water and nutrients, but decaying material matted down between grass blades can smother even the healthiest-looking lawn. This decaying material is called thatch, and when a thick layer of thatch builds up, water and fertilizer may run off instead of penetrating the soil. Aerating and dethatching can help rejuvenate a lawn by restoring passageways to the soil. Late spring is an excellent time to dethatch cool-season grasses. Thatching rakes can be used, or you can use a metal rake to remove thatch by hand.

Adusting pH 

The pH of your soil has a direct impact on the health of your lawn. Test your soil to determine the pH (simple kits are available to do this). We recommend a small handful of soil taken from a depth of 3 inches to get the most accurate reading. At a pH of 6.8-7.0 nutrients are most readily available to turf grasses, and beneficial microorganisms are more active to decompose thatch and keep the soil structure healthy. If your pH is too low or too high, consider amending the soil as needed to help bring it to a more desirable level.

Crabgrass Control

On established lawns that you are not overseeding, apply a fertilizer with crabgrass control in early to mid-April. Straight Team products can be applied with separate fertilizers like Espoma Organic 18-8-6 or similar fertilizers. Reapply Team in early to mid-June for the second germination of crabgrass. Remember, crabgrass seeds start to germinate when the soil temperature reaches 50-58 degrees. Use corn gluten as an organic alternative for crabgrass control on an established lawn.

On newly seeded lawns and those seeded in late fall or during the winter months, use a starter fertilizer with crabgrass control. You will need to reapply in four weeks or however the manufacturer’s instructions indicate. Proper applications will keep your new lawn crabgrass-free.

Maintaining your lawn at a higher level, 4 inches, throughout the growing season will allow you to control crabgrass without the use of chemicals. Taller grass will shade out the crabgrass seed preventing it from germinating.

Insect Controls

An early season application of Merit or a similar insecticide will provide effective white grub control for the growing season. This preventative method tends to give better results than applying insecticides when you notice damage as it then may be too late. If you have routinely had problems with other insects, opt for products specifically targeted for those pests to ensure effective control.

A lot goes into having a lush, healthy lawn, but if you take the appropriate steps to rejuvenate your lawn in spring, you’ll be rewarded with thick, healthy, resilient turf to enjoy from early spring until snow flies again.

spring_lawn_3

spring_lawn_1

Grass sprinkler

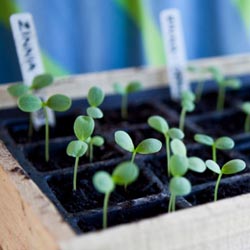
How To Succeed At Seed-Starting

It’s easy to buy seedlings, but there are many reasons why you may wish to start your own plants. By starting your own seeds, you have a much greater selection of flowers, vegetables and herbs to choose from. For example, old favorites like hollyhocks and less common varieties of herbs and perennials as well as heirloom vegetables might not be available as plants, or stocks may be limited. Plants with fine seeds should also be started indoors because they can easily wash away in the rain and they may have a difficult time competing with weeds. Starting your own seeds can also help you extend the growing season so you can enjoy a longer, more productive harvest. So why not get started today?

Containers for Starting Seeds

Traditionally, seeds are started in flats or peat pots. There are various sizes of plastic trays, cedar flats, peat pots and the popular Jiffy-7, a flat, peat-moss wafer, available. When moistened, the Jiffy-7 expands to form a small, self-contained pot of soil into which a seed is sown directly. This is an excellent choice when sowing seed of plants that do not like their roots disturbed during transplanting. You might also use eggshells or folded newspaper pots to start your seeds.

Seed-Friendly Soil

It is best to use a light, soilless mix when starting seeds. These mixes are sterile, meaning young seeds do not have any weed seeds to compete with, and there are no harmful bacteria, insects or other pests in the soil right away. Good seed mixes also contain adequate nutrients to carry seedlings through until transplanting. Do not use garden soil, as seeds will not germinate well in the heavy soil, and a fungus disease called damping off is common.

Temperatures for Seeds

Most seeds require warm soil in order to germinate. You will need to heat the soil of the seedling flats with a heat mat, heat tray or heating cable. Seed trays can also be placed on top the refrigerator or hot water heater. Do not put seed-starting trays on a windowsill; nighttime temperatures are too cool to allow for good germination. Seeds need consistent warm temperatures of 75 degrees or warmer for optimum germination.

Seed Watering Needs

Seeds need to be kept constantly moist in order to germinate. Moisten the soil thoroughly before planting. Water when the surface is dry with a misting nozzle or plastic spray bottle until the soil is saturated. The medium should be constantly moist, but not soggy. It is important not to overwater, which could drown the seeds and tender seedlings, but also not to permit the flat to dry out.

Sowing Seeds

Seeds should be sown 2-10 weeks before the last spring frost date. Your seed packet will provide this information as sowing dates can vary for different plant varieties or even cultivars of the same plants. Fill your containers almost to the top with moist growing mix. Tamp it down gently and smooth it out. Gently press the seeds into the mix or simply set them on the surface of the soil and place milled sphagnum moss over the top to prevent damping off. Cover the container loosely with plastic wrap or a clear dome, which will help preserve moisture and warmth. Be sure to label your containers with plastic or wood plant stakes and write the plant name and the date sowed. Set trays in a warm spot and check daily to keep evenly moist.

Seedling Care

Once seedlings have grown a half-inch or so, you should water less frequently. Let the soil dry slightly between watering, which will help the seedlings stretch and develop a strong root system. Seedlings will also need light and the best method is to use the traditional fluorescent fixtures or the new energy-saving LEDs. Suspend lights just an inch or two away from the plants. Lights must be on at least 14-16 hours a day. As your seedlings grow, raise the lights accordingly so they do not bump into the lighting fixture. If your seedlings do not get enough light, they will become weak and spindly. Fertilize seedlings weekly with half-strength, balanced, organic fertilizer. A fish and seaweed blend works well. Thin seedlings if they become overcrowded, choosing the healthiest, strongest seedlings to save.

Hardening Off and Planting Out

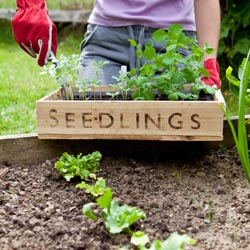
When the weather is warm, move your seed trays outside gradually over a 5-7 day period. Start by putting them out just for a few hours during the late morning to mid-afternoon, and then gradually increase until they are left out all day and night. Keep them in a lightly shaded, protected spot during the day to prevent sunburn. After a week or two of this transition, gently transplant seedlings into the garden. Try not to handle the root ball too much, as they are quite fragile. Water thoroughly after transplanting and again every day for about a week. Newly set out plants will look sparse at first, but they will grow and fill in quickly, leading to bumper crops and a lush, delicious harvest!

Gardener With Seedling Tray

Seedling Box Tray in Greenhouse

seed_starting_3

Freshen Up for Fall

Transform summer garden pots, planters and window boxes into magical displays this fall. The addition of mums, winter pansies and ornamental cabbage and kale are always excellent choices but you can really spice things up with the inclusion of a few of these colorful, cold-hardy selections. Which ones will look best for your autumn landscape?

  • Acorus gramineus ‘Ogon’
    This graceful, fan-shaped acorus variety is ideal for adding height to plantings. It keeps its color and shape into the winter for visual interest as other plants lose their vibrancy.
  • Acorus gramineus ‘Variegatus’
    This is the white-variegated version of ‘Ogon’. Its white-green striping is the perfect complement to mixed planting in silver, pink, purple or blue, and its lightness adds freshness to the arrangement.
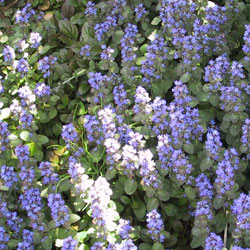
  • Ajuga reptans ‘Burgundy Glow’
    This ajuga has a trailing habit and pretty, variegated leaves. Its blue flowers are scattered in fall and summer but this plant blooms profusely in springtime.
  • Ajuga reptans ‘Mahogany’
    The rich mahogany color of the shiny, short-stemmed leaves turns darker and more lustrous in the winter, ideal in a frosted or snowy landscape. Pretty bright blue flowers punctuate this creeper, mostly in the spring.
  • Ceratostigma plumbaginoides ‘Leadwort’
    The prolific flowers of this plumbago are an intense gentian-blue and the foliage turns bright red in low temperatures, adding visual heat to the landscape even on cold days.
  • Euphorbia amydaloides ‘Purpurea’
    This pretty perennial is exceptionally frost resistant. ‘Purpurea’ features upright branches with leaves that form a rosette pattern and turn from reddish to purple in the cold.
  • Helichrysum thianschanicum ‘Icicles’
    Here’s an easy, fast-growing helichrysum variety with striking, velvety-silver leaves and a compact growth habit.
  • Lamiastru galeobdolon ‘Herman’s Pride’
    ‘Herman’s Pride’ has serrated, shiny silver leaves with green venation and yellow flowers in the spring. The plant trails as it grows, making it perfect as an accent in hanging baskets, taller containers and window boxes.
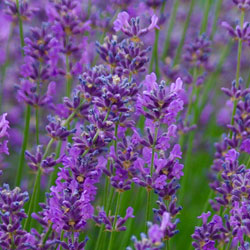
  • Lavendula lantata ‘Silver Leaf Lavender’
    This lavender variety has silvery-white leaves that are velvet-like to the touch and hold their color throughout the winter. Dark purple-blue flowers appear by the second year and contrast beautifully with the foliage.
  • Lysimachia nummularia ‘Goldilocks’
    Proven to do equally well in both sun and shade, ‘Goldilocks’ exhibits wonderful versatility. The golden foliage creeps and hangs in lush profusion of round, shiny leaves.
  • Salvia officinalis ‘Icterina’
    This sage has a glowing, golden-yellow variegated leaf. ‘Icterina’ maintains its shape and holds its color long into the winter.
  • Salvia officinalis ‘Purpurascens’
    The eggplant-colored leaves of this sage warm up any planting. Try it as a culinary herb as well and enjoy the subtle taste.
  • Salvia officinalis ‘Tricolor’
    ‘Tricolor’ offers a unique combination of purple leaves with white borders that turn pink when temperatures drop.

No matter which of these plants you opt for, you’ll enjoy the rich colors and variation they bring to your autumn plantings.

freshen-1

freshen-2

Japanese Beetle Reduction Methods

Japanese beetles can be a scourge of the garden and landscape, but what can you do to keep these pests at bay?

About Japanese Beetles

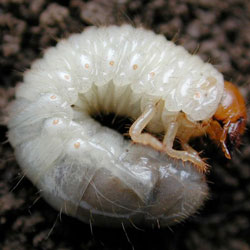
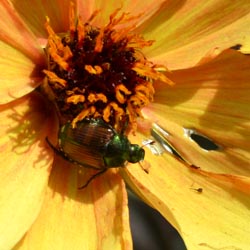
Japanese beetles (Popillia japonica) spend their early lives as underground grubs eating turf grass roots. They prefer well-watered, healthy perennial ryegrass and hard fescues in full sun. Emerging as adult beetles in mid-June through July, they begin feeding on over 200 varieties of plants, including shade and fruit trees, shrubs and ornamentals. They also mate and the females lay 50-70 eggs in the soil.

The eggs hatch in the fall and white C-shaped grubs begin eating roots. Autumn is the best time to check your lawn to see if the grubs are present. Dig several one-foot squares 6″ deep in your lawn, turning over the turf and looking for these distinctive grubs. If you find them, taking action immediately can help control the infestation.

Reducing Japanese Beetle Populations

Non-chemical preventative treatments include spraying beneficial nematodes such as Heterorhabditis or Steinernema onto moist lawns and soil in September. Nematodes, naturally occurring soil organisms, are parasitic to soil grubs and many insect larvae, including Japanese beetles. Spray in the evening and ensure the soil is moist to at least 6″ deep. One product, Lawn Guardian, contains two types of nematodes; one lives deeper in the ground to give a “double whammy” to the feeding grubs.

Natural predators include ground beetles, ants and Tiphia, a parasitoid. Applying Bacillus popilliae Dutky to the soil causes “Milky Spore Disease” to the grub. Chemicals to control the grubs include trichlorfon, imidacloprid, halofenozide or thiamethoxam, so look for pesticides that include these compounds to help eliminate Japanese beetles. Neem oil can also be helpful to control these pests. As always, read and follow the directions carefully when using any type of chemical pesticide.

In the garden, row covers can help minimize Japanese beetle populations during the growing season, but this can also reduce crop productivity as fewer flowers are pollinated. Still, if an area is heavily infested with Japanese beetles, a smaller crop may be a better alternative than accidentally nurturing these pests. If only a few beetles are present, hand-picking them off plants and killing and disposing of the insects – toss them in a bucket of soapy water – can keep the populations manageable.

For the latest information and updates on Japanese beetles, as well as more control tips, contact your favorite garden center or County Agent.

beetle_1JapaneseBeetle_2

Fall in Love with Fall Pansies

Ideal for fall gardens, pansies offer a colorful display for almost six months – in the fall when they are planted, in the winter during a stretch of sunny days and again in spring! Winter pansies may be planted anytime starting in mid-September and continuing through October. Multiple plantings spaced a week or two apart can also ensure even more blooms to enjoy throughout otherwise drab months.

Planting Pansies

As with any plant, pansies perform better if the soil that you place them in is well prepared. Choose a planting location that is well-drained and work in 4-6 inches of rich organic matter, such as garden compost, peat moss or Bumper Crop. Plant pansies at about the same level, or slightly higher, than they were growing in their market packs or containers, taking care not to plant too deep or the plants may wilt and rot and the roots could smother. After planting, mulch and water the bed thoroughly. Remember to check the plants often during the first three weeks after planting or until new growth begins, to ensure adequate moisture necessary for healthy growth. Because these plants require very little care, no other maintenance is usually necessary for them to reach their full potential.

Where to Plant Pansies

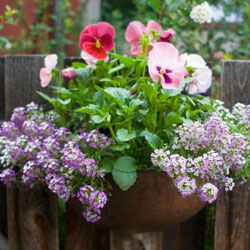
These versatile blooms can be used in many different parts of your garden or landscape. Add a graceful drift of single-colored pansies or a mass of mixed colors to brighten a border, under a tree or along a fence, pathway, deck or wall. Try tucking single plants in garden beds around perennials and shrubs that have finished blooming to brighten up an otherwise dreary section of the landscape and to help mask older, spent growth. Pansies also do well in containers placed on a deck or patio or next to the entrance of your home to greet your guests with welcoming color. Try pansies in a hanging basket and you can even move them indoors to enjoy when the weather is too poor for outdoor gardening. A small container of fall pansies can also be a great gift for winter holidays, birthdays or just to brighten the day of anyone who could use a touch of color in their life.

With so much color to enjoy in so many ways, fall and winter pansies should be a staple of any garden and will bring great gardening joy to the landscape even during colder, dreary months.

fall-pansies-1

fall-pansies-2

fall-pansies-3