Author Archives: GCSDev

Versatile Hydrangeas

Tall or short, red, pink, purple, blue, white and shades in between, few shrubs provide the versatility of hydrangeas. Generations of gardeners have loved and designed their gardens using these showy shrubs as summer privacy screens, landscape focal points and beautiful cut flowers. Now, thanks to new hydrangea introductions, there are even more ways to use them.

Discover the Newest Hydrangeas

New types of hydrangeas are being introduced every year, and these showstoppers are fast favorites among both experienced hydrangea aficionados as well as newcomers to the hydrangea craze.

  • ‘Endless Summer’
    Termed “the best new flowering shrub of the decade” by some gardeners, this cultivar has gained a reputation as the first “reblooming” hydrangea. Blooming from early summer to first frost on both new and old wood, it is unfazed by high heat or extreme cold. Now gardeners in colder microclimates can grow beautiful low maintenance 3-5’ tall and wide hydrangeas. The 8″ diameter mophead balls of light blue or pink flowers bloom the entire summer.
  • ‘Bloomstruck’
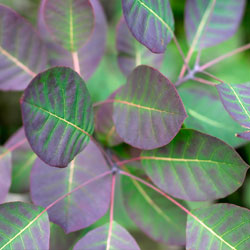
    A dwarf ‘Endless Summer’ this hydrangea grows to only 2-4’ tall and wide with pink or blue 4-5″ diameter mopheads on upright red-purple stems. Perfect for containers, in smaller gardens or in the front of cutting beds, it also graces balconies and decks. In fall, red-purple colored leaves extend the beauty.

Color Tip: Change the flower colors of ‘Endless Summer’ and ‘Bloomstruck.’ The soil pH affects the flower color of many hydrangeas. To intensify the pink color, decrease the acidity by adding hydrated lime. To intensify the blue color, increase the acidity by adding sulfur. Our staff can suggest products to help you determine your soil pH and the amount of lime or sulfur to use.

  • ‘Quickfire’
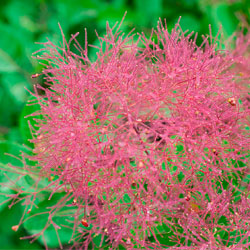
    Also known as Hydrangea paniculata, this variety blooms earlier than most other hydrangeas and has flowers along an elongated stalk. The flowers, blooming on new wood, open as white, gradually turning to pink in the summer and darker rose in the fall. The soil pH does not affect the flower color. As one of the hardiest hydrangeas, this beauty grows to 6′ tall in most soils, full sun or dappled shade and tolerates drought conditions.
  • ‘Little Quickfire’
    A dwarf form of ‘Quickfire,’ this tiny powerhouse has all the beauty and benefits of its bigger relative but in a small package. Growing only to 3-4′ tall with a slightly larger spread, this hydrangea makes a big statement in a little space when covered with blooms and can be an ideal choice to start out with hydrangeas.
  • ‘Bobo’
    Another paniculata hydrangea, this variety creates huge drama for such a little plant. Growing only to 3′ tall and wide, it’s a thriller in containers, and easily won the Gold Florall medal for best novelty plant. ‘Bobo’s early season white flowers also bloom on new wood and cover the plant on strong overhead stems. Unaffected by soil type or pH, this hardy hydrangea steals the show wherever it is planted.

No matter how you use these newcomers in your landscape – larger varieties in the back of beds or as borders, smaller options in the front or in containers – their long-lasting flowers will make you think summer truly is endless.

hydrangeas-4

hydrangeas-1

hydrangeas-2

hydrangeas-3

Pruning Red Raspberries

There’s an unfounded rumor that raspberries are difficult to prune. This isn’t true if you understand the type of raspberry in your garden. Summer-bearing raspberries produce only one harvest per year while everbearing, or fall-bearing, raspberries can produce two harvests.

Raspberry Types

Summer-bearing raspberries plants bear fruit on one type of cane, a floricane. These large, thick canes grow fruiting lateral branches. Most of the purple and black raspberry varieties and some red varieties are summer-bearing plants.

Everbearing raspberries grow two types of fruiting canes, floricanes and primocanes. The floricanes are similar those of the summer-bearing raspberry. However, the primocane has no lateral branches. Instead, the fruit buds are located on the thick cane. Most red and yellow raspberry varieties are everbearing.

No matter what type of raspberry you grow, proper pruning improves production and the taste of the fruit, the appearance of your garden and makes it easier to harvest the delicious fruit.

Raspberry Pruning Tips

If you are growing summer-bearing raspberries, you will follow a cycle of pruning out the older floricanes, which already bore fruit. If you are growing ever-bearing raspberries, you will prune out floricanes and the top one-third of the primocanes where fruit developed in the fall. However, you can choose a second option for pruning everbearing raspberries. Simply cut the entire plant to the ground in early spring to produce berries from fall until the first frost. This sacrifices the summer harvest, but puts all plant energy into fruit production for fall harvest, creating a larger, more robust crop. It also protects the canes from any extreme winter conditions and reduces insect damage. Using row covers or greenhouses to maintain a warmer temperature easily extends the harvest season later into the fall.

To simplify the pruning process…

raspberry-chart

When you grow your own berries, you know exactly how they were grown, you save money, and best of all, they taste great, even with dirt under your fingernails!

raspberry-1

Less Pain, More Gain: Ergonomics in the Garden

Merriam-Webster defines ergonomics as: An applied science concerned with designing and arranging things people use so that the people and things interact most efficiently and safely. Experts in ergonomics strive to design and produce items that better match the capabilities, limitations and needs of the people who use them. The result is a safer product that causes less fatigue and stress on the body, while still allowing you to perform the same functions as with regular tools or items.

How Gardening Can Hurt Your Body

Repetitive gardening activities can put you at risk for carpal tunnel syndrome and tendonitis, and can exacerbate other conditions such as arthritis, sciatica and other aches and pains. Poor movement or sudden strains can pull muscles or pinch nerves, which can lead to days or weeks of recovery, doctor appointments, tests, medications and other treatments. Even worse movements could lead to more severe injuries, falls or sprains which could cause you to miss out on a gardening season altogether. Listen to your body – if a movement hurts, change what you are doing and the tools you are using.

Ergonomic Garden Tools

Before purchasing the tools required to perform your garden chores it is best to choose those that fit the job – weeding, pruning, digging, trimming, harvesting, raking, etc. It is equally important, however, that the tools fit you as well – your size, your grip, your posture and your preferences.

Ergonomic tools will help you accomplish different garden tasks with greater efficiency and reduced effort, force, bending, leaning or twisting. With the correct tools you will be able to dig, trim and cut more, in less time, with less effort and more gardening enjoyment. Some ergonomic tools may look no different than the familiar tools you’ve been using for years, but they may be made of different materials to be lighter or stronger. There may be angle or length changes in handles to allow for easier use, or handles may be cushioned to provide firmer grips without causing pain or fatigue. Some tools, such as portable stools or combined tools that include buckets as well as a seat or kneeling pad, help make gardening chores more accessible and comfortable as well.

Ask one of our employees for their assistance in making your garden equipment choices. We carry a wide selection of ergonomic garden tools and are happy to help you choose the right device, size and style for you to accomplish your gardening chores safely and pain free.

ergo-1

ergo-2

The Enabled Gardener

As we age, many activities that have brought us joy are lost as physical limitations set in. Gardening does not have to be one of those lost hobbies. With a little planning, gardening can be made accessible for everyone. No matter what your needs or abilities, there are ways to modify your practices, situations and tools so that you can enjoy the therapeutic benefits of gardening.

  • Beat the Heat
    High temperatures can lead to fatigue, heat stroke and other dangerous conditions, so garden early in the morning or late in the day when temperatures are lower. Drink plenty of water to stay hydrated. Wear lightweight, loose fitting clothes that cover exposed skin. Wear a hat, apply sunscreen, eat light meals and wear gloves.
  • Stay on the Level
    Getting down to the dirt can be difficult if you have joint or mobility problems. Use raised bed systems to reduce the need to bend or kneel. Knee pads are also a good idea, or you can use a lawn chair cushion to make kneeling more comfortable. Garden stools can provide an intermediate step between standard gardening and raised beds.
  • Get a Grip
    Adaptive tools like a kneeling bench offer better leverage and improved grips help make gardening easier. Look for ergonomic tool designs that can alleviate hand pain and help you leverage your motions more easily for more efficient gardening using less effort or strain.
  • Downsize
    If a large garden is outside your ability or endurance, there are still areas you can indulge your green thumb. Choose container gardening or window box projects for smaller areas that are easier to reach but can be just as productive and fun for creative gardening.
  • Go Vertical
    Don’t overlook the possibility of vertical gardening. Climbing plants reduce the need for bending and stooping and bring the plants into easy reach. Look for fences, walls and other areas you can use for vertical gardening, or create unique vertical container gardens to make the best use of climbing space.
  • Sow the Joy
    If you have trouble managing a garden on your own, sow seeds of gardening joy with others in your life and you’ll have plenty of able helpers. Invite neighbors, friends, children and grandchildren to help out in the garden, or offer to help start a joint garden at a senior center, community center, church or elementary school where many hands can make light work of garden chores.

Even if gardening gets more difficult as you age, you don’t have to give up your passion for playing in the dirt. Adjusting your gardening style is easy and you will continue to enjoy the beauty, bounty and relaxation that gardening brings.

enabledgardener2Gardener Preparing Raised Beds in Vegetable Garden With Rake

Adding Nighttime Garden Accessories & Accents

You can enjoy much more than plants in your garden every evening and into the night, and in fact the right accessories can beautifully enhance your garden even as twilight falls. Consider these stunning accessories and accents to turn your daytime garden into a nighttime paradise.

Wind Chimes

Let gentle evening summer breezes play soothing sounds in your garden or patio. Choose from Bamboo styles or traditional wind chimes, and try different sizes and styles to find the tinkling tones you like best. Avoid using too many wind chimes, however, as different styles can have contrasting tones that may clash with one another rather than create a soothing melody.

Candleholders, Lanterns & Torches

Light up the night with lovely candleholders, lanterns and decorative torches to keep your summer evenings long and bright. Place appropriate lighting along pathways, deck edges and stairs to safely illuminate gathering areas, or use spotlights to create dramatically uplit trees and shrubs. For a whimsical touch, try kitschy strings of themed lights for a fun accent, or add elegance with multiple lanterns suspended from a large tree.

Tabletop Fountains

Erase your daily pressures by bringing the soothing, relaxing sounds of water to your patio or deck. A handcrafted tabletop fountain will add a soft, natural sound in harmony with your evening of relaxation. Consider fountains that may double as bird baths or centerpieces to do double duty during the daytime as well.

Tinkling Toadstools

Add enchantment to your garden with magical Tinkling Toadstools. When placed in groups, colorful glazed caps create a tinkling sound when the wind blows. Position them under a shrub or in a large, rustic container to add a fairy garden ambiance to your evening landscape, and be sure there is subtle light nearby to highlight their color and beauty.

 Ponds or Other Water Features

When the moonlight, candles and twinkle lights reflect on the water’s surface, there is an added glow and iridescence to the garden. Running water from a re-circulating pump powering a small spray fountain or waterfall provides a relaxing background sounds to the summer evening. Accent your water feature with floating lights, stunning water lilies or other creative options.

Egglites

Add nighttime beauty to ponds, fountains, statuary, landscaping and more with Cal Pump’s Egglite. These assorted colored, 10-watt lights are compact spot lights that can be used in or out of the water and are suitable for fresh, salt or chlorinated water. Position them unobtrusively and select colors that can magically enhance your nighttime landscaping.

With the right evening accents, you don’t have to stop enjoying your garden when the sun sets – just as temperatures cool off, the beauty of your garden can be heating up.

nightgardenaccessories1nightgardenaccessories2

Blossom End Rot

Nothing is more disheartening than grabbing a beautiful tomato only to find the entire bottom is soft, black and rotten. Blossom end rot (BER) affects tomatoes, peppers, eggplant, squash and melons. Caused by insufficient calcium and uneven water during the rapid growth of the plant and its fruit, BER is easily avoidable with the proper precautions.

All vegetables need calcium for healthy development. When tomatoes, peppers, melons and eggplant can’t get enough, the tissues on the blossom end of the fruit break down. By testing your soil to determine its pH and calcium content, regularly watering and curbing fertilizer use, your susceptible veggies should be free of BER.

The best prevention occurs before planting. The soil pH determines the amount of calcium available to a plant. At lower pH levels, less calcium is available for the plant to absorb because it becomes chemically tied up in the soil. Most vegetables grow well in soils with a pH of 6.2-6.8. However, vegetables susceptible to BER require a pH of 6.5-6.8, where more calcium is available and it can be more easily absorbed, especially during rapid growth and fruiting periods. If the pH is lower than 6.5, the crop is likely to develop BER. This can also occur when the pH is correct, but the soil contains an insufficient amount of calcium.

Water fluctuations and excessive fertilizer also affect nutrient absorption. A plant requires water to absorb nutrients. If no water is present, no nutrients can be absorbed, and in addition to blossom end rot, plants may be small and weak as well as more susceptible to other pests, diseases and deficiencies.

Additionally, too much fertilizer can cause a plant to grow so quickly that the nutrient uptake cannot meet the demands of growth, leading to BER. In these cases, the plants grow so rapidly and develop produce so quickly that there isn’t time for the proper nutrient balance to be absorbed, including the right amount of calcium. Because of this accelerated growth and insufficient nutrition for the growth pace, plants will be more susceptible to blossom end rot.

Unfortunately, simply adding calcium to the soil will not stop BER this year, but it can help your soil become better conditioned for next year. However, we do carry several products to help with this year’s crop as well. Easy-to-use calcium sprays can save much of this year’s crop of tomatoes or other vulnerable produce. Come on in and our knowledgeable staff will help you find the best product for your situation, as well as for tips on how to improve your soil’s pH levels, calcium content, moisture retention and overall nutrition so blossom end rot is never a problem in your garden again.

end-rot-2

end-rot

Late Spring Gardener’s Calendar

Turn over your vegetable garden and add humus, mushroom compost or manure to enrich the soil. Apply Bonide Fruit Tree Spray as buds swell and again at petal drop to all fruit trees.

Fertilize perennials with Dr. Earth Rose & Flower Fertilizer.

Continue spring cleanup. Completely remove winter mulch. Cultivate to remove winter weeds and debris from the planting beds, then edge. Prepare your annual beds, and mulch landscape beds with shredded mulch, bark chips or gravel. Apply Preen or Corn Gluten and scratch it in to prevent future weeds, or try the new Preen Mulch Plus which combines mulch and Preen and prevents weeds for up to 6 months.

Plant and transplant trees and shrubs, including roses, ground covers, and perennials (including hardy lilies and lily-of-the-valley).

Seed or sod new lawns. Reseed bare spots in established lawns. Keep the area moist until seedlings appear, then mow when the new grass is 3” high.

Put down a second application of Team or Tupersan (newly seeded lawns) for pre-emergent goosegrass control and control of crabgrass the rest of the year.

Transplant cool-season seedlings into the garden. When the soil temperature reaches 60 degrees, sow warm- and cool-season vegetable and herb seeds.

Dig and divide crowded spring bulbs after they have finished blooming. Enrich the soil with compost, manure or Espoma Bulb-Tone.

Prune forsythia and other spring-flowering trees and shrubs after the flowers fall.

Place gro-thru sets and link stakes over or around peonies, grasses or any other perennials in need of support.

Check arborvitae, cedar, juniper spruce and pine for bagworms. Hand-pick bags from the host and spray with Ortho Systemic Insecticide.

Begin summer rose care program of deadheading, spraying and watering.

Fertilize roses with Bayer All In One Rose and Flower Care or Dr Earth Rose and Flower Fertilizer, azaleas with Espoma Holly-Tone or Dr Earth Azalea/Camelia Fertilizer, and fruit trees with Dr Earth Tomato and Vegetable Fertilizer.

Deadhead bulbs, but leave foliage to mature and yellow before removing. This will help nourish the bulb for next year’s flowering. Fertilize with Dr Earth Bulb Fertilizer.

Prune new growth on needled evergreens.

Dig and divide early blooming perennials after flowering.

Apply Encap Fast Acting Iron Plus or Bonide Liquid Iron Plus to azaleas, hollies, junipers, laurel, pines, rhododendron and spruce to provide iron for chlorophyll production by foliage.

Fertilize container plants and window boxes weekly with a Master Nursery Bud and Bloom Plant Food, or use Dynamite All Purpose Plant Food for season-long feeding, to promote healthy, vigorous plants all summer.

Pay close attention to the watering needs of these plants as well as hanging baskets, because they tend to dry out quickly on hot summer days.

Check plants for spider mite damage and treat with Bayer 3 in 1 Insect, Disease and Mite Control then alternate every 7-10 days with Bonide All-Season Oil Spray.

Try Delosperma

“Ice plants” refer to several types of plants, usually succulents with fleshy thick leaves in cool green-blue colors. However, after an introduction to Delosperma, you’ll know it as the real deal. As a group of tough groundcovers, these blooming succulents flourish in full sun in well draining soils with little water, once they are established. Plus, they’re amazingly colorful!

About Delosperma

Native to Africa, with fleshy, clustered green leaves, Delosperma species and varieties solve many common groundcover, erosion and container garden needs. From only ½” tall and a few inches wide to 4 inches tall and spreading to 2 feet wide, Delospermas begin blooming with daisy-like flowers in early spring and often continue blooming through the summer. Depending on the variety, these perennial succulents punch up the garden with bright fuchsia, red, bronze, yellow, white, lavender or orange flowers, and several variegated or two-toned blooms are available as well.

A more adventurous gardener can turn up the heat with Delosperma ‘Fire Spinner.’ It quickly grows to an attractive weed-thwarting 2 inches high and 15 inches wide mat in two seasons. The variety name perfectly describes the flowers. It’s a kaleidoscope of hot colors on unbelievable 1½” wide fiery flowers. Radiating from a clear white center, petals with deep magenta color in the middle transition to hot orange, finishing with bronze on the outer tips. These arresting flowers sit atop shiny, apple-green needle-like succulent leaves making an astonishing garden statement from late spring through fall. What an unexpected showstopper!

What Delosperma Demands

Most gardeners are all too used to the finicky habits of their favorite plants, from precise soil pH levels to a specified amount of sunlight to a unique cocktail of soil fertilization and amendments for the best growth. Not so with Delosperma – all these plants ask (it’s more of a demand, really) is good drainage. With that, they’re fairly self sufficient – easy to care for and requiring very little maintenance.

Birds, bees and butterflies love Delosperma just as much as gardeners, but deer don’t, making these plants ideal for areas where deer are a bit too friendly in the garden. They work well as borders or to soften the edges of buildings, walkways and driveways, and they’re right at home in well-drained terraces, rock gardens and xeriscaping.

Whether you live in a naturally drought-prone area or just want to conserve water without sacrificing color and beauty, give Delosperma a try and you won’t be disappointed!

delosperma-1

Heavenly Hosta

Hostas are amazing plants, truly glorious with heavenly foliage that is stunning as a specimen or in mass plantings. The thin spikes of purple or white, trumpet shaped flowers appear for several weeks in the summer and are an added benefit to this divine perennial. But how much do you know about hostas, and which can you add to your landscape?

Phenomenal Foliage

Hostas are praised by many for their magnificent variety of leaf sizes, colors and textures. These angels will grace your garden with heart-shaped, lance-shaped, oval or nearly round leaves, and leaf sizes vary as well. Smooth, quilted or puckered textures, with either a matte or glossy sheen, add to the glory and hostas’ radiant glow.

The leaf margins can be either smooth or wavy and range in color from light to dark green. Foliage colors also include chartreuse, gray and blue, depending on the cultivar. Variegated hostas with cream, white or yellow margins will radiate in a dark area of your garden.

Where to Plant Hostas

While most hostas are shade worshippers, some types will tolerate sun, depending on the overall climate and moisture levels. Hostas remain attractive from spring until frost and can withstand a wide range of growing conditions.

As choice groundcovers or single specimens in the landscape, hostas are certainly divine. Some hostas are quite unusual and rare and may increase in value each year, especially as the plants thrive and can be divided and transplanted with ease.

Best Hosta Care

Little maintenance is required to care for hostas. Cut off old flower stalks after flowers have faded. Divide plants occasionally to increase their quantity. Keep an eye out for pests, especially slugs and snails that munch on the foliage.

Types of Hostas

With so many selections and varieties, you can find a hosta the will fit into almost any garden situation. The most popular options include…

  • Dwarf & Small Hostas: In addition to being planted in secret little pockets throughout your garden or next to paths, dwarf and small hostas can be used in difficult places. Plant them among tree roots, on a slope or terrace or in rocky places containing little soil.
  • Edger Hostas: These hostas are 12” or less in height and have more horizontal growth. They are able to control weeds as they leave no light, when well established, or room for weeds to grow.
  • Groundcover Hostas: This group of hostas grows to 18” or less in height. They do a great job in areas difficult to weed or maintain. If you are in need of a hosta for use as a groundcover, keep in mind it works great to plant spring-flowering bulbs among them. The hosta comes up after the show of flowers and covers the fading foliage of the bulbs.
  • Background Hostas: Selections from this group grow to 24” or taller at maturity. They can be used to increase privacy where you sit and relax or to provide definition to your property line as a unique hedge.
  • Specimen Hostas: Specimens may be any size. Choose a site close to where the plant will be viewed so that every detail (texture, color pattern, buds, flowers and fragrance) may be enjoyed.

Not sure which hosta is right for you? Come in today and let our landscape and garden experts help you choose the right heavenly hosta to add a bit of the divine to your yard!

hosta_1

hosta_2

hosta_3

hosta_4

Clematis

Beautiful, showy clematis are not as difficult to grow as you might think. Learning when to prune your clematis and giving a little attention to their few requirements will reward you with a magnificent show of colorful blooms.

Planting Clematis

A beautiful clematis starts with proper planting. Clematis prefer to have their roots in the shade and their tops in the sun. Keep the roots cool with a well-drained rich soil with added compost, peat moss or composted manure and a good layer of mulch. Planting ground cover or other low growing perennials around the base of your clematis will also help to keep the soil cool and minimize weed growth. Organic amendments will help to retain moisture when added to the soil. Feed monthly with a liquid fertilizer or use a slow release fertilizer which can last for up to six months.

A Note About Bloom Rates

For the first few years, clematis may be slow to grow. Just keep in mind that it is establishing its root system, which is essential to a healthy, vibrant plant. In its first year, your clematis may produce very few flowers or even none at all. By the second year there will be more growth and a few flowers. By the third year you should see substantial growth and many lovely blooms.

Planting Clematis

For the best chance of success if you are new to gardening with clematis, buy plants in larger containers. While smaller starts will be less expensive to buy, they will take a little more work to establish and can be more delicate and prone to failure. If you purchase a pot of any size and are not planting it in the ground immediately, be sure not to allow the soil in the container to dry out or the plant may be overly stressed and vulnerable.

Keep the climbing habit of clematis in mind when selecting your planting site. Allow your plants to grow up into large shrubs and trees, or on a trellis against a sunny wall. Select varieties with growth that will not exceed your shrub or trellis; a 20-foot vine may overwhelm a smaller shrub or a weak trellis and will look overgrown and out of place.

Proper Pruning

Clematis are divided into three distinctive groups. Knowing what group your clematis falls under will guide you on when and how to prune.

These pruning suggestions are for established vines that have been in the ground for at least three years. Young vines should all be pruned to 12 inches the second spring and to 18 inches the third spring. This helps to develop more shoots, a fuller vine and a better root system.

  • Group 1
    This group includes certain species clematis and their cultivars which bloom early in the year. Some of the more familiar representatives of this group include the Montanas, varieties of C. alpina and C. macropetala. All of the Group 1 clematis bloom on growth made the previous year. They can be pruned to keep them within their allotted space or to remove dead and unsightly foliage. If they are pruned late in the season or before they flower, however, the cuts may remove potential flower buds and reduce that year’s flowering. To prevent this, prune Group 1 clematis right after flowering.
  • Group 2
    These are the large flowered hybrids. They are often divided again into two subgroups – 2a and 2b. All of the clematis in Group 2 bloom on ‘old wood’ (actually on short shoots from old wood) and should not be pruned except for deadwood pruning in early spring after the leaf buds open slightly.
  • Group 3
    These are the summer-blooming varieties such as the viticellas and Jackmanii types that bloom on new wood and the late bloomers such as Sweet Autumn Clematis (C. terniflora) and orientalis types. Clematis in Group 3 mainly flower on new wood produced in the current year and should be pruned back severely every year in late winter, when they are completely dormant, to about 12-14 inches. Leave at least two pairs of buds on each stem of the plant. Most clematis in this group are very fast growing and will reach their full height before blooming every summer.

Once you know how to properly care for clematis, you will find it to be a welcome addition to your landscape. If you aren’t sure just what your clematis needs to thrive, our expert staff will be glad to help be sure you and your plants have a great relationship!

clematis_1

clematis_2

clematis_3

clematis_4